Live Chat empowers your support team to connect with customers in real time, delivering fast, personalized assistance across multiple channels. Whether you’re answering product questions, resolving issues, or guiding users through a process, our Live Chat ensures immediate engagement and improved customer satisfaction.
Live Chat is the core of our live customer service platform. Here’s what you need to know:
- Support Queue:
The Support Queue collects all incoming customer inquiries, ensuring that every request is attended to promptly. Users can manually pick chats or use the auto-assign feature to distribute them efficiently, regardless of the customer’s communication channel. i.e, unattended chats remain in the queue until they are manually picked or automatically assigned. This ensures no customer request is overlooked and every inquiry is handled appropriately.
- Active Chats: Real-Time Customer Engagement
Once a chat is selected, it becomes an Active Chat—a space for real-time, ongoing interaction between agents and customers.
Steps to Start and Manage Active Chats:
- Be Online: Ensure you are logged on the platform, and your status is displayed as online to pick or be assigned chats.

- Select a Chat: This depends on whether Auto-Assign is enabled. If it is, chats will be automatically assigned to you based on a set limit (e.g., 5 or 10 chats at a time). If Auto-Assign is disabled, you’ll need to manually select a customer from the queue and click “Start Chat” to begin the conversation.

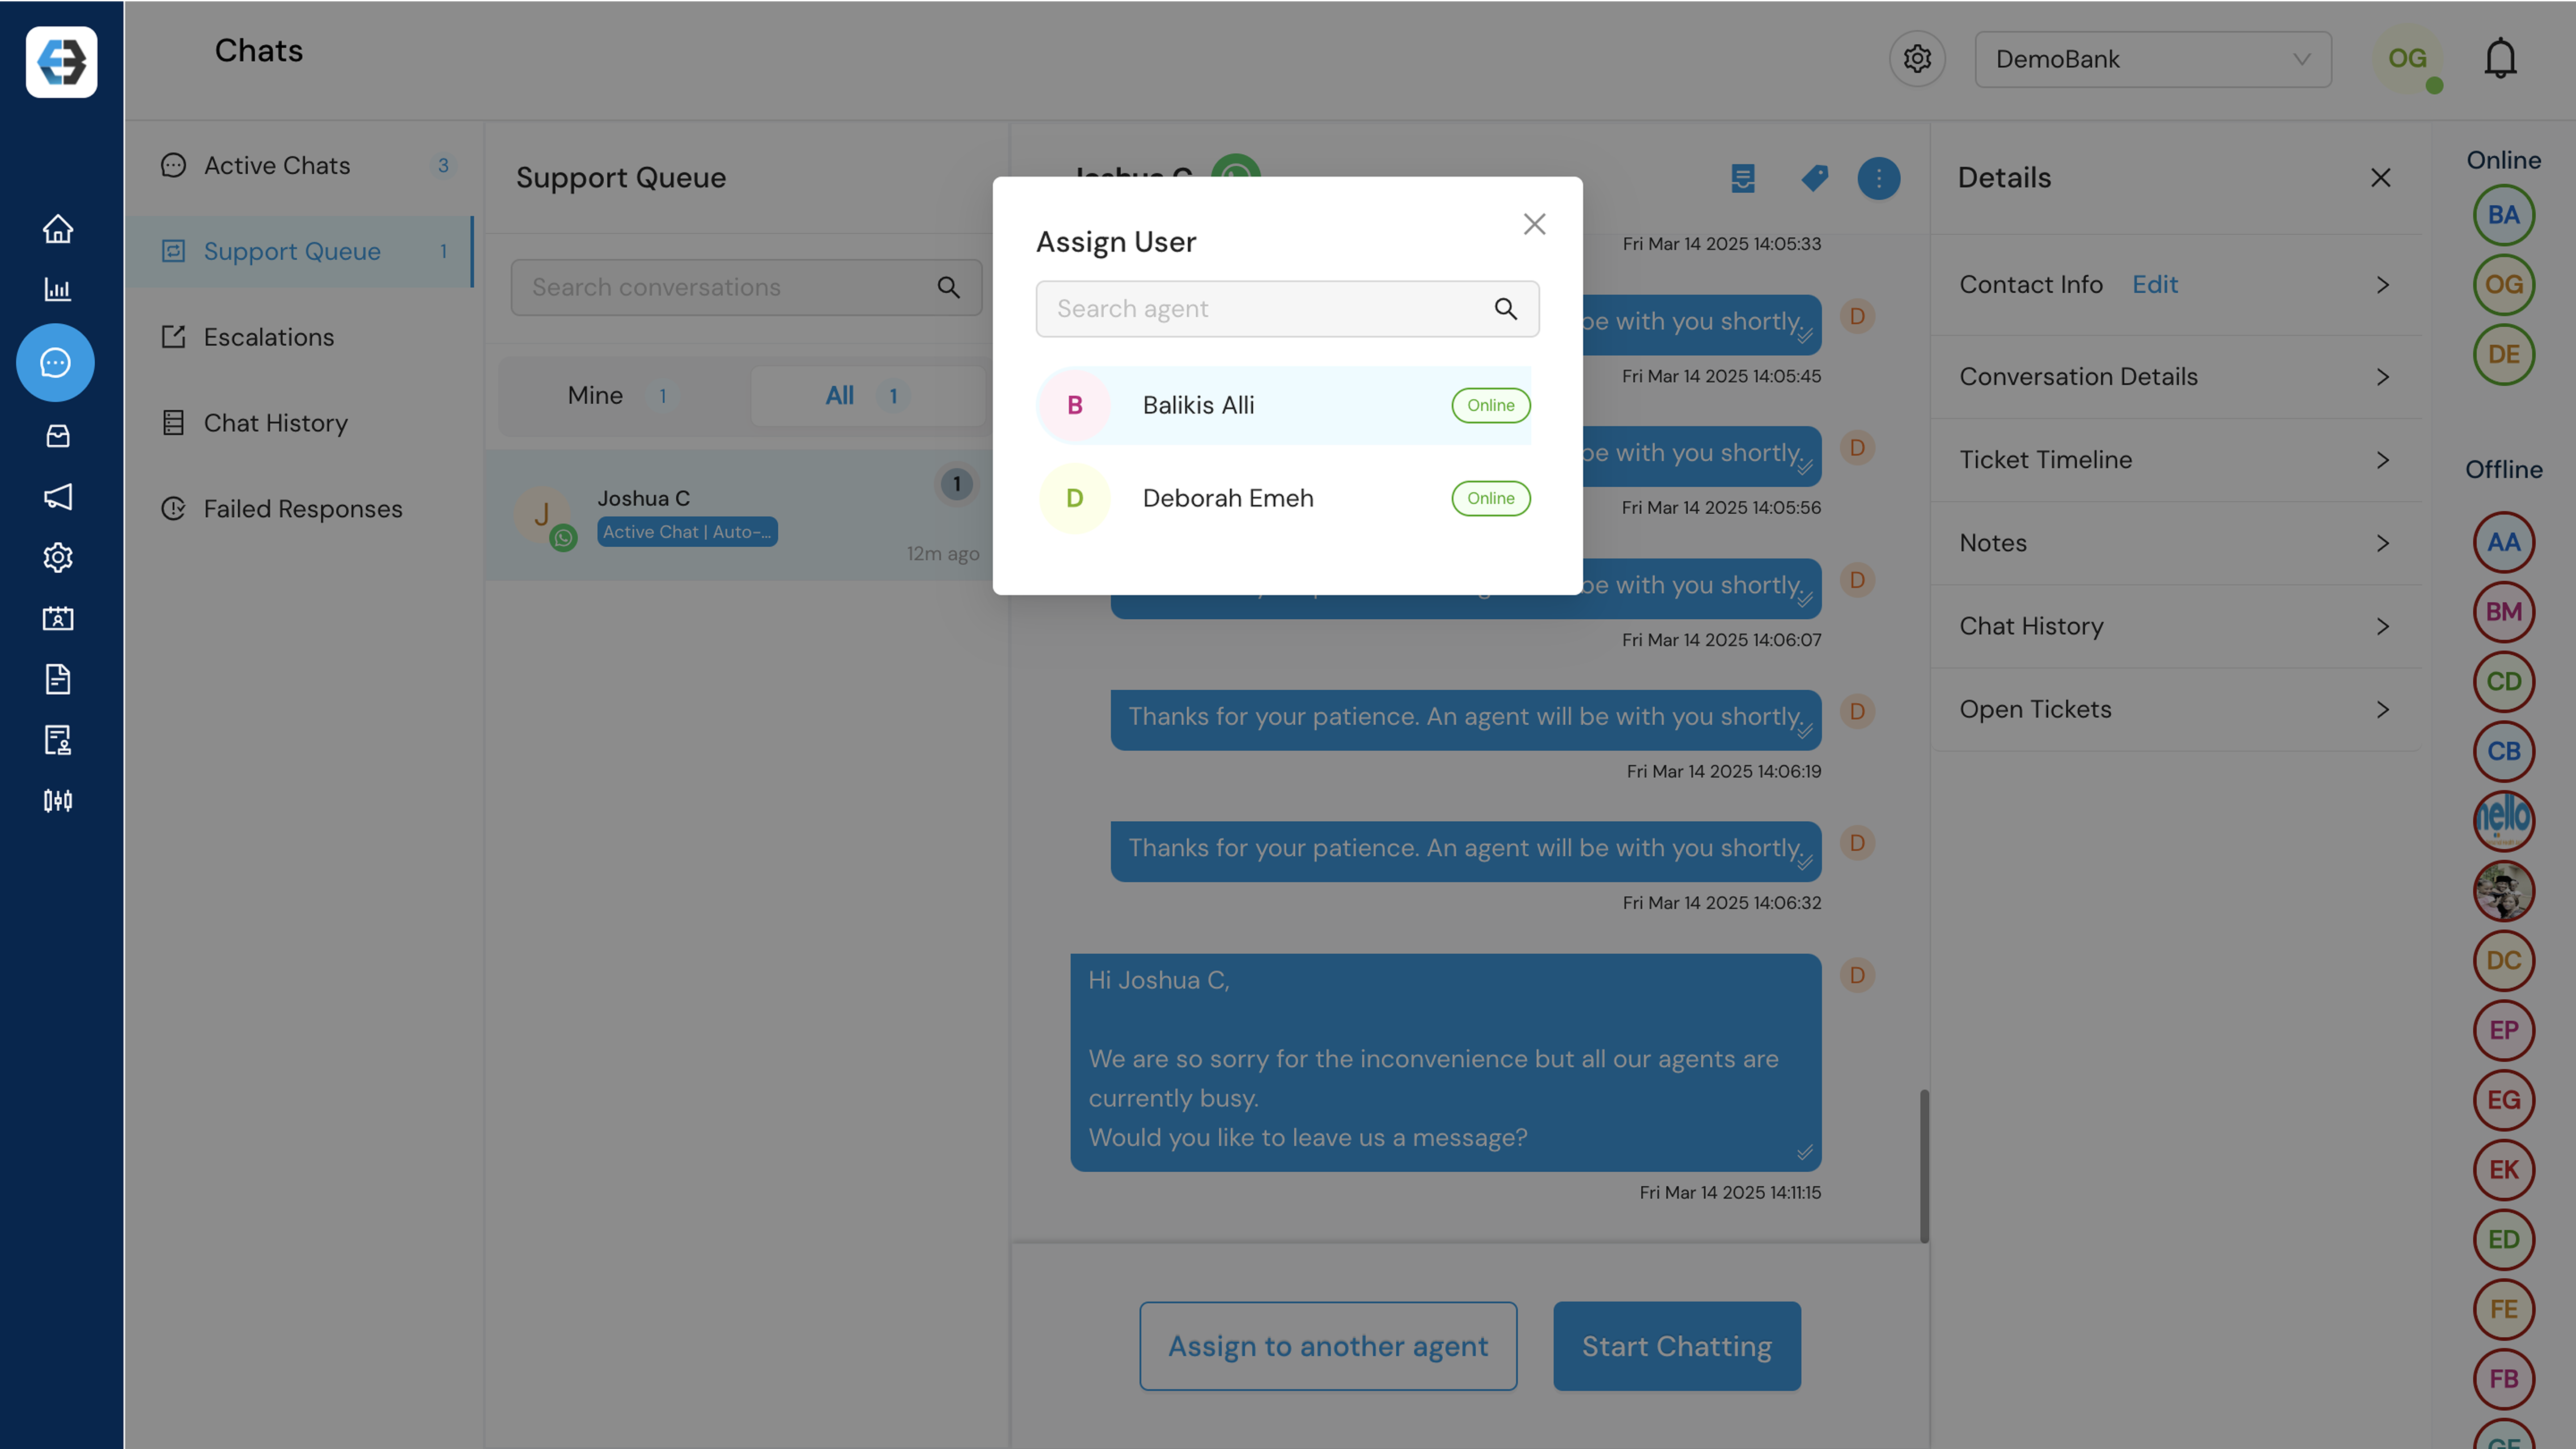
- Assign to another Agent: You can reassign chats to another agent, provided they are currently online. Chats can be assigned to another agent who’s also online
- Media: Photos, audio, video, and documents can be uploaded during chats, but each file must be within the 5MB size limit.

- Use Canned Messages: These are predefined, reusable responses that agents can use to reply to common customer inquiries quickly and consistently. This can be activated by typing `/` in the chat box to quickly access and send pre-saved responses.

- End Chat Reasons are predefined options agents must select when ending a chat. These reasons help categorize the outcome of the conversation and provide context for future reference or reporting.
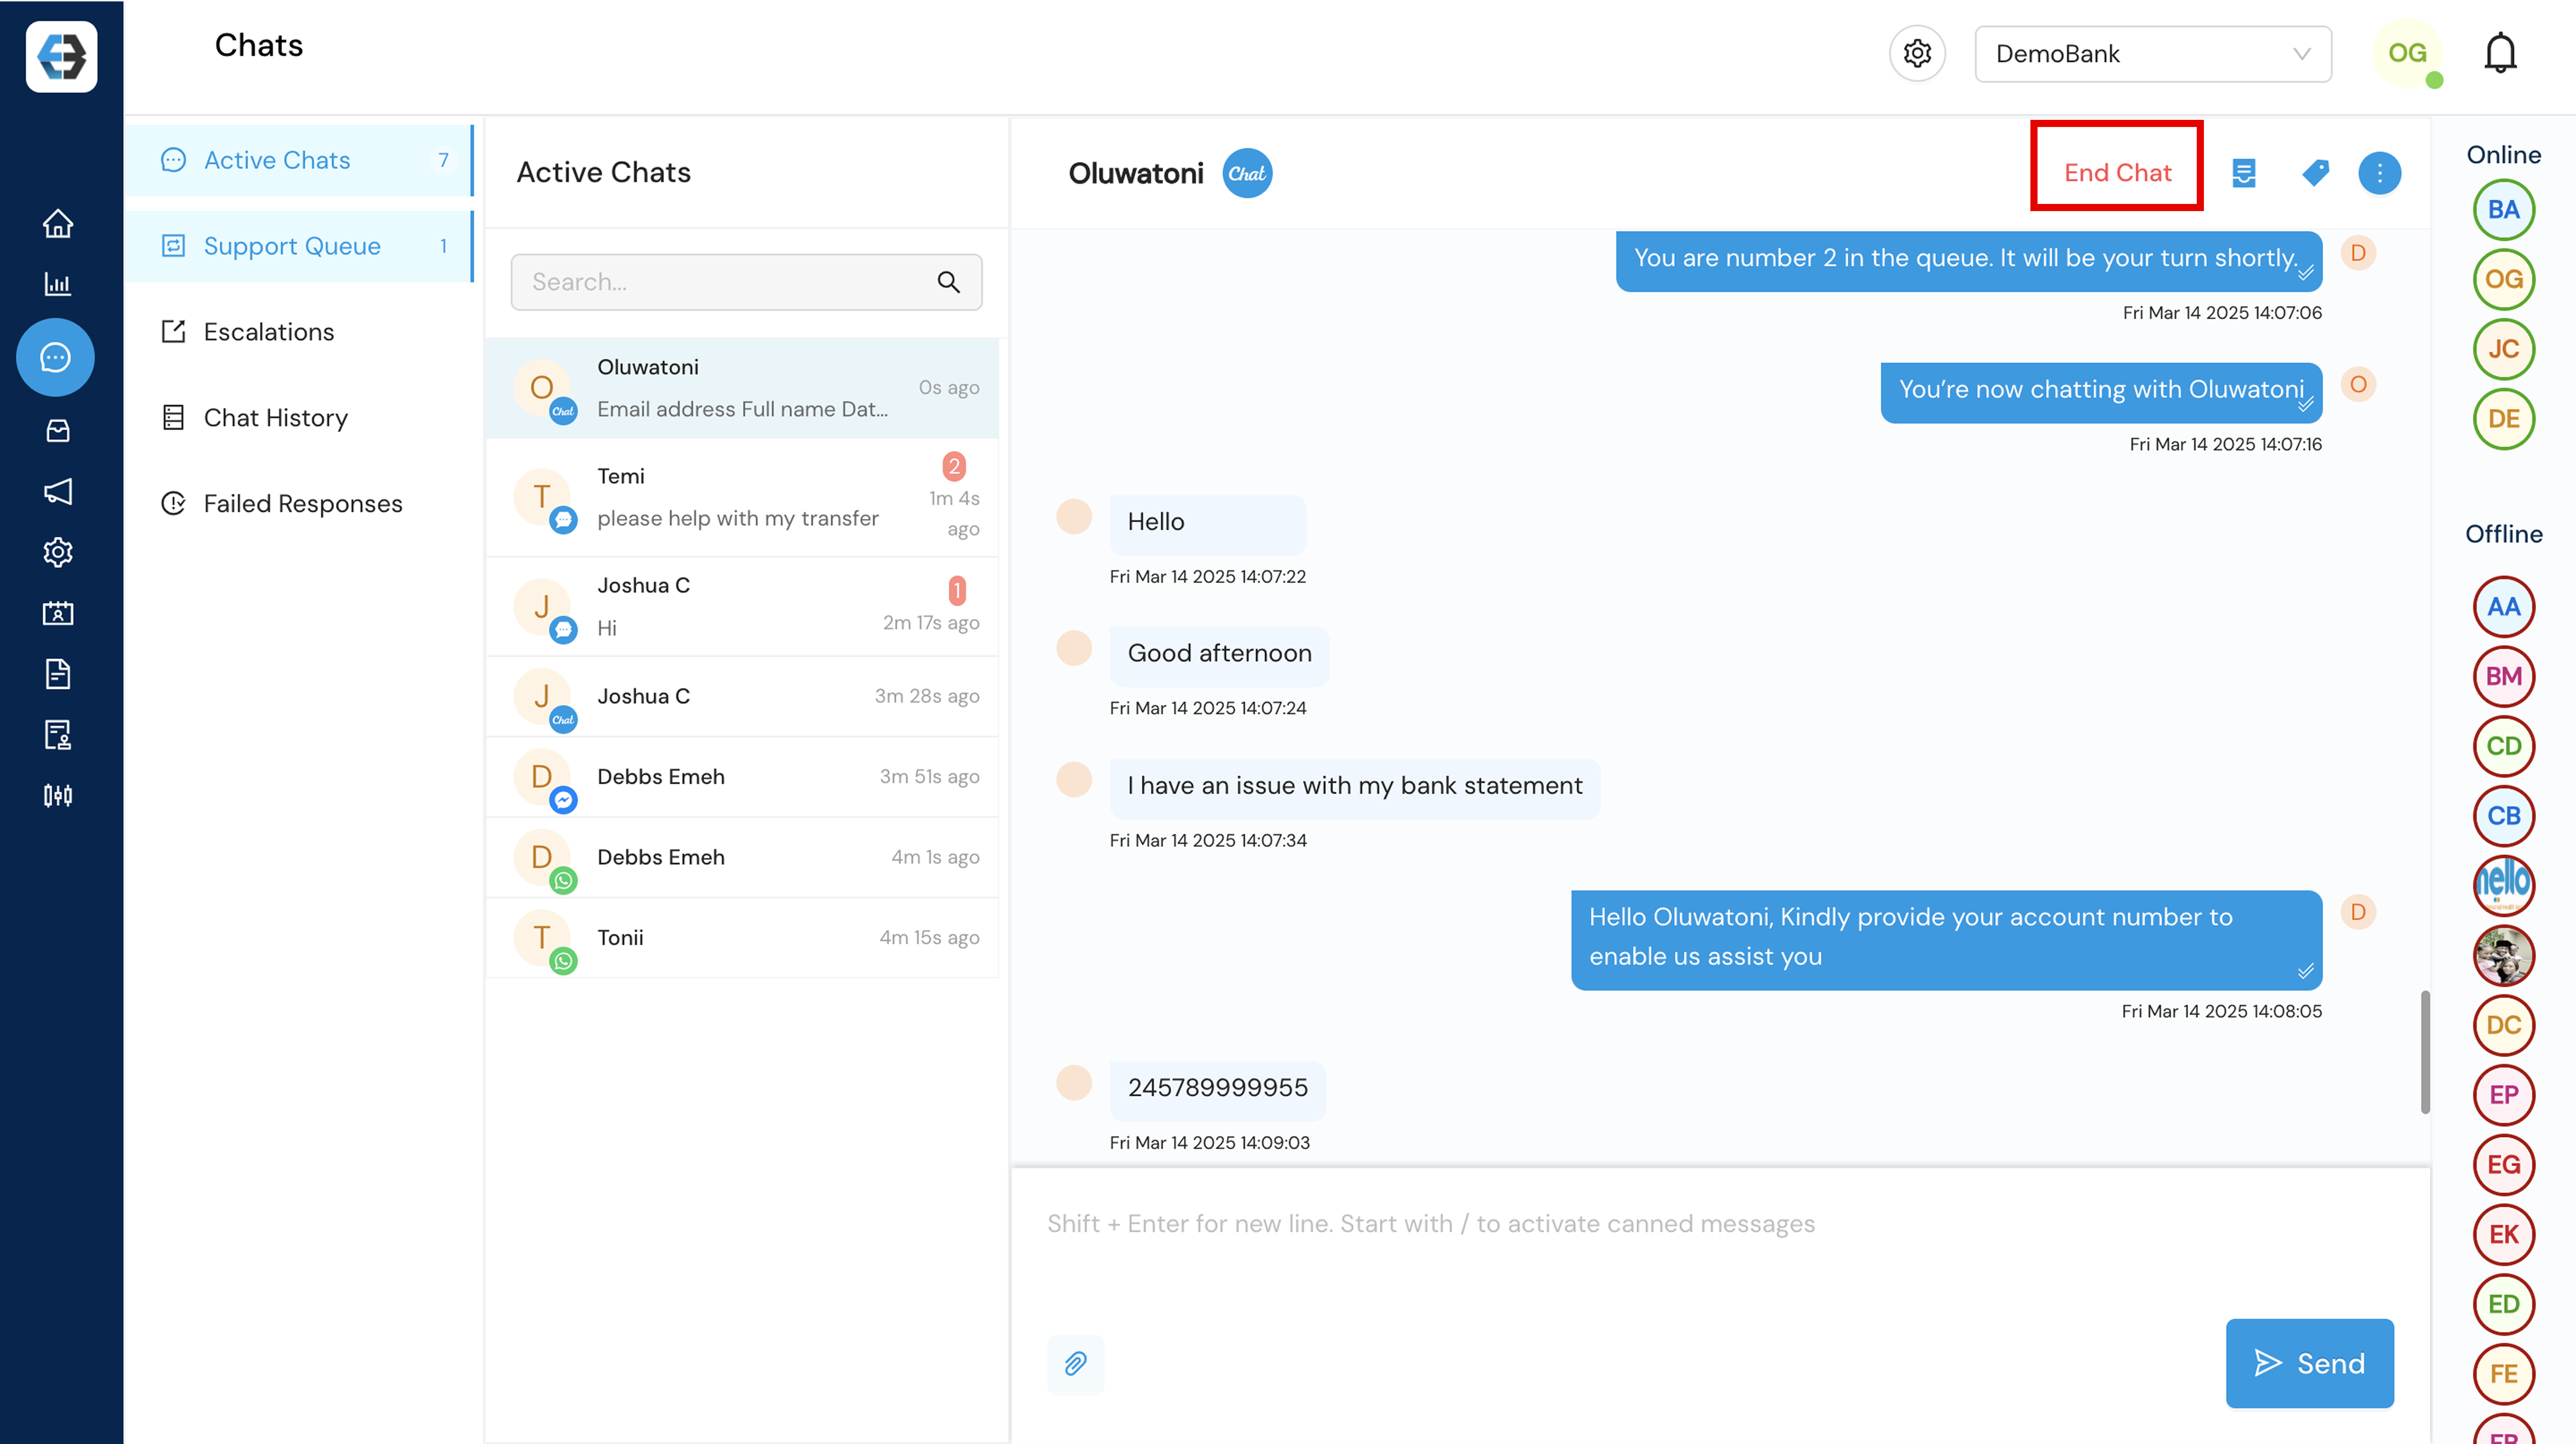
- Customer Issue Resolved: The customer’s concern was successfully addressed during the chat.
- No Response from Customer: The customer entered the queue but did not engage in the conversation.
- Will be contacted upon Issue Resolution: The issue couldn’t be fully resolved during the session and will require follow-up.
- Time Waster: The customer engaged without a legitimate or clear inquiry.
- Others: Use this option to specify a reason not covered above. A brief explanation is required.

- Add Notes: This is a feature that allows support agents to document important information within a chat session. These notes are internal and not visible to the customer.


- Add Tags: Categorize chats by assigning labels based on topic, issue type, department, or any relevant keyword to make conversations easier to organize, search, and analyze.
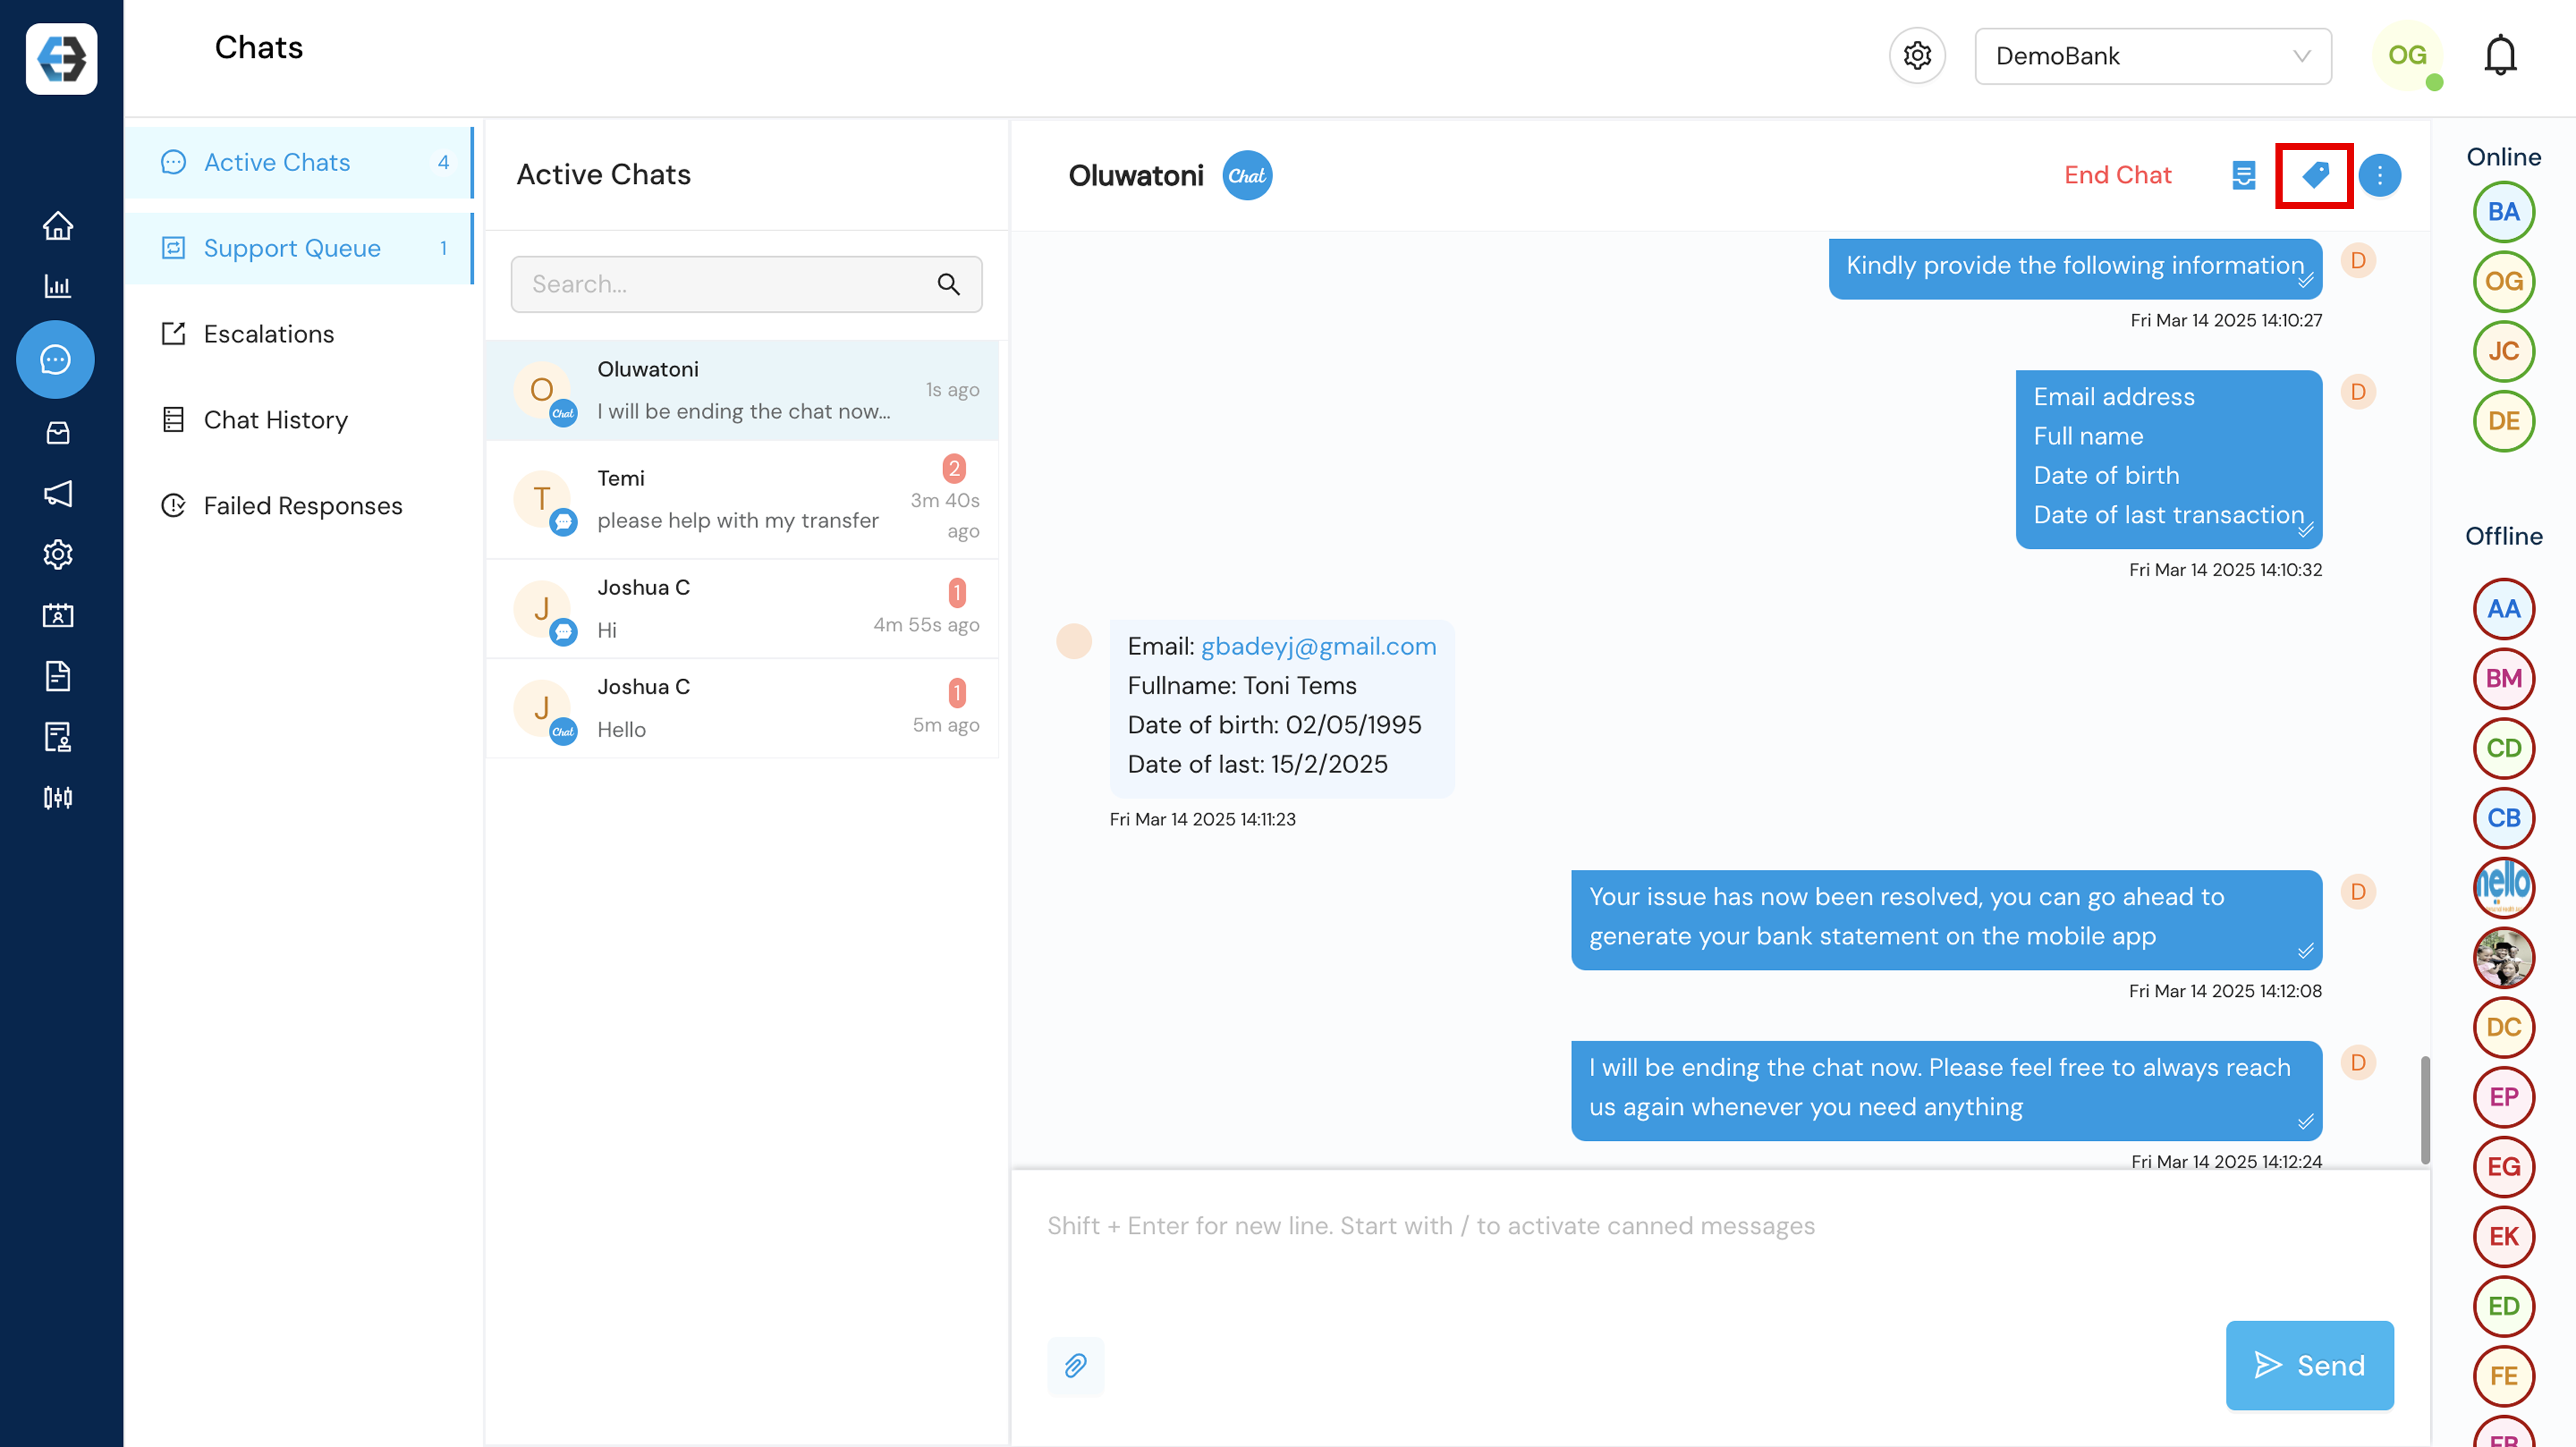

- View User Details: Access key customer details, such as name, contact information, previous interactions, and the initial message, to provide a more personalized and informed support experience.

3. Escalation Process:
This is the process of transferring a customer chat to another agent, typically when the initial agent is unable to resolve the issue or when the inquiry requires specialized knowledge or technical expertise.
When to Escalate Chat:
- The issue requires advanced knowledge or technical expertise
- The customer requests to speak with a support agent
- The situation is sensitive or complex and needs special handling
How to Escalate:
- Click Escalate in the chat window.
- Add a brief note explaining the issue and steps taken.
- Assign the chat to the appropriate team or support agent.
- Notify the customer and provide an expected resolution time.
- Cancel Escalation Process: Select this option if the escalation was triggered by mistake or if there are no available support agents to transfer the customer to at the moment.


Monitoring Escalations:
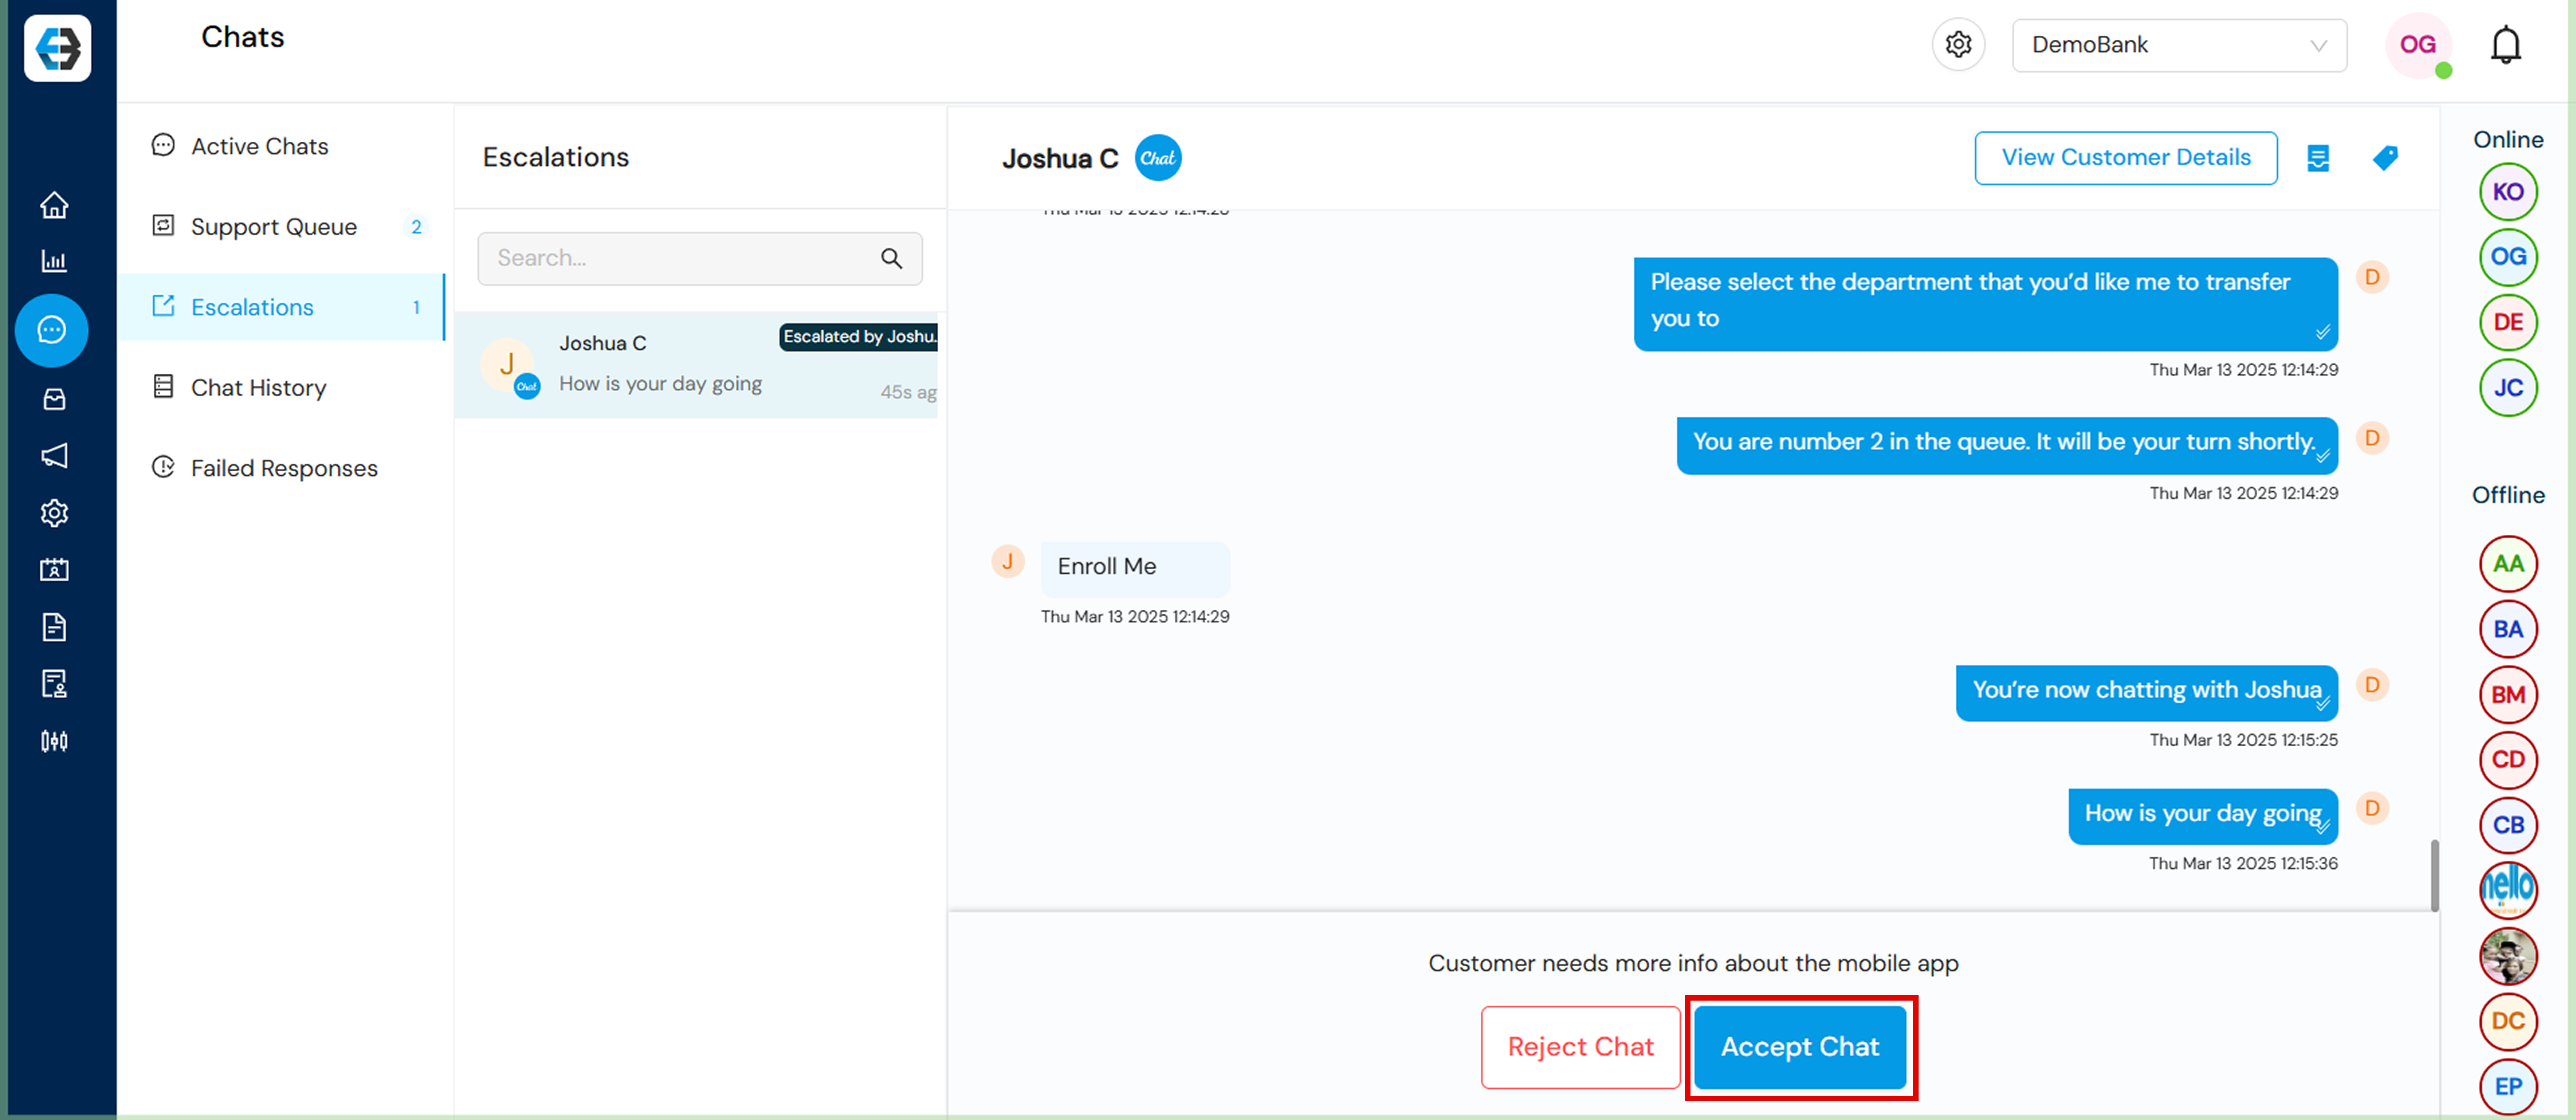
Escalated Chats: When a chat is escalated, it appears in a dedicated queue labeled “Escalations.”
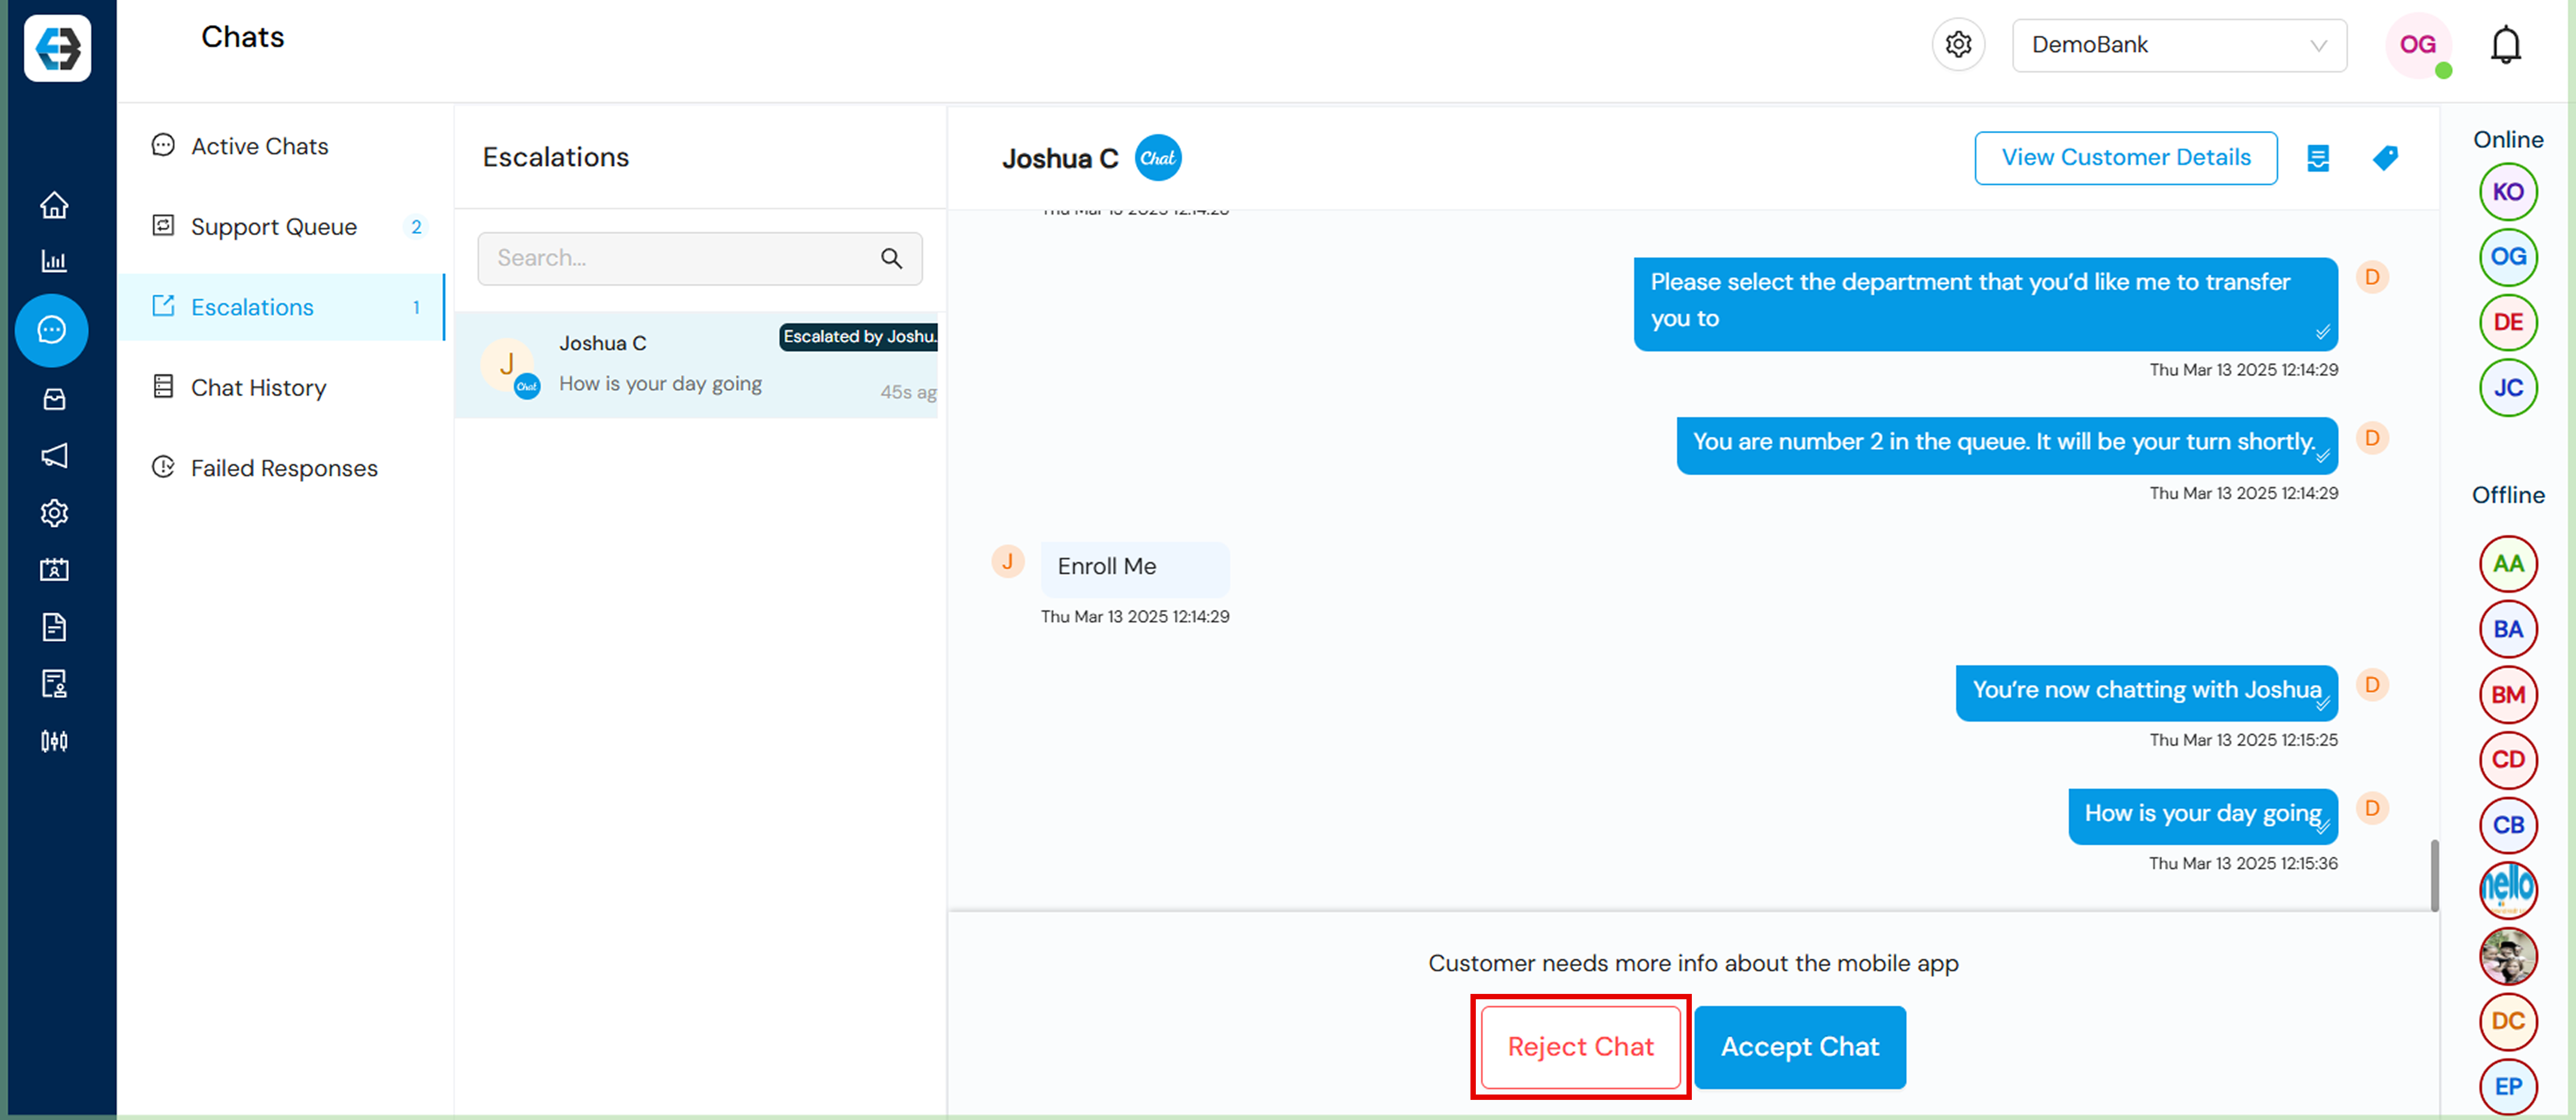
Support agents assigned to this queue have two options: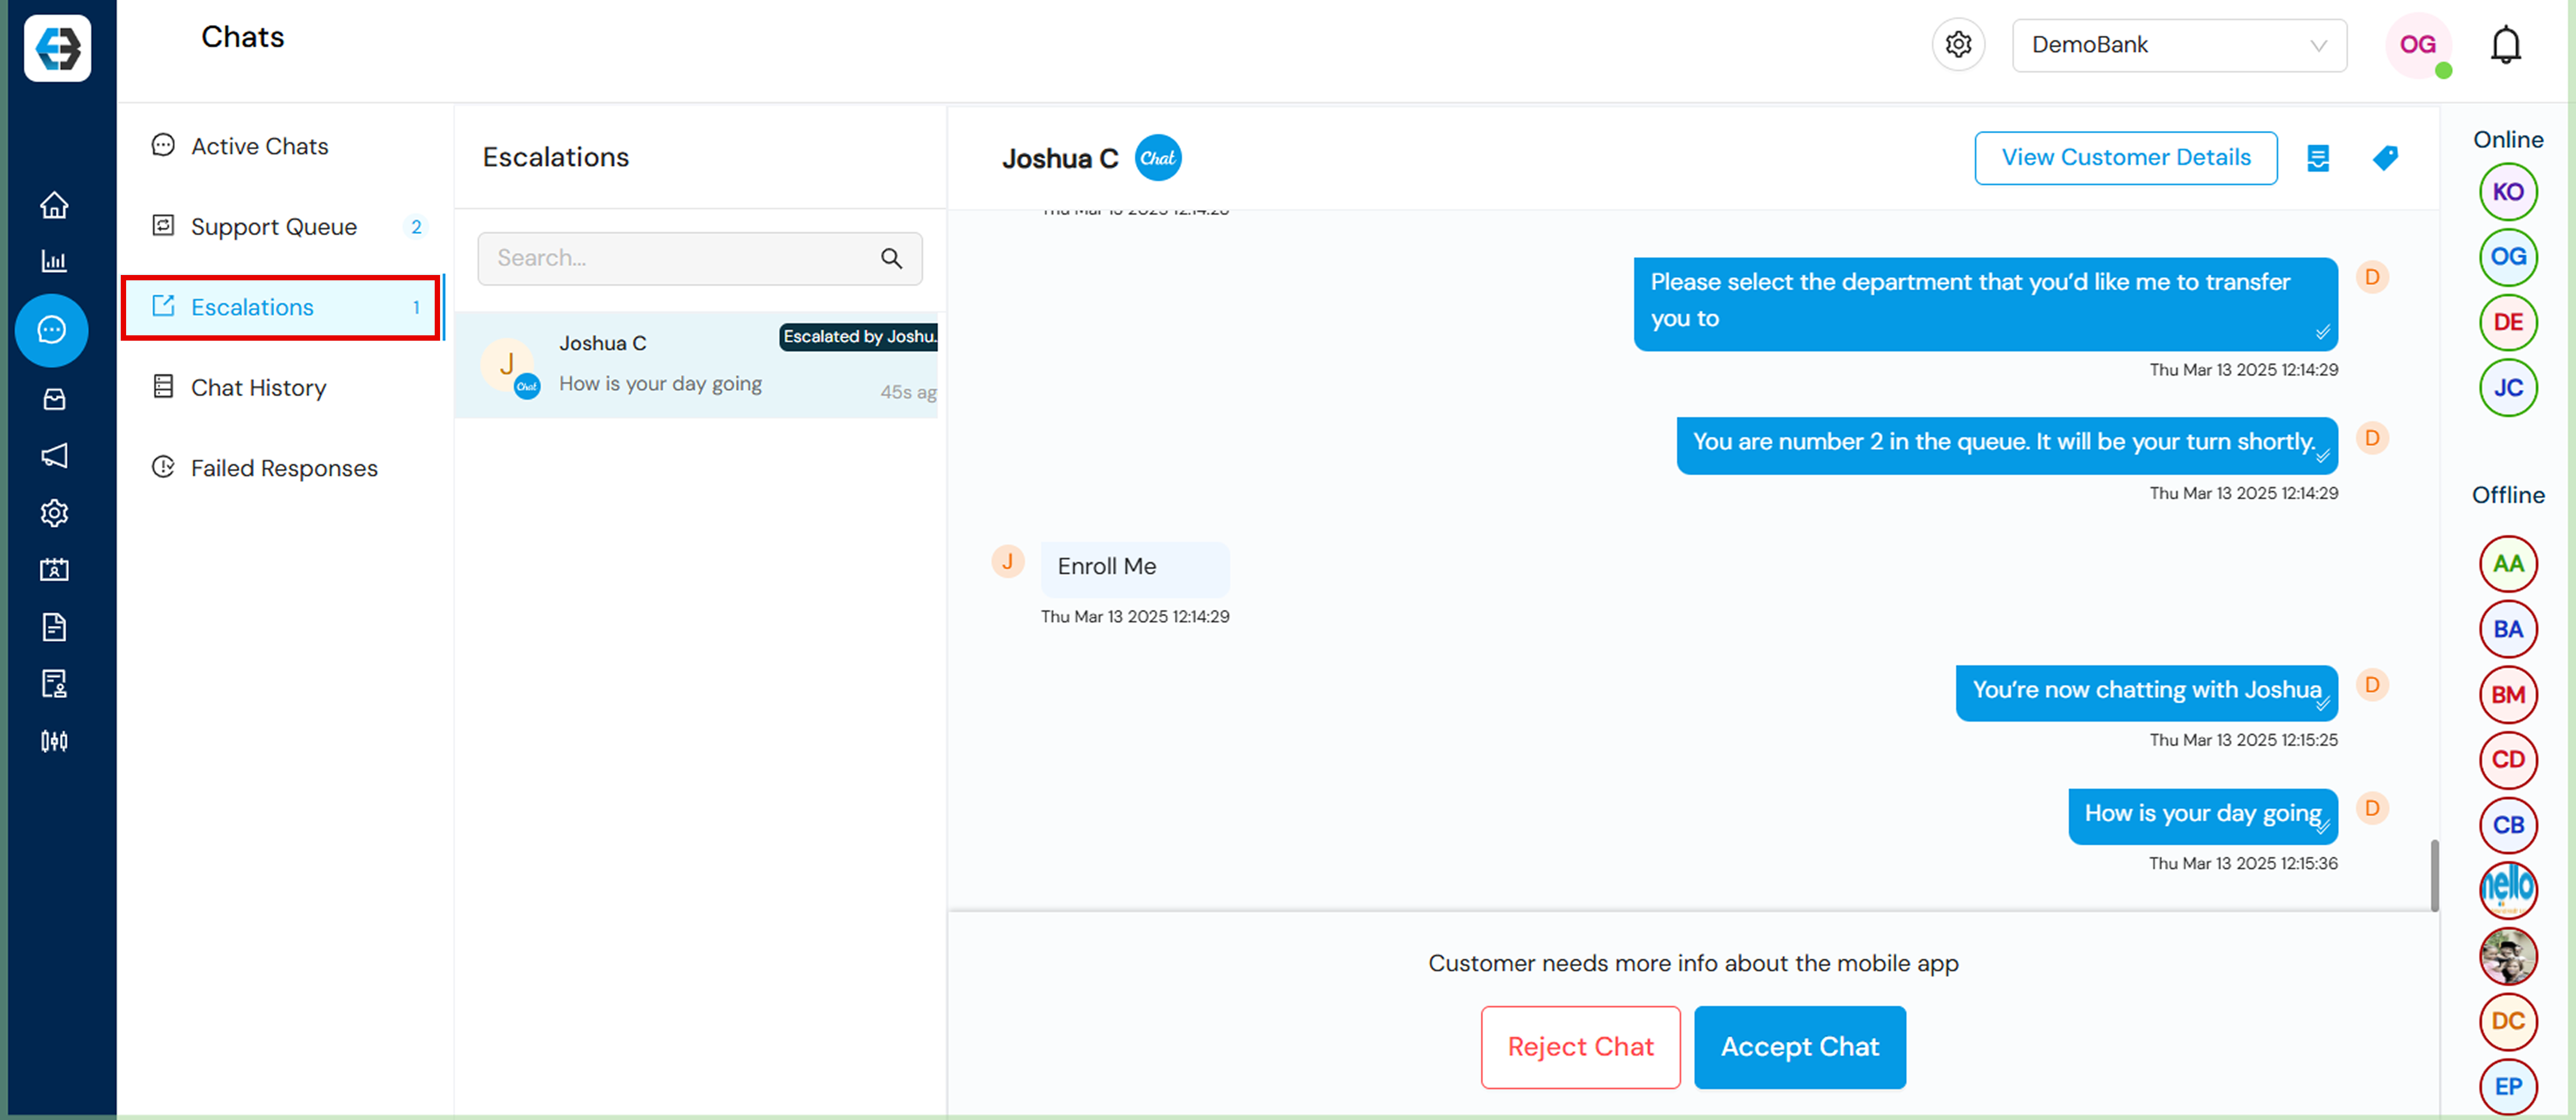
- Accept Chat: Confirms that the agent is ready to take over and continue the conversation.
- Reject Chat: Allows the agent to decline the escalated chat. A valid reason for rejection must be provided.
4. Chat History: Stay Informed with Past Interactions
Chat History provides a comprehensive record of all customer conversations, helping agents maintain continuity and deliver consistent, high-quality support.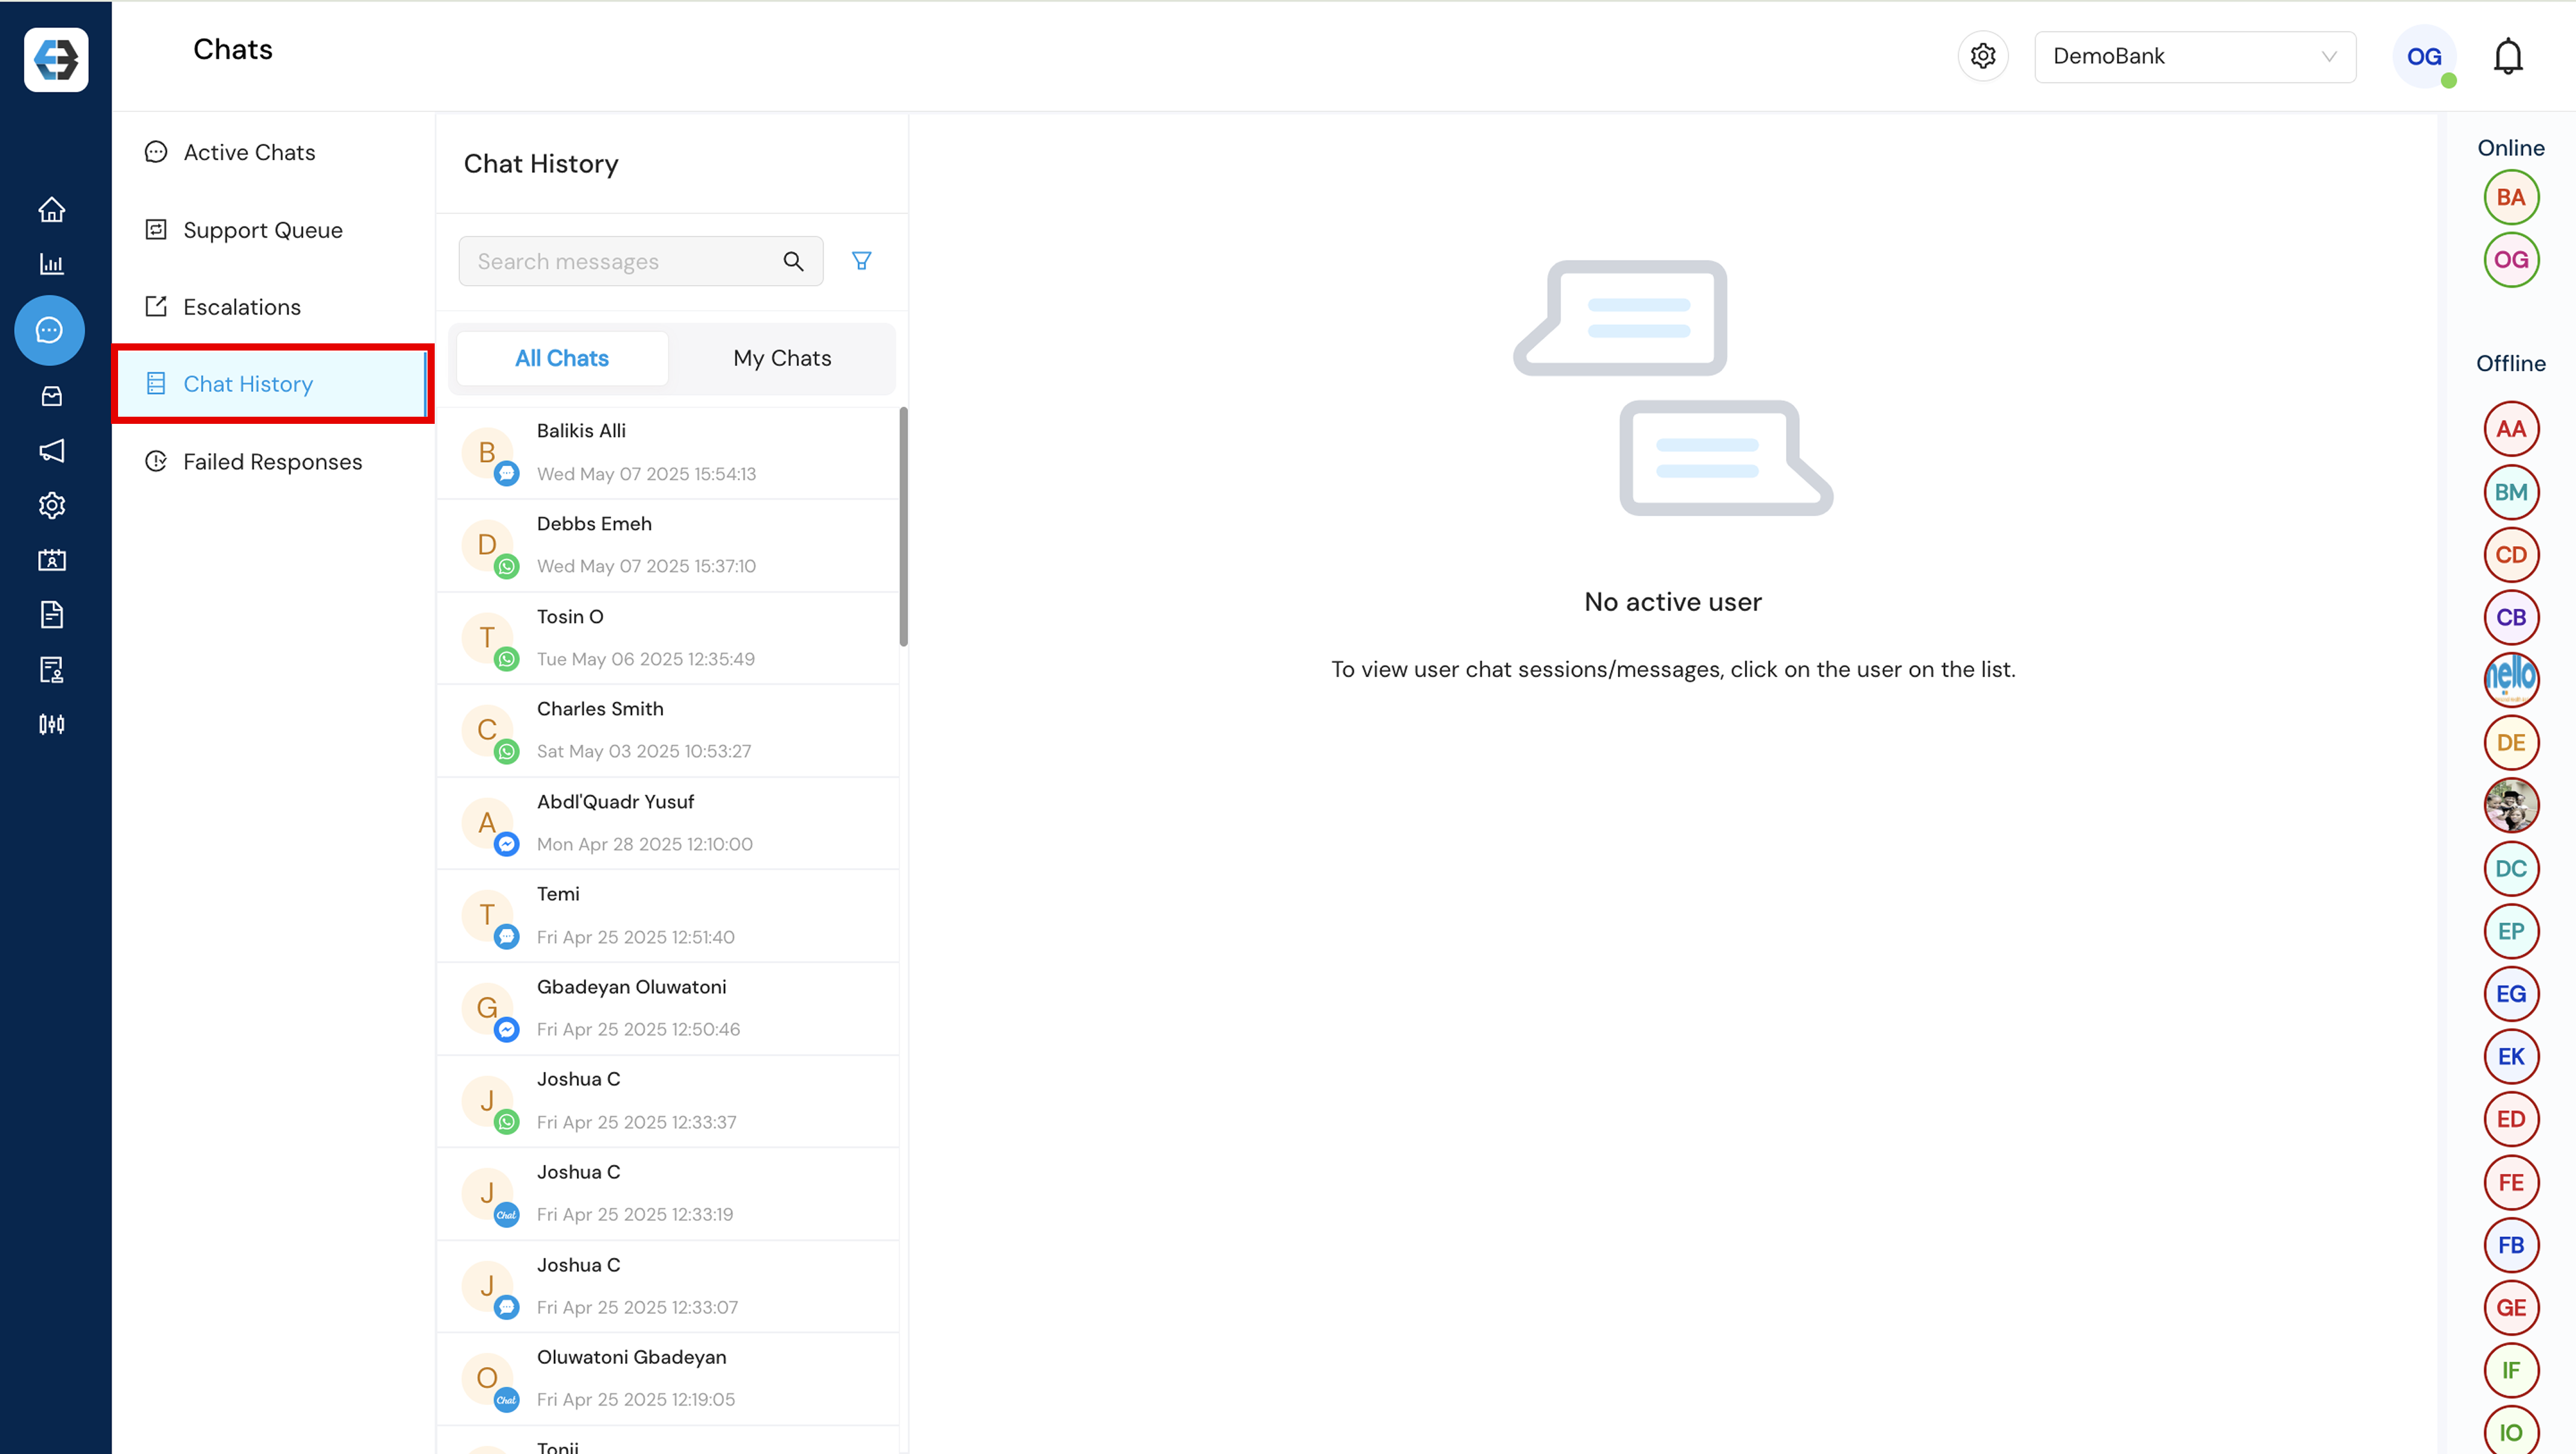
- All Chats: This section displays every chat handled across all support agents, providing a complete overview of customer interactions within the team.
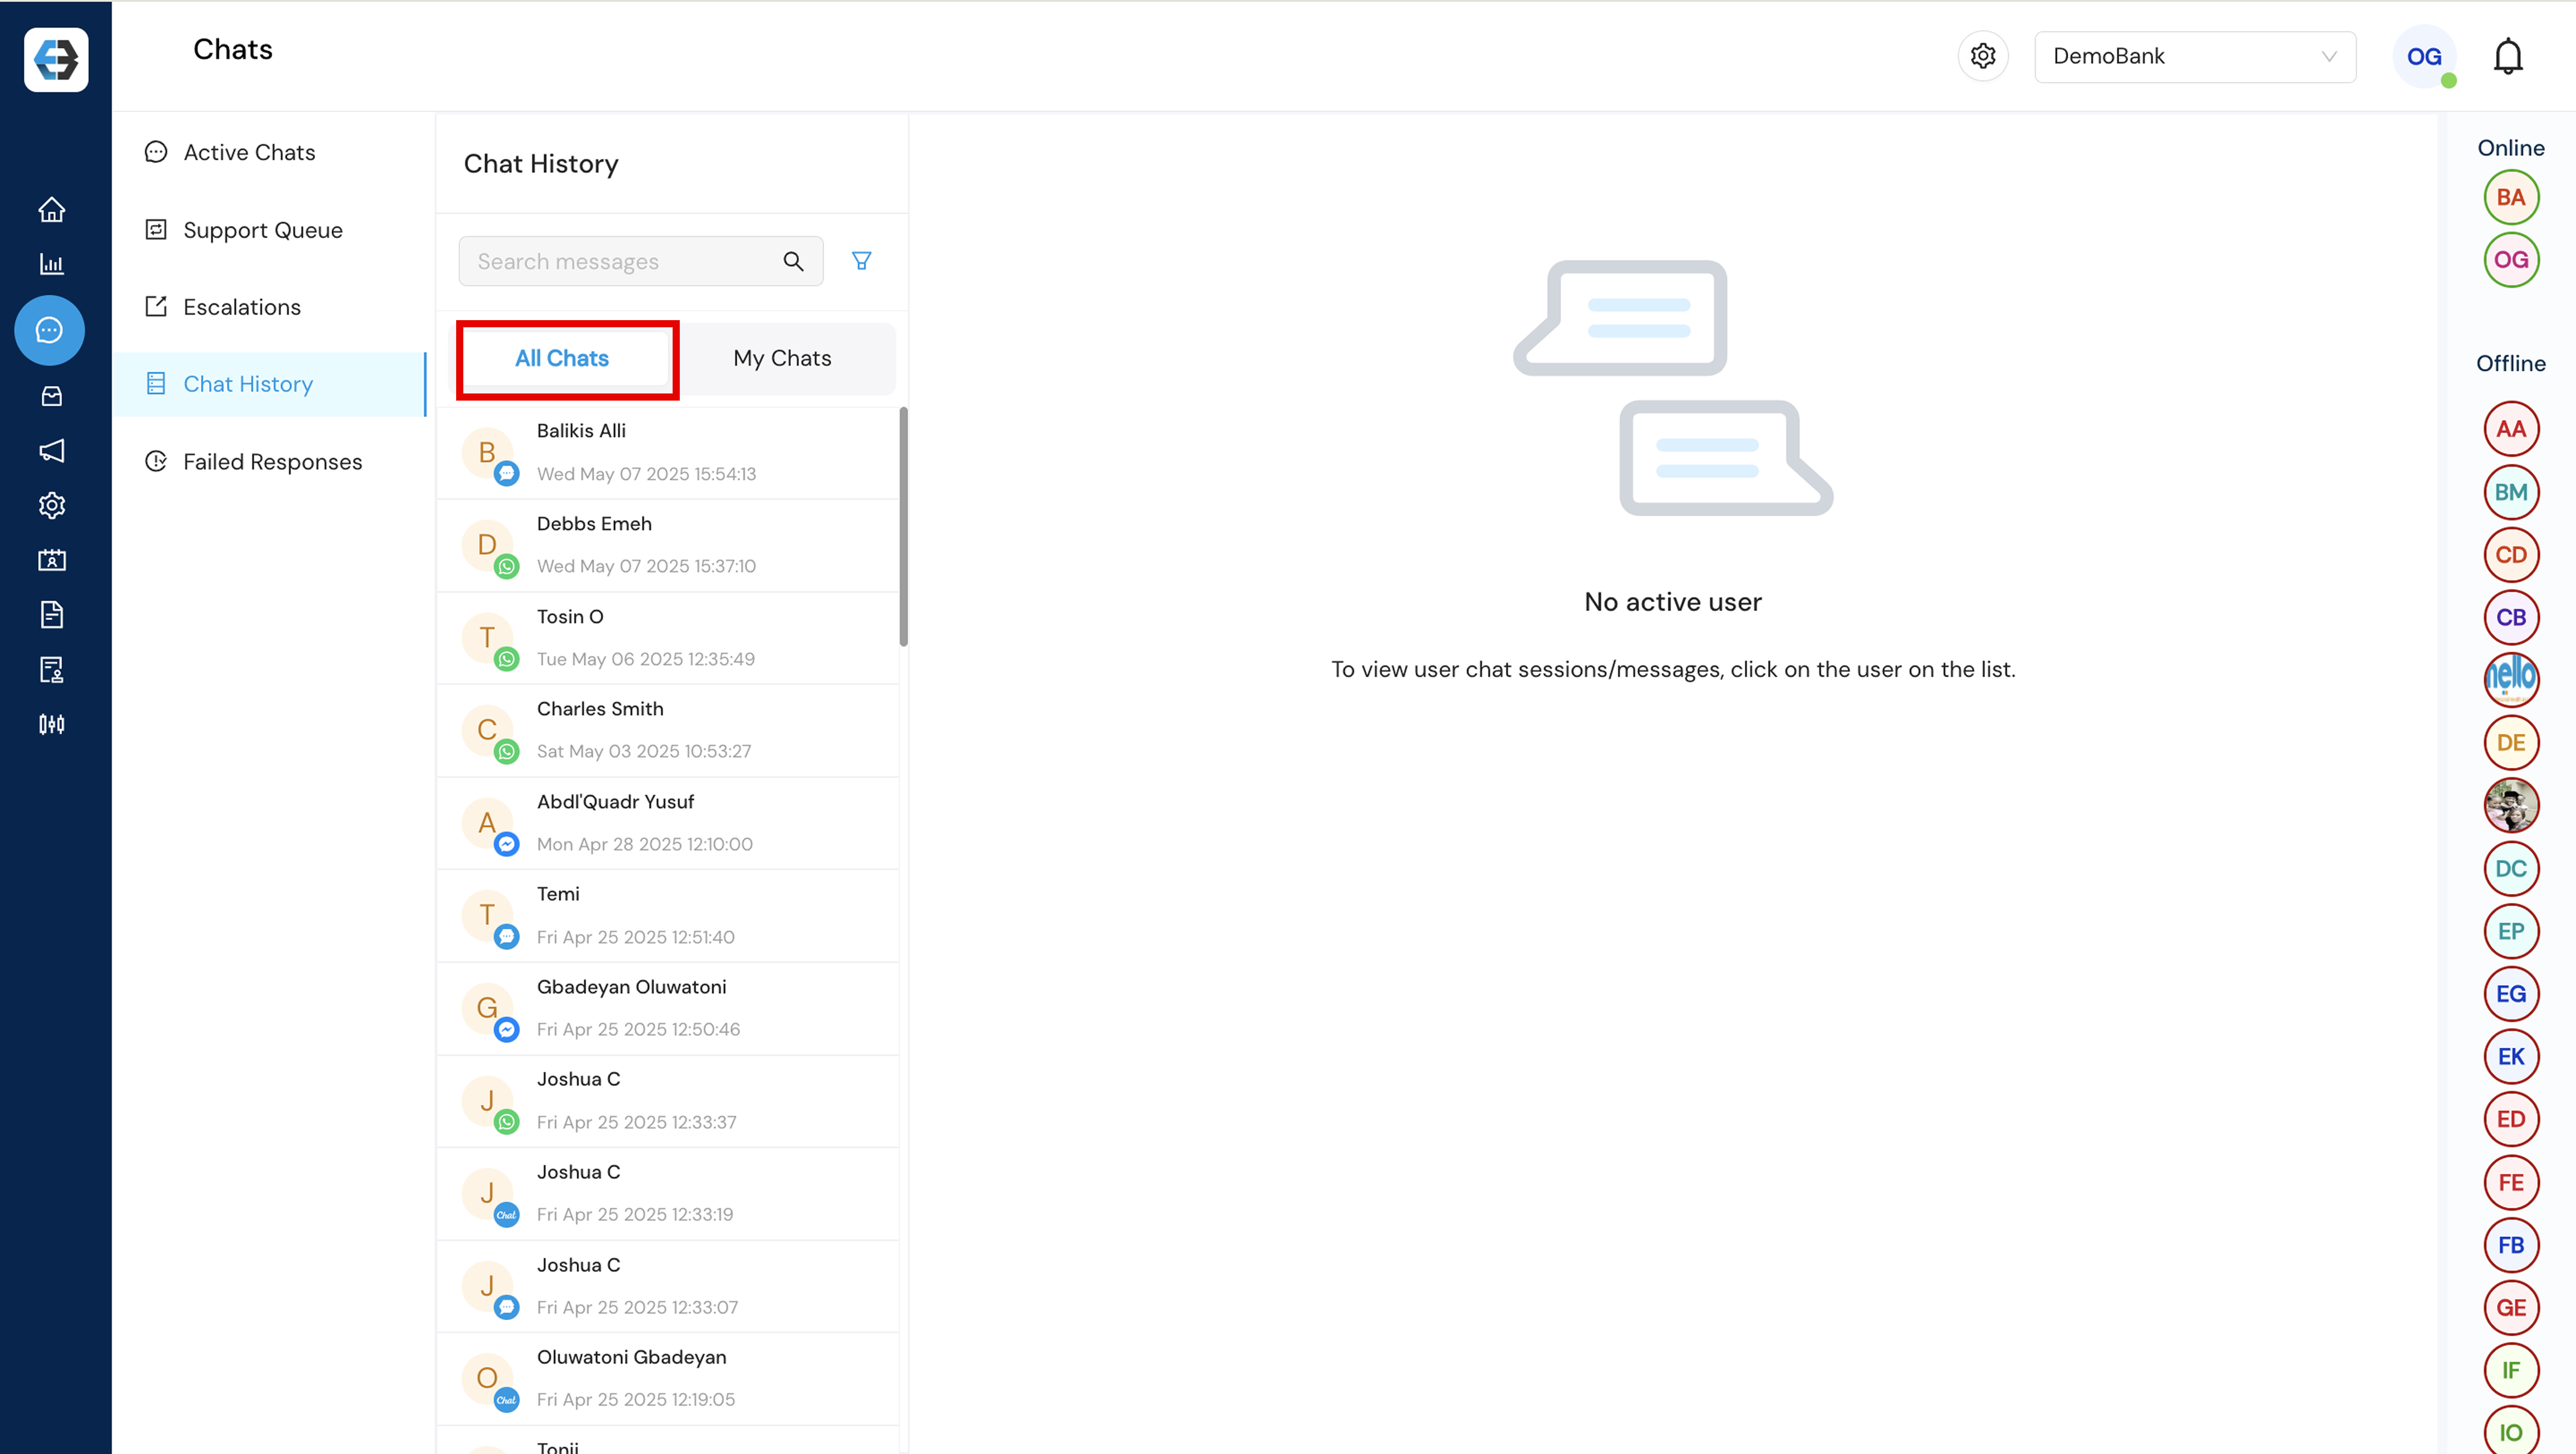
- My Chats: This section displays chats assigned to or handled by the logged-in support agent, offering a personalized view of their interactions.
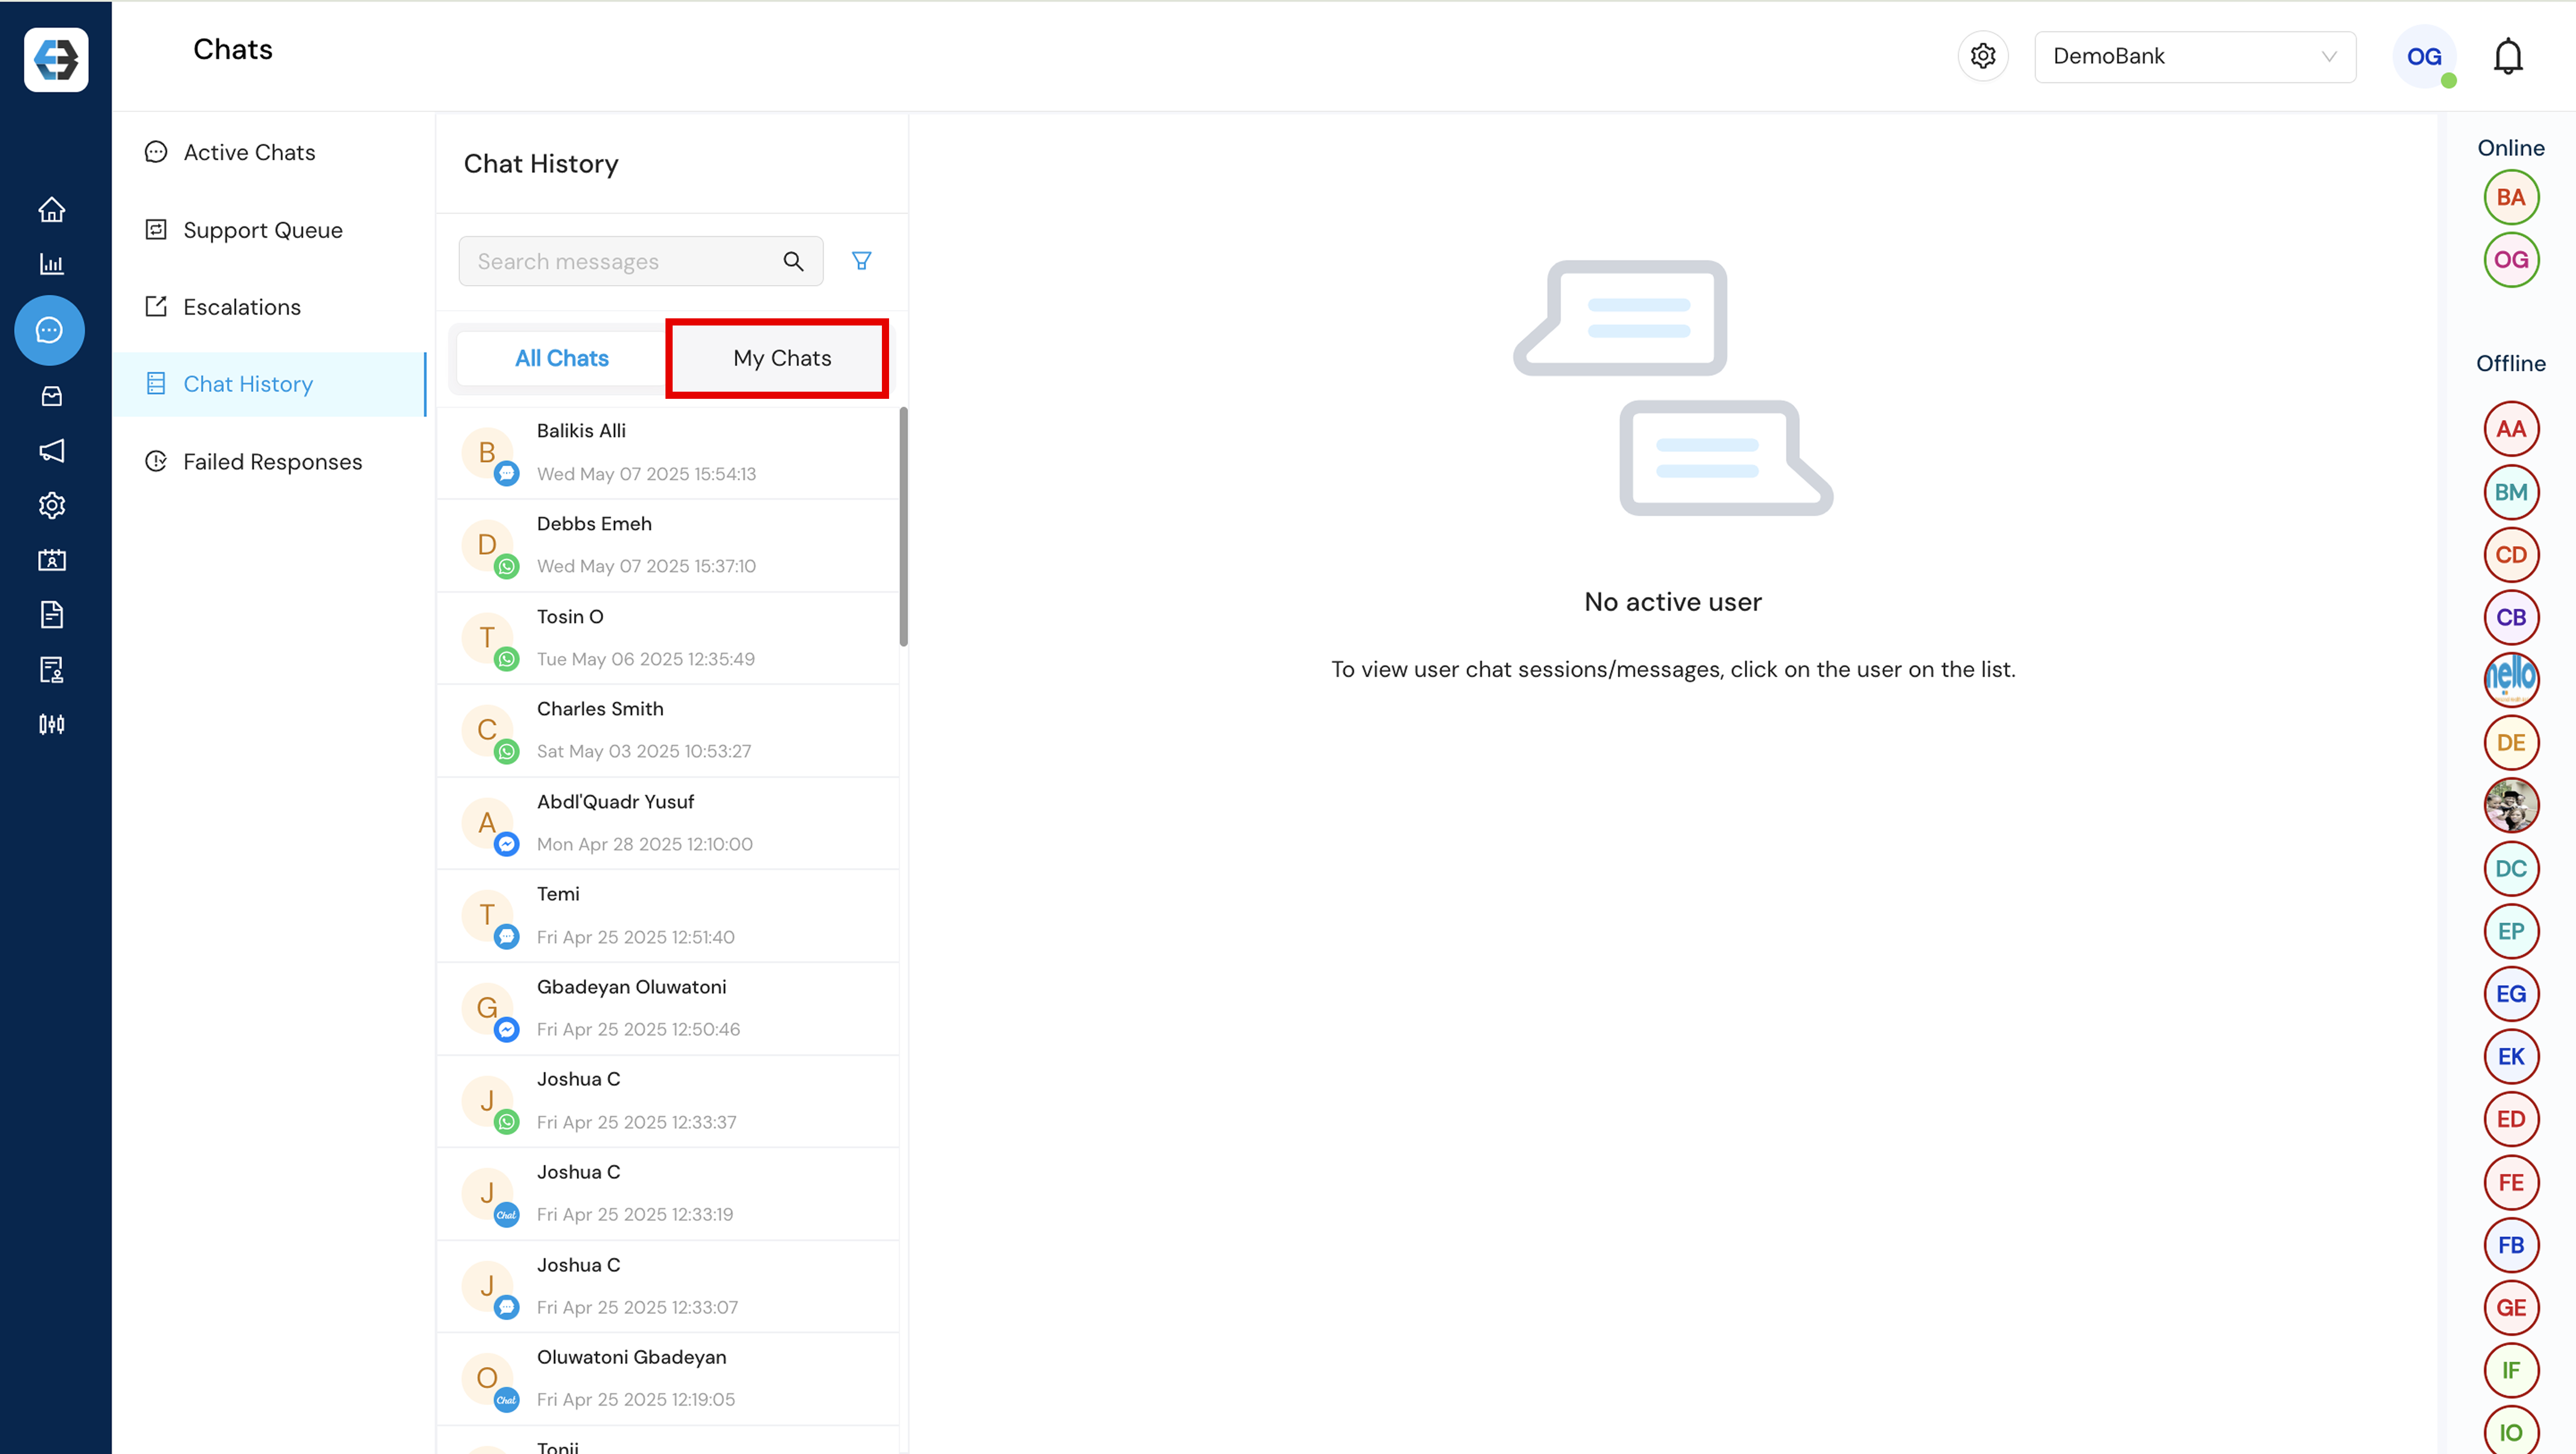
- Session View: Displays the complete timeline of interactions for a specific session or issue, regardless of how many times the customer has chatted. It focuses solely on that particular session, not the customer’s entire chat history.

- Chronological View: Presents all customer interactions in the order they occurred, offering a full historical timeline across multiple sessions for a comprehensive view of the customer’s journey.

5. Failed Responses:
Displays instances where the chatbot was unable to provide an appropriate reply, helping teams identify gaps and improve the accuracy and effectiveness of automated responses.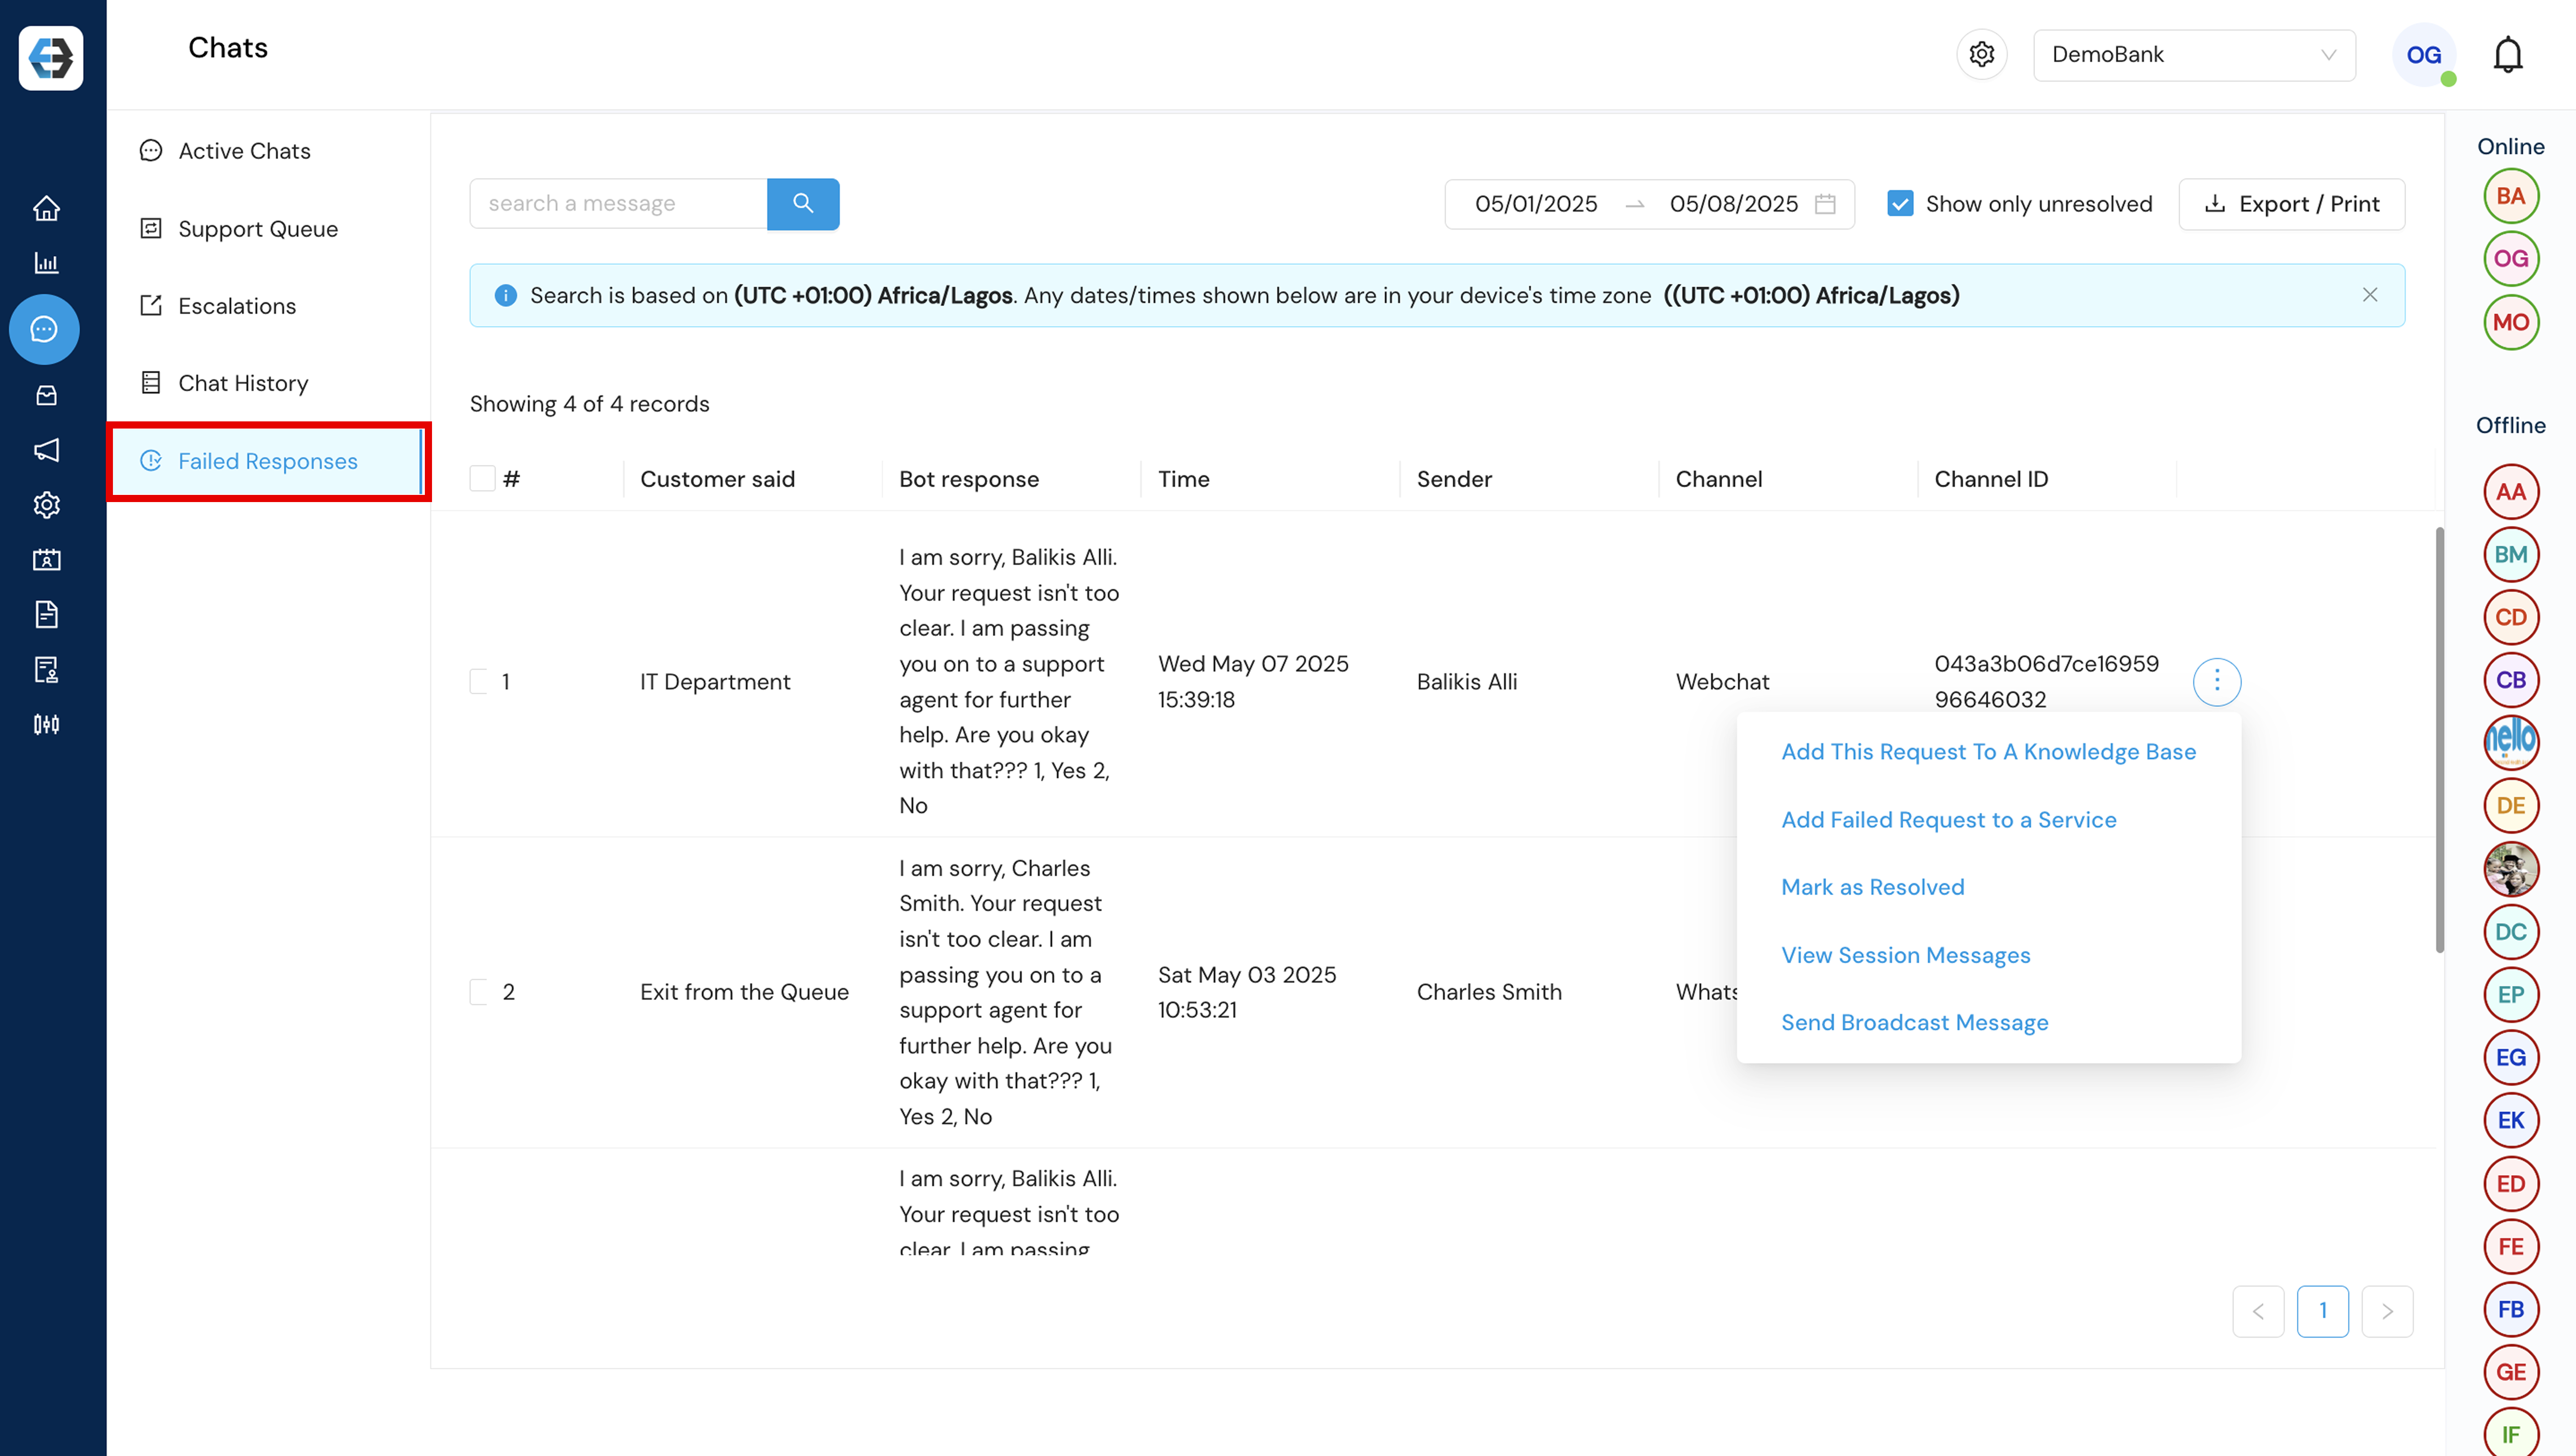
When a failed response is identified, the following actions can be taken to improve bot performance and ensure proper follow-up:
- Add to Knowledge Base: Convert the customer’s query into a helpful article or entry to enhance future responses.
- Add to Service: Map the failed response to an existing service or intent to improve bot understanding.
- Mark as Resolved: Indicate that the failed response has been reviewed and addressed.
- View Session Messages: Review the full conversation thread to understand the context of the failure.
- Send Broadcast Message: Reach out to affected users with a follow-up or corrective message, if necessary.
Need more help? Explore our full Help Center or reach out to our support team at customersuccess@ebanqo.com
Happy Chatting!
How useful was this post?
Click on a star to rate it!
Average rating 0 / 5. Vote count: 0
No votes so far! Be the first to rate this post.
We are sorry that this post was not useful for you!
Let us improve this post!
Tell us how we can improve this post?