Creating new users on the eBanqo platform allows you to manage who has access to your business dashboard and assign roles accordingly. Follow the step-by-step guide below to create users for your team.
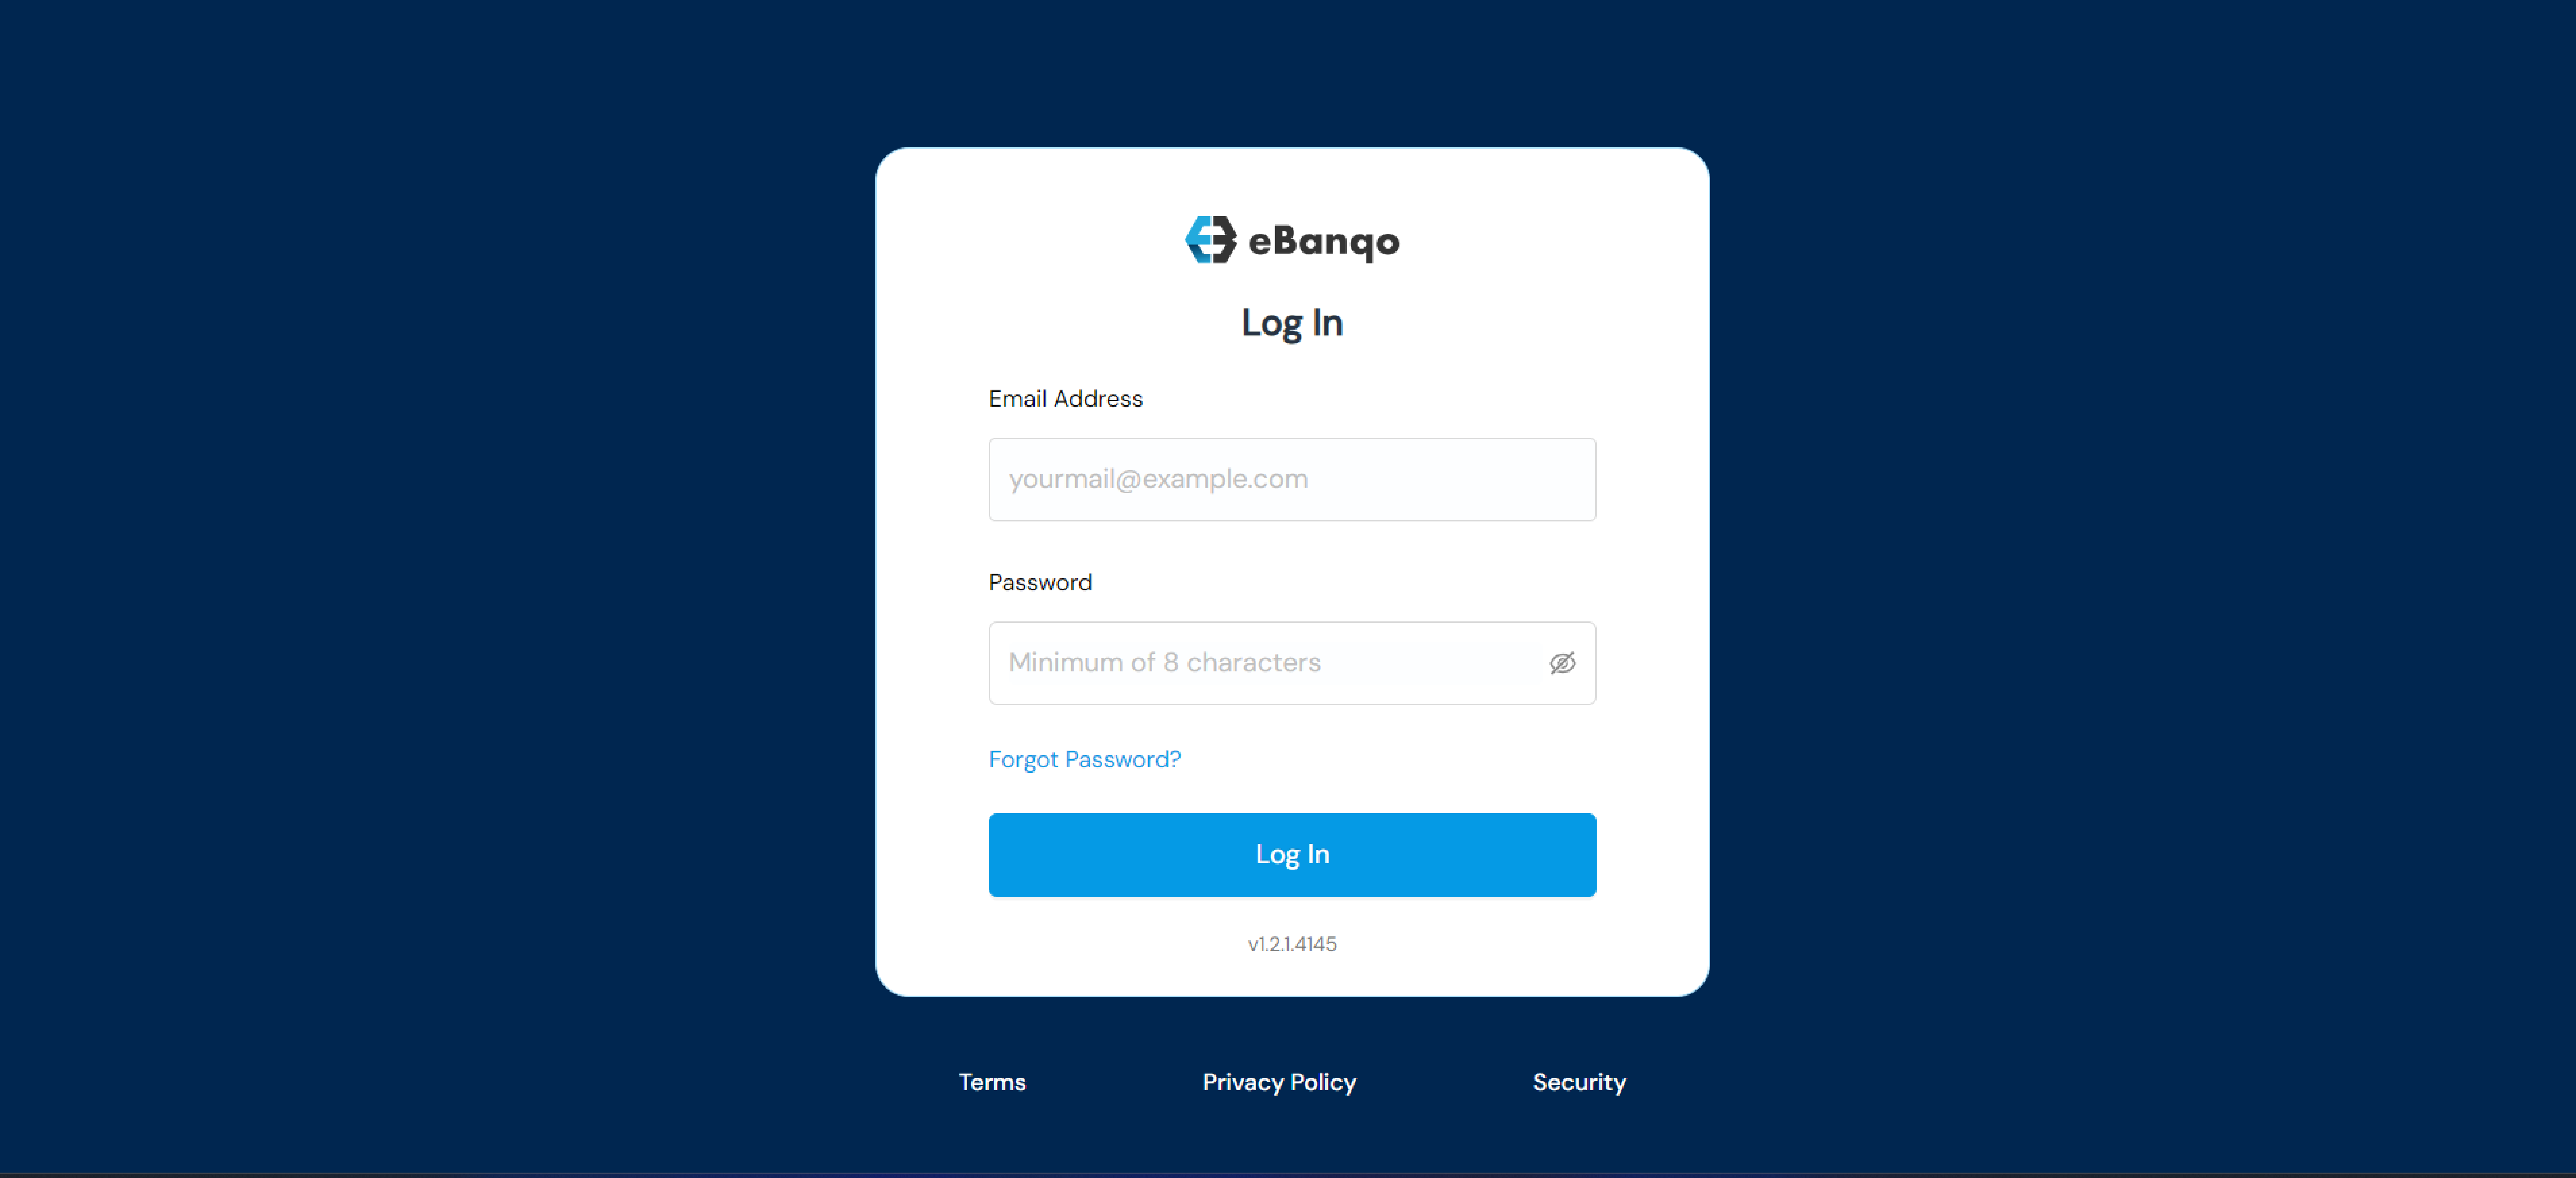
Step 1: Log in to Your Admin Account
- Visit eBanqo’s portal and log in using your admin credentials.
- Once logged in, you will be directed to the dashboard
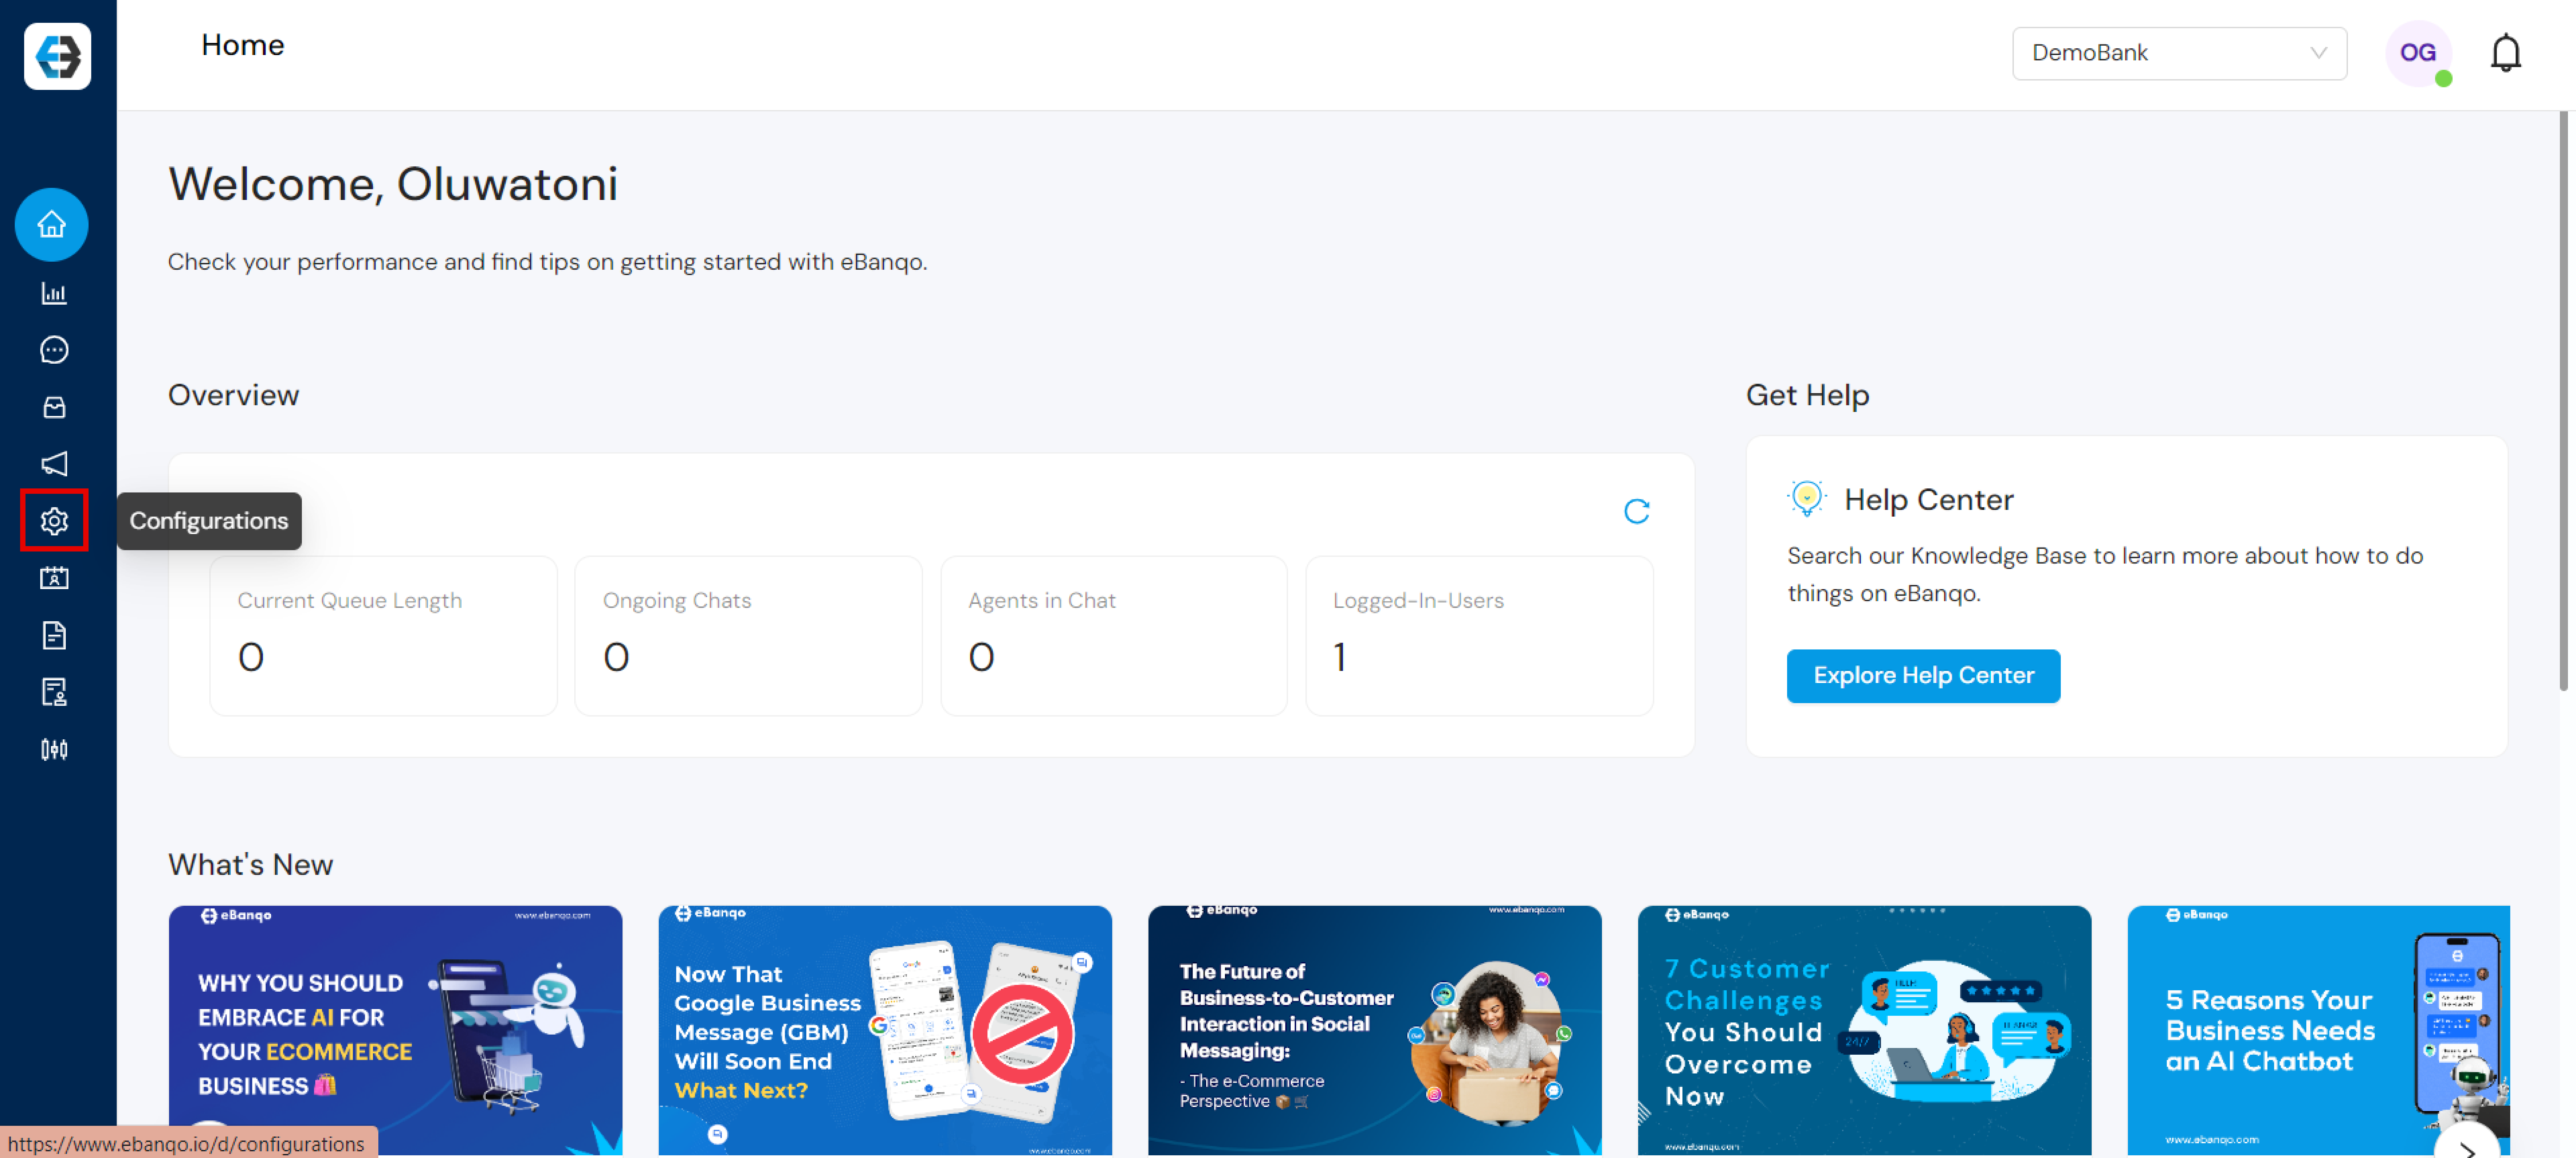
Step 2: Navigate to the Users Section
- Click on Configurations in the left-hand menu.
- Select Users.
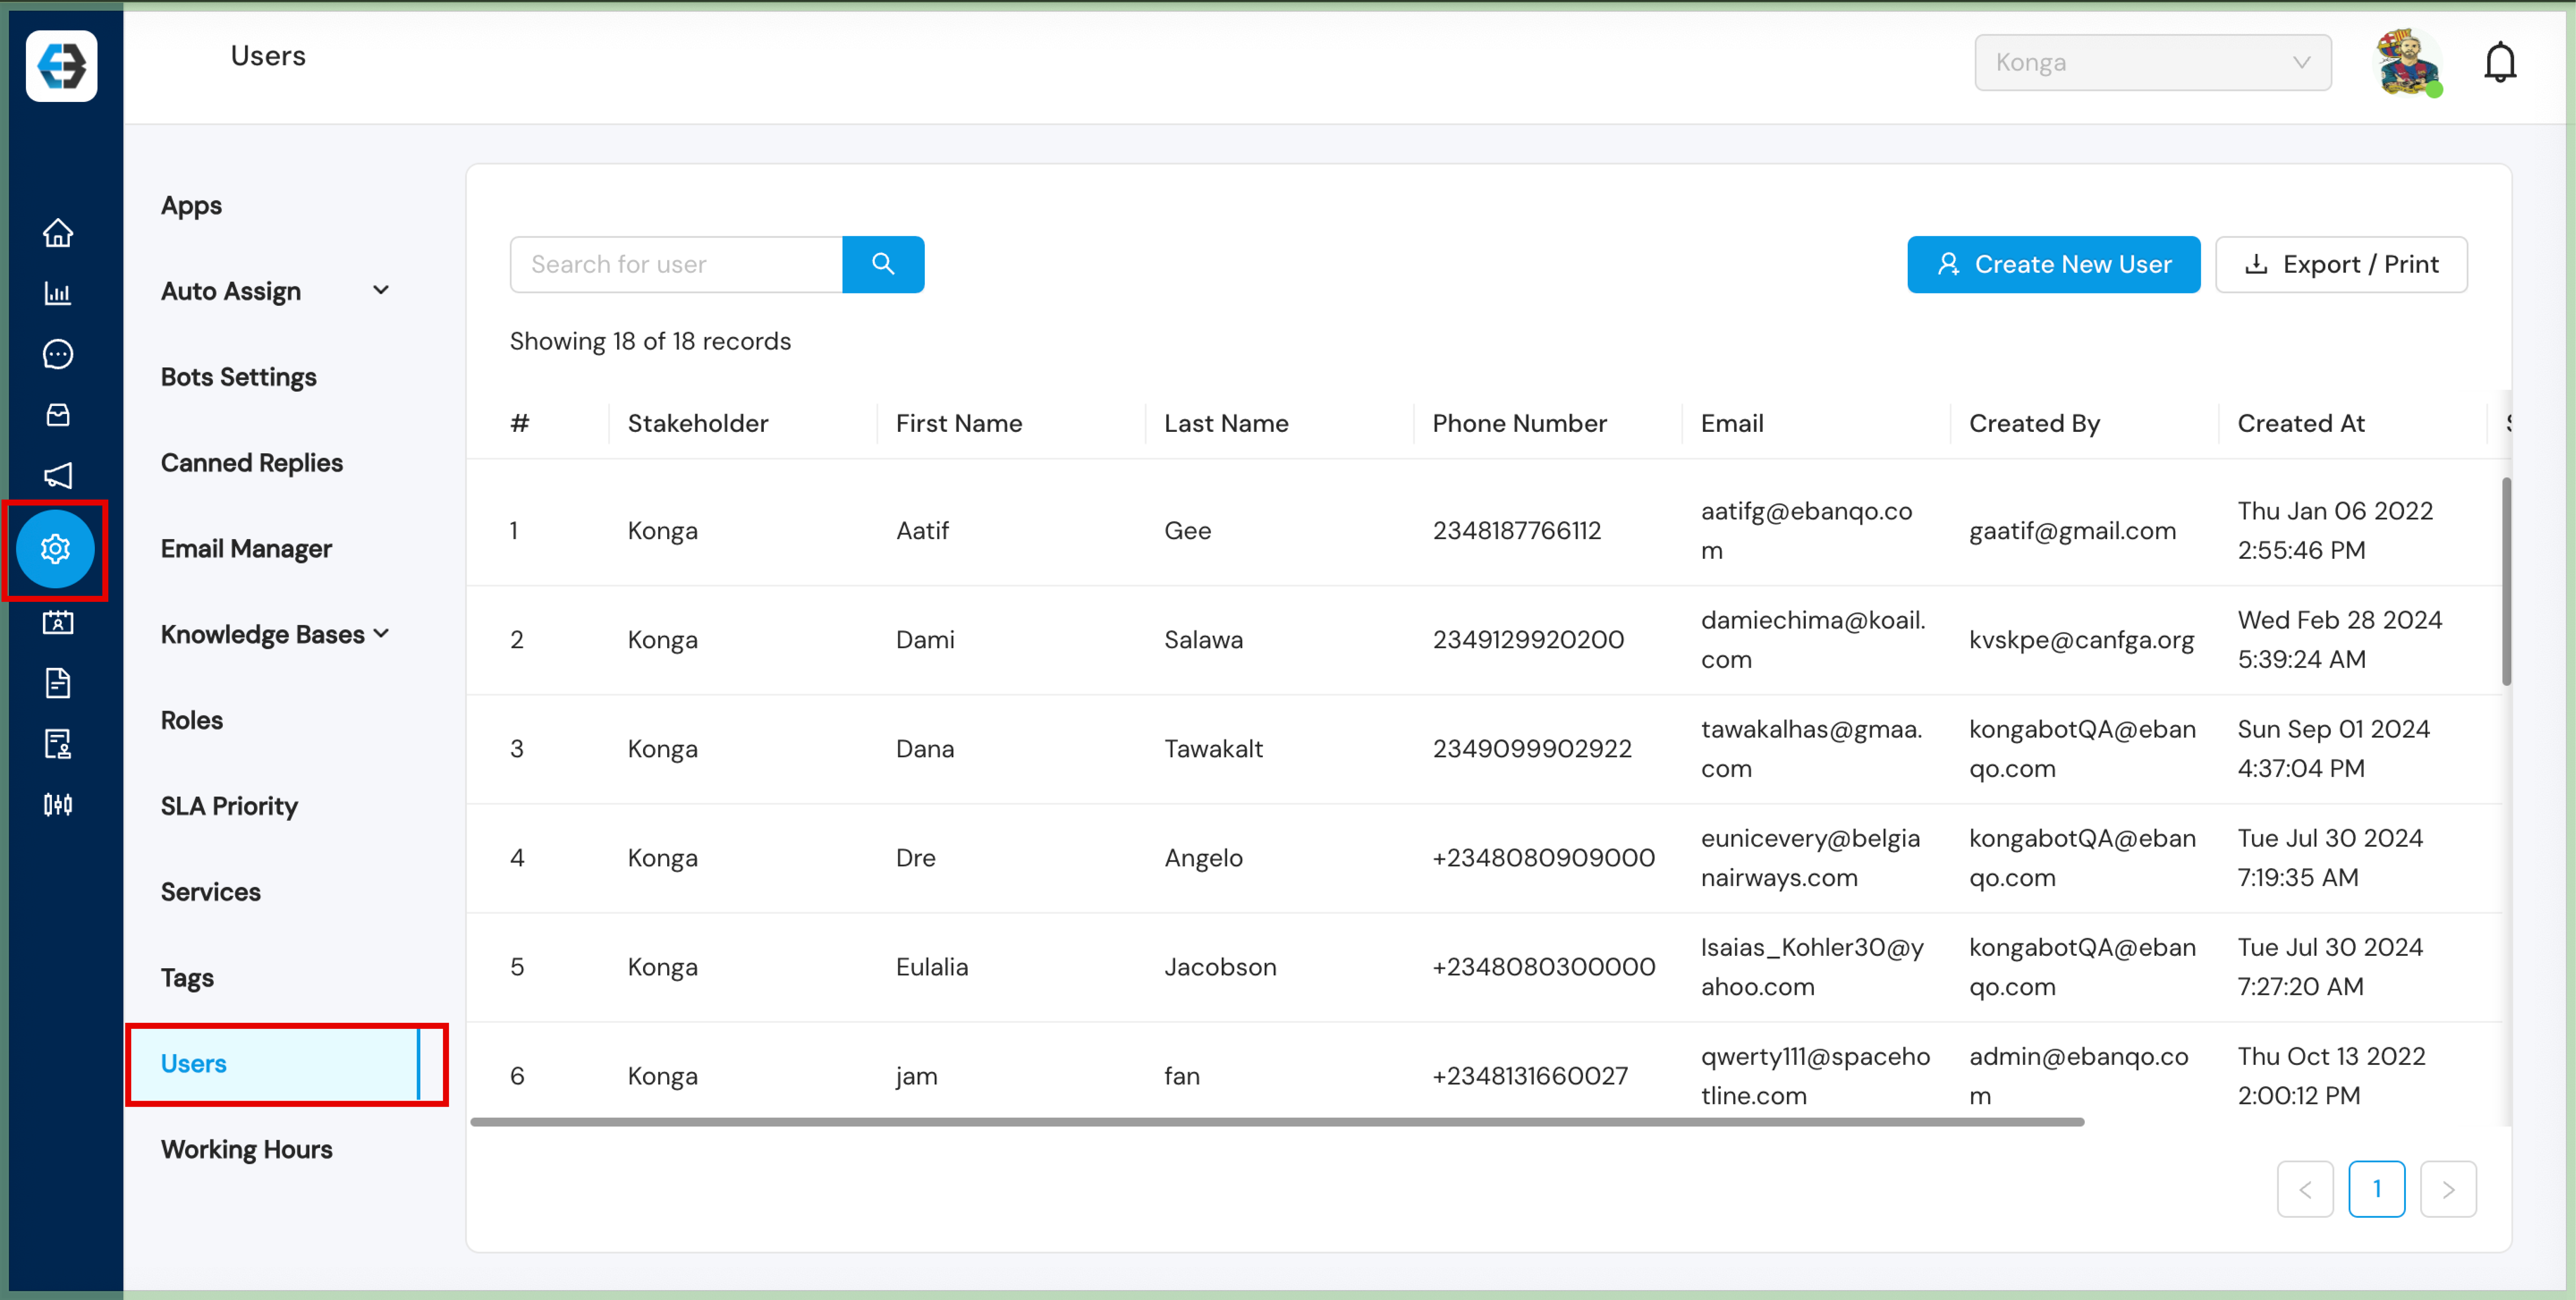
Step 3: Create a New User
- Click on the “Create New User” button.
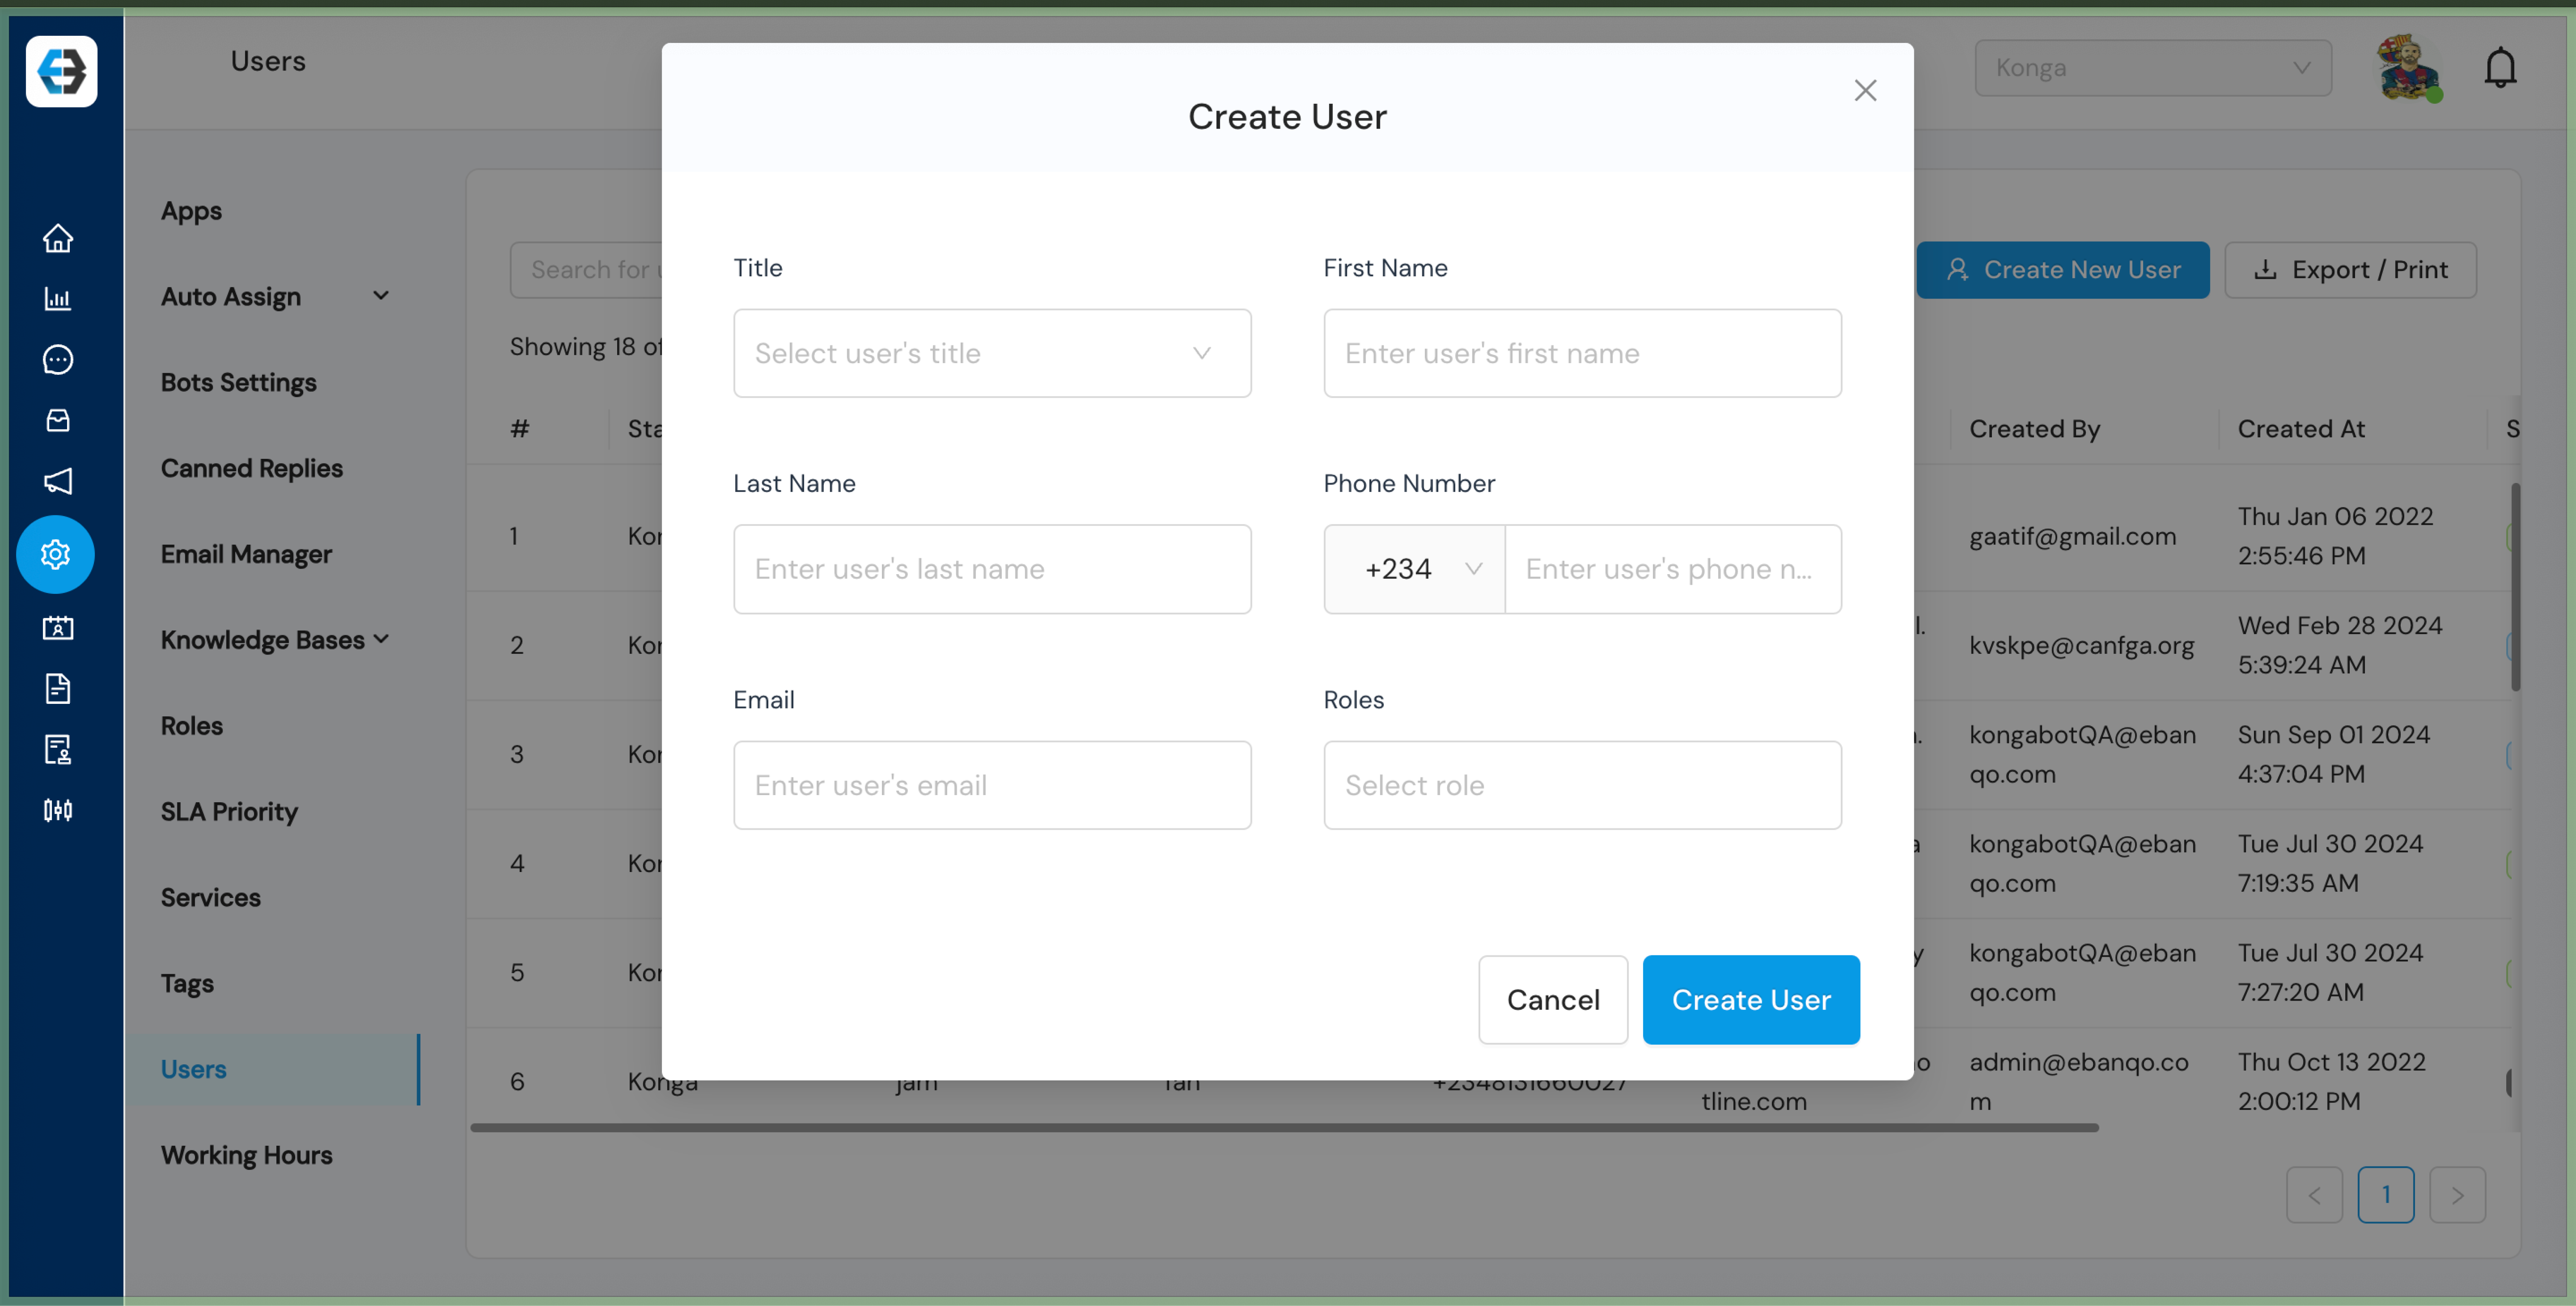
- A form will appear where you can enter the details of the new user.

Step 4: Fill in User Details
Fill out the following fields for the new user:
- Full Name: Enter the user’s first and last name.
- Email Address: Provide the email address the user will use to log in.
- Phone Number: Enter the user’s contact phone number.
- Role: Assign a role to the user. You can choose from pre-defined roles such as admin, Agent, or Supervisor. Each role has different access permissions.

Step 6: Create and Send Credentials
Once you’ve filled out the user information:
- Click Create User.
- The system will generate login credentials and automatically send them to the user’s registered email.
Step 7: Confirm User Creation
After successfully creating the user, they will appear in the user list under the Users section.
Notes:
– Ensure the email address is accurate to prevent login issues.
– Assign the right role based on the user’s responsibilities to maintain security and proper access.
– You can always revisit the Users section to deactivate users who no longer need access.
How to Deactivate Users on eBanqo
Deactivating a user on eBanqo is a simple process that ensures inactive or former team members can no longer access your organization’s account. Follow this step-by-step guide to deactivate users on the eBanqo platform.
Step 1: Log in to Your eBanqo account
Step 2: Navigate to the Users Section
- Once logged in, locate the Configurations icon on the left sidebar menu.
- Click on Users under the Configurations menu. This will take you to the user administration dashboard, where all users are listed.
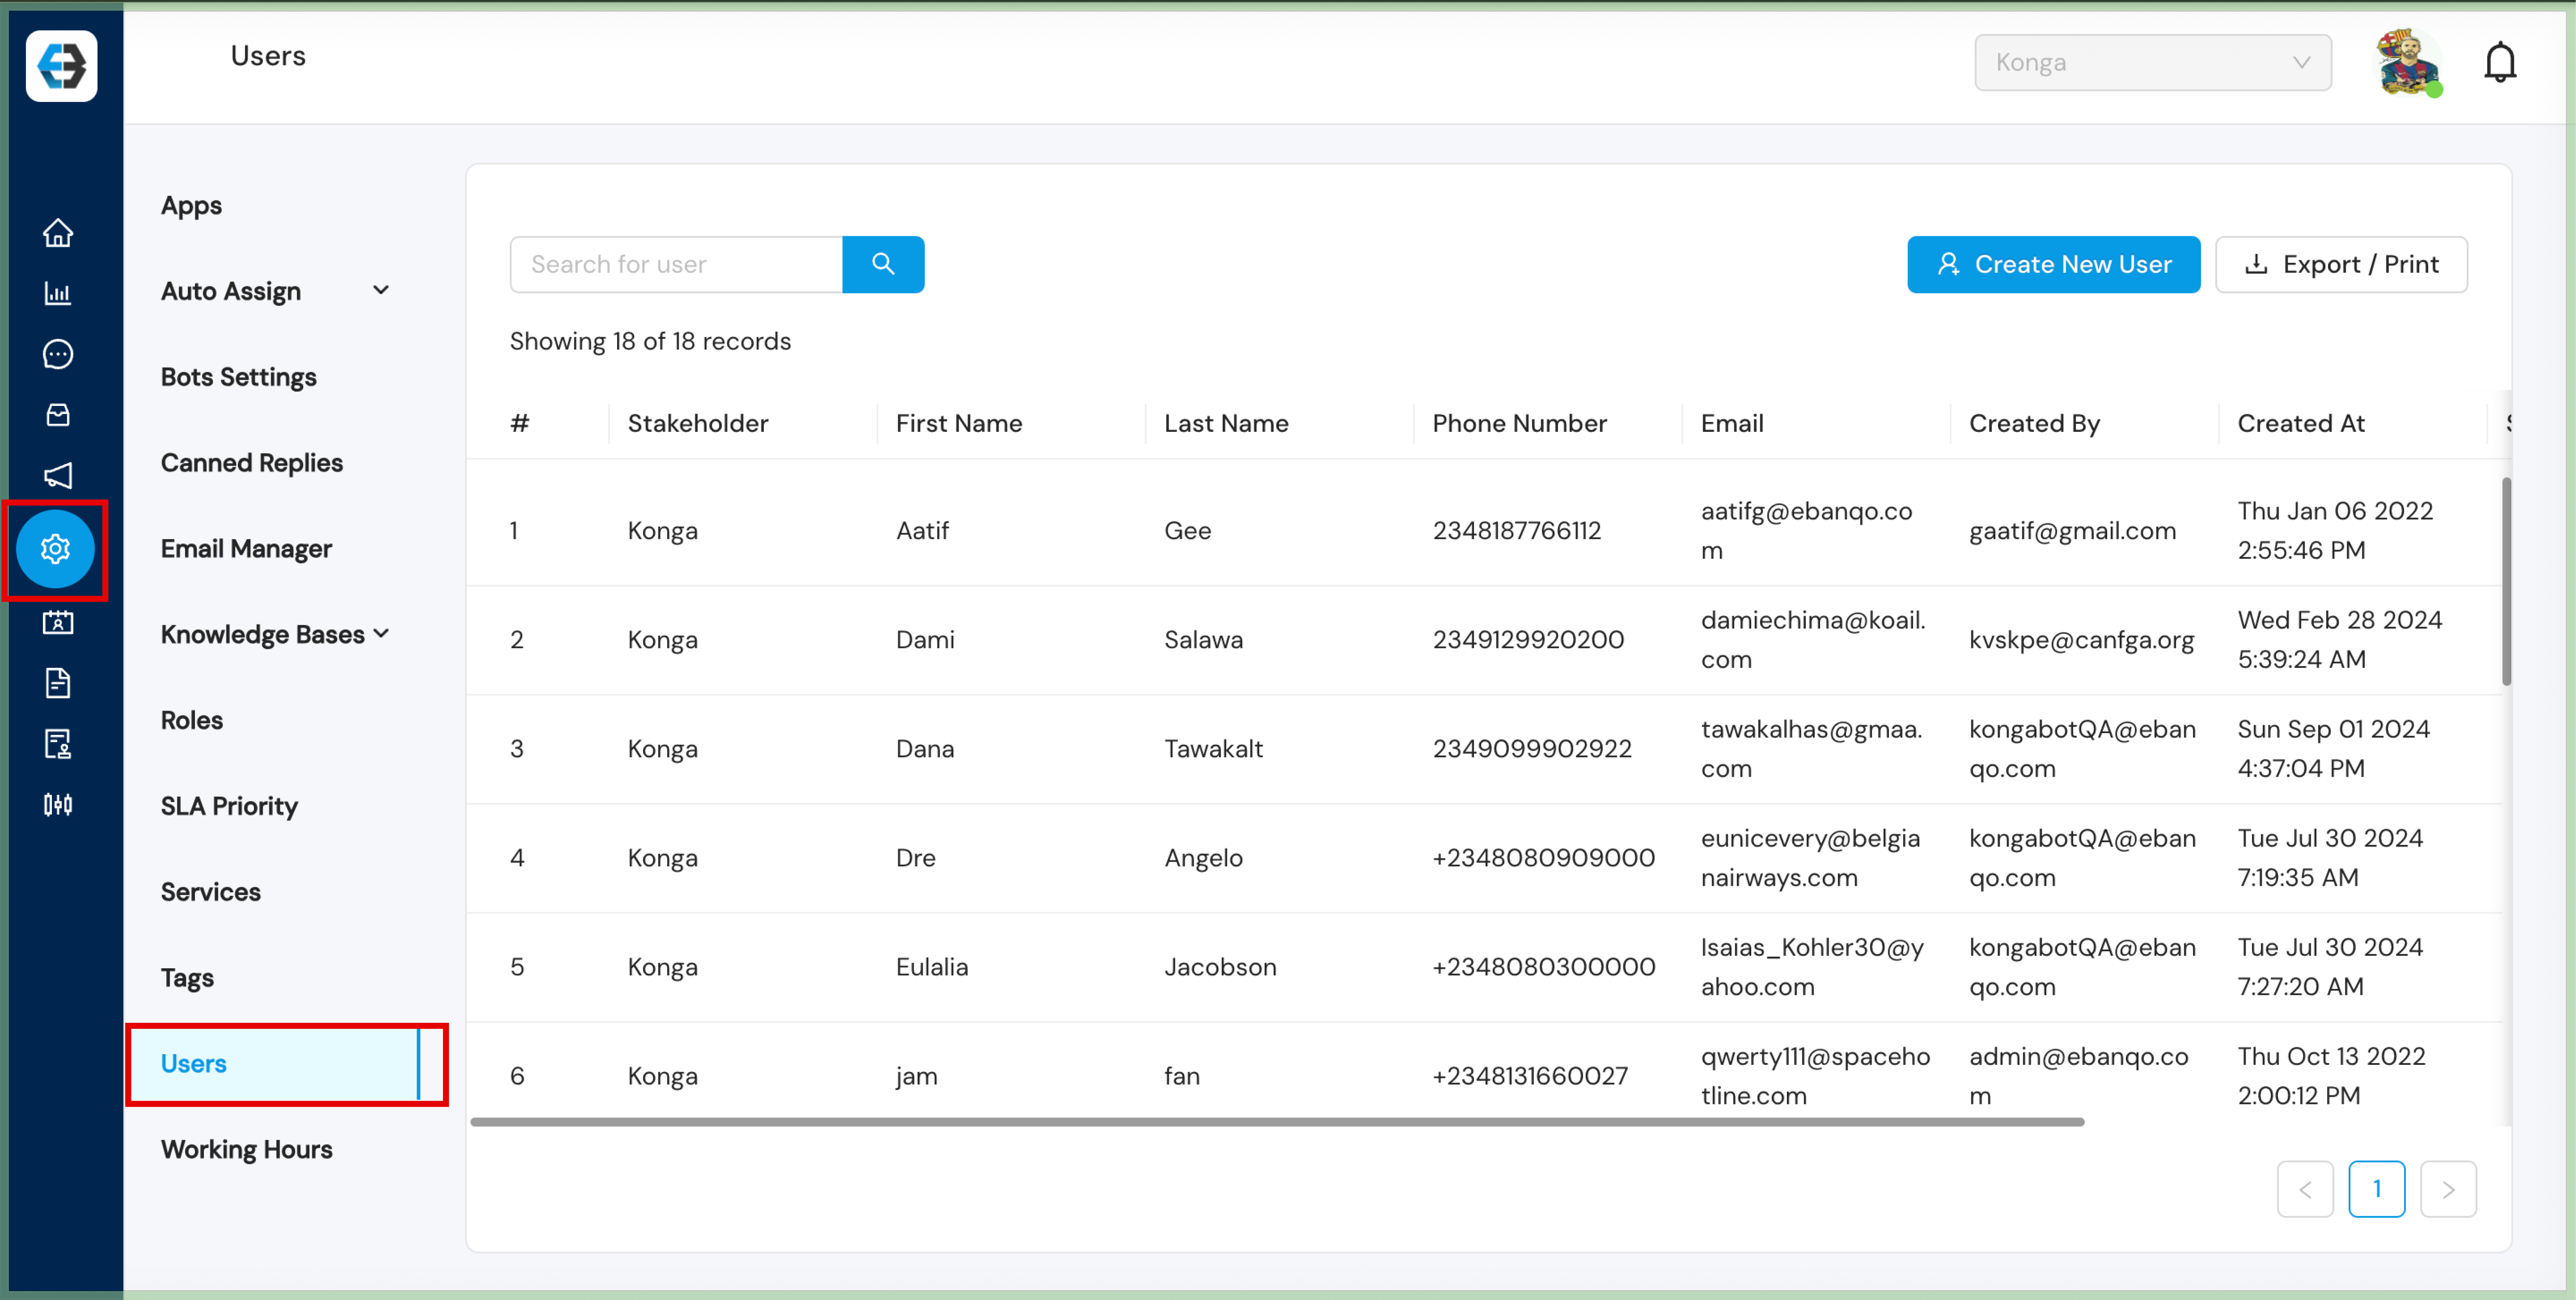
Step 3: Find the User You Want to Deactivate
- In the Users section, search for the user you want to deactivate by scrolling through the list or using the search bar to find them by name or email.
- Once you locate the user, click on the 3 dotted hamburger menu beside their details.
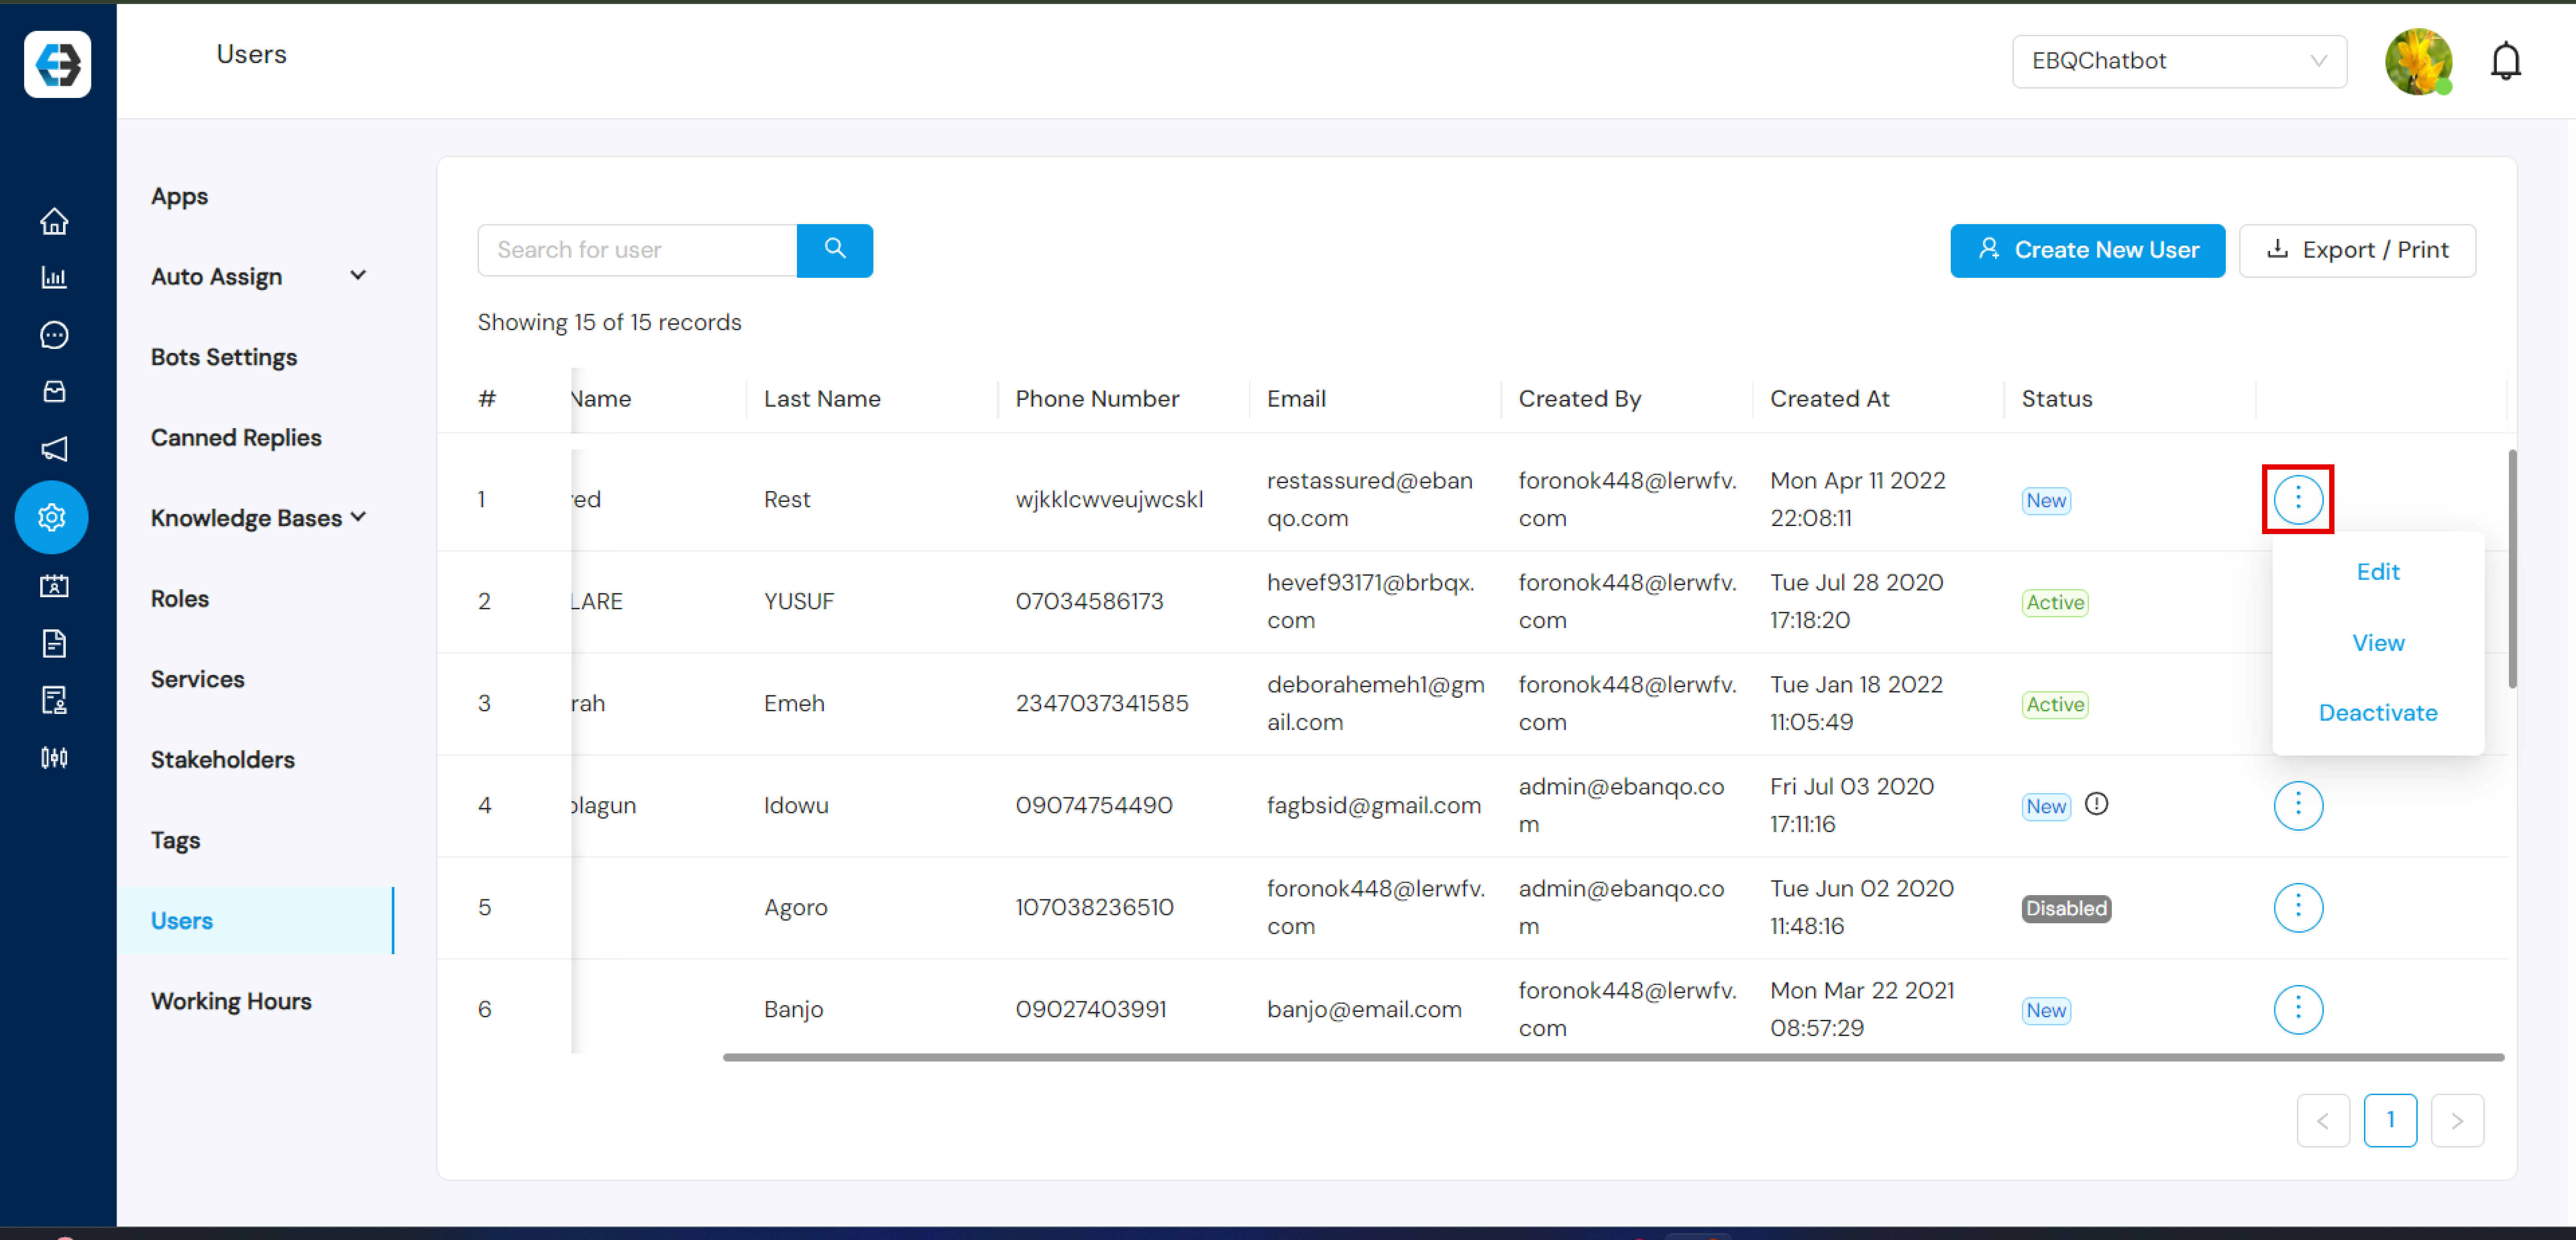
Step 4: Deactivate the User
- In the user’s profile, you will see an option to Deactivate the user.
- Click the Deactivate button to remove their access to the platform.

Step 5: Confirm Deactivation
- A pop-up window will appear asking you to confirm the deactivation. Confirm by clicking Yes, Deactivate.
- The user will now be deactivated, and their status will be marked as “Inactive” in the user list.
How useful was this post?
Click on a star to rate it!
Average rating 0 / 5. Vote count: 0
No votes so far! Be the first to rate this post.
We are sorry that this post was not useful for you!
Let us improve this post!
Tell us how we can improve this post?