Transform your business into an online store in minutes with eBanqo’s integrated storefront solution. This comprehensive guide will walk you through every step, from initial setup to managing your first orders all by yourself in just a few minutes.
What You Need to Get Started:
- Business Email Address
- Business Website
- Facebook Business Page (preferably verified)
- Phone Number (not currently on WhatsApp for verification)
- Bank Account Details
- RC Number (Certificate of Incorporation)
- BVN (Bank Verification Number)
- Tax ID
- Primary Address (office address)
- Product Descriptions and Images
Optional but Recommended
- Shipping addresses
- Branch information for pickup locations
Step 1: Initial Setup and Storefront Activation
1.1 Sign Up and Log In
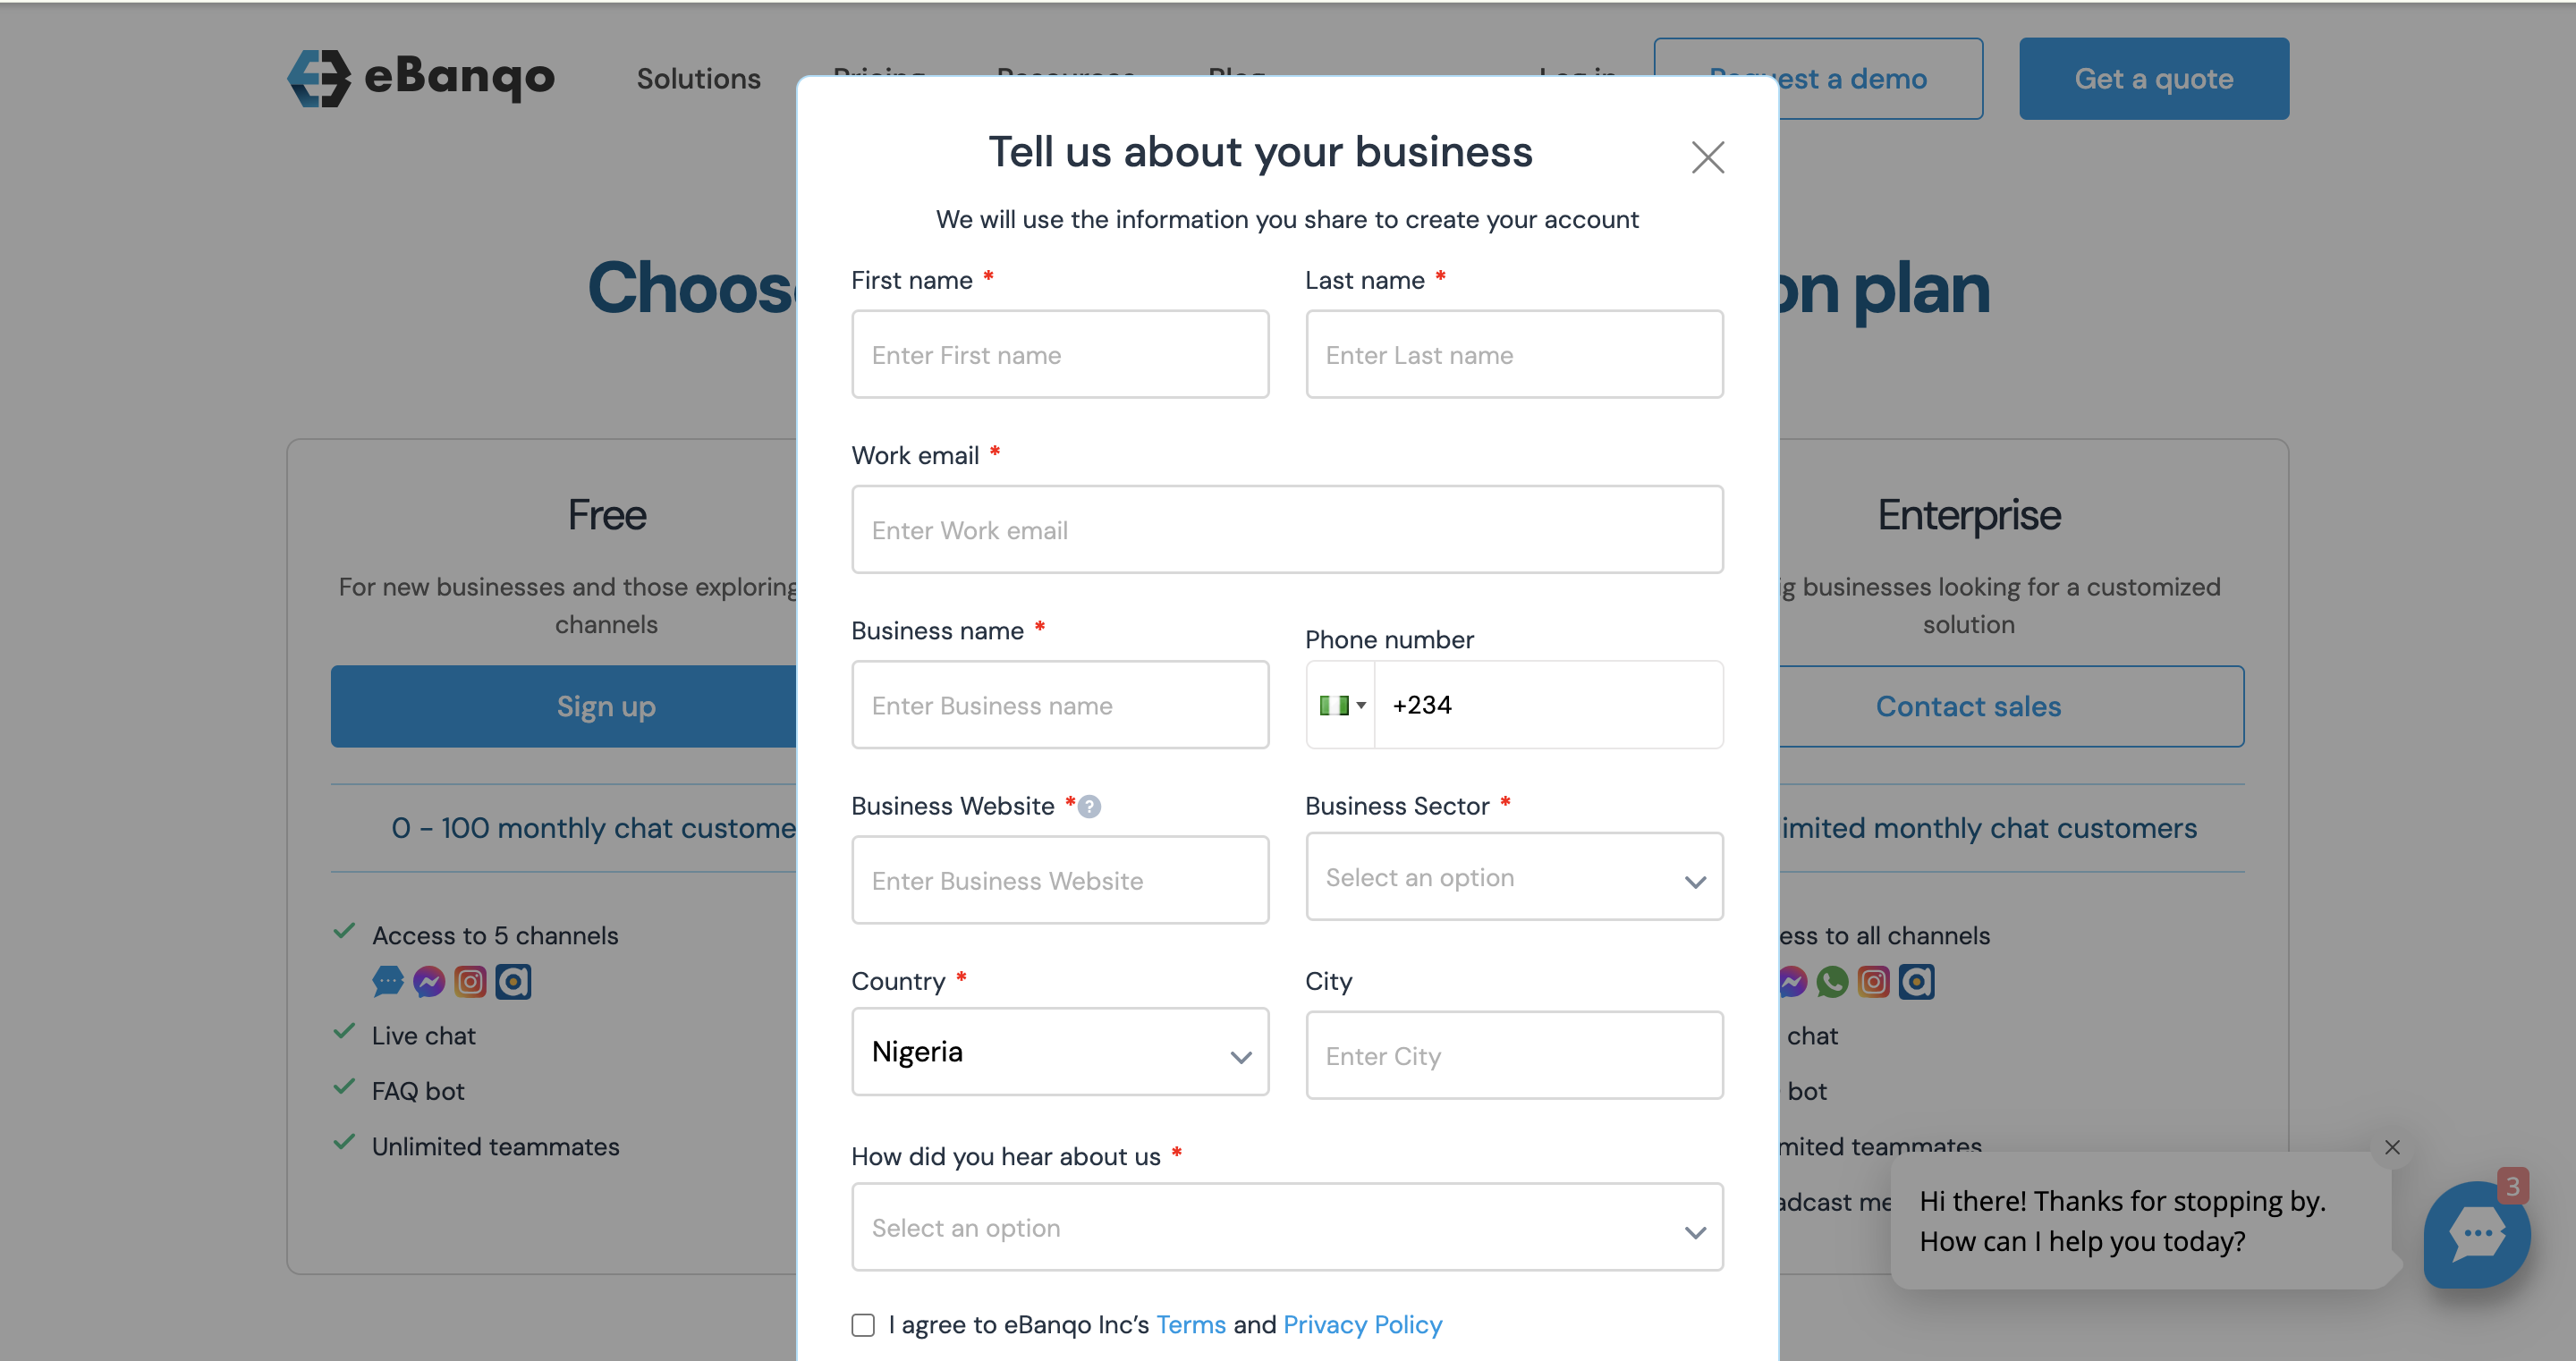
- Visit eBanqo at www.ebanqo.com and sign up.
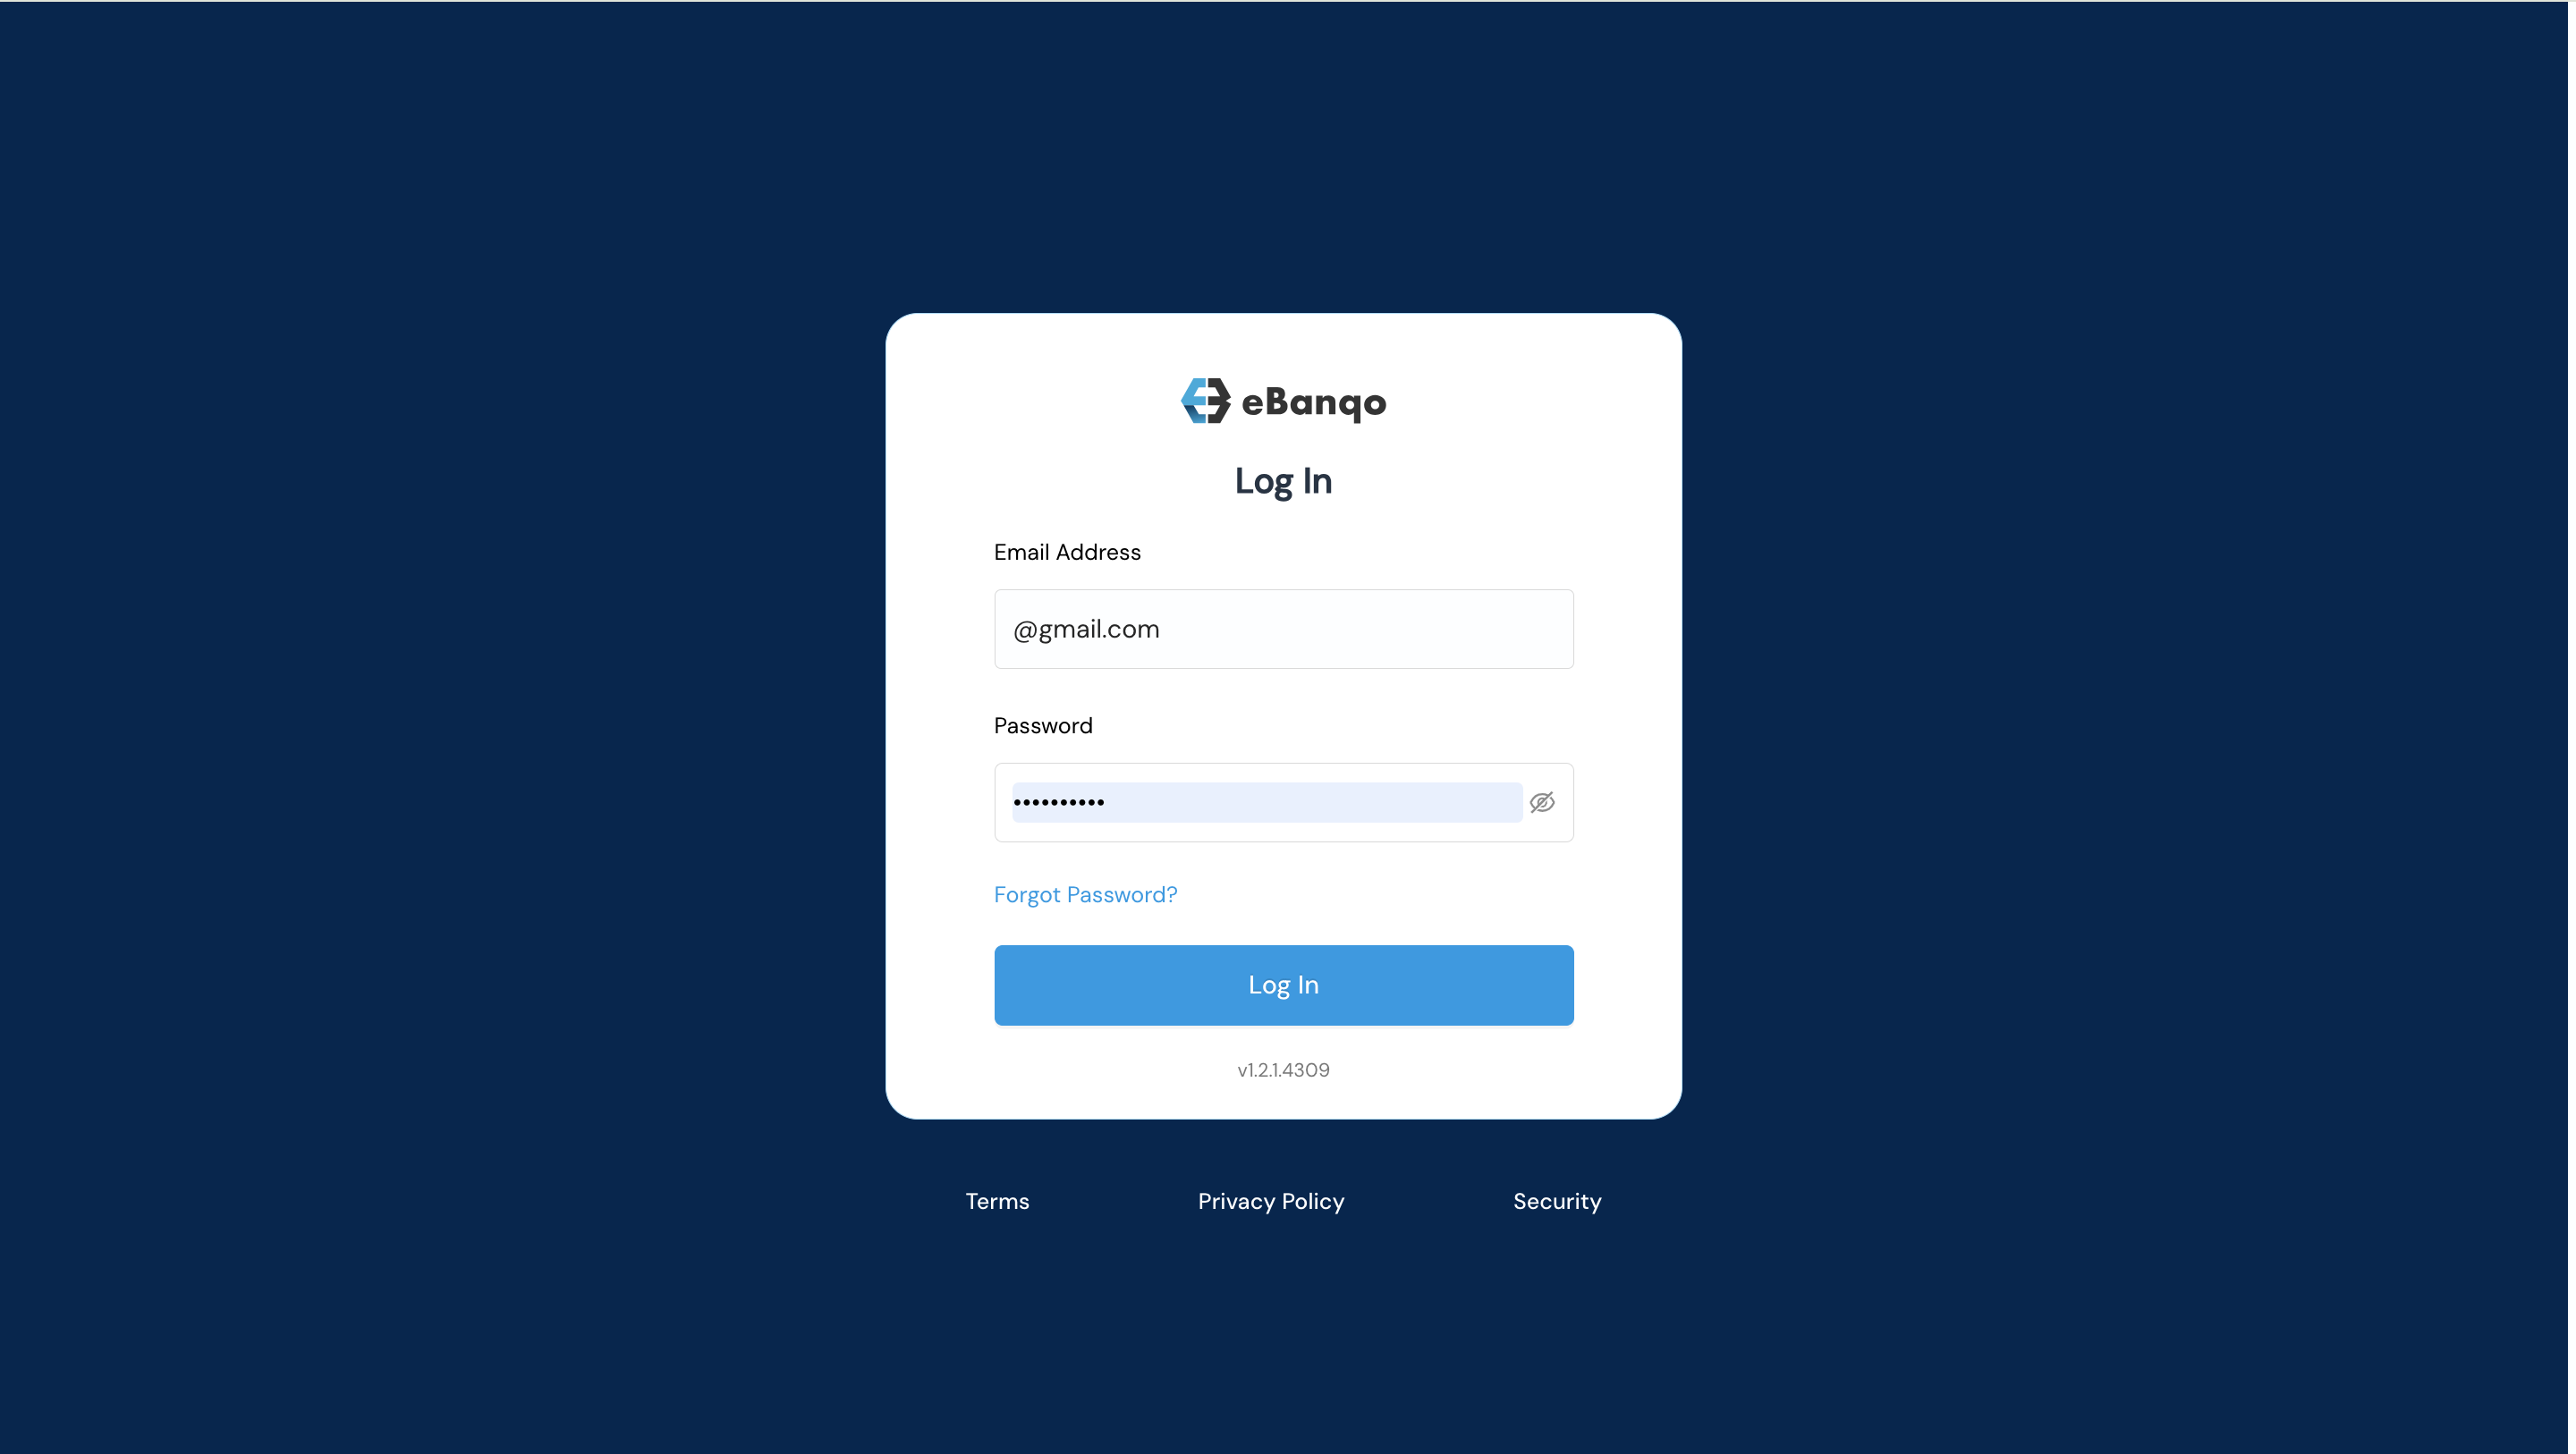
- After signing up, proceed to log in to your dashboard.
1.2 Enable Storefront
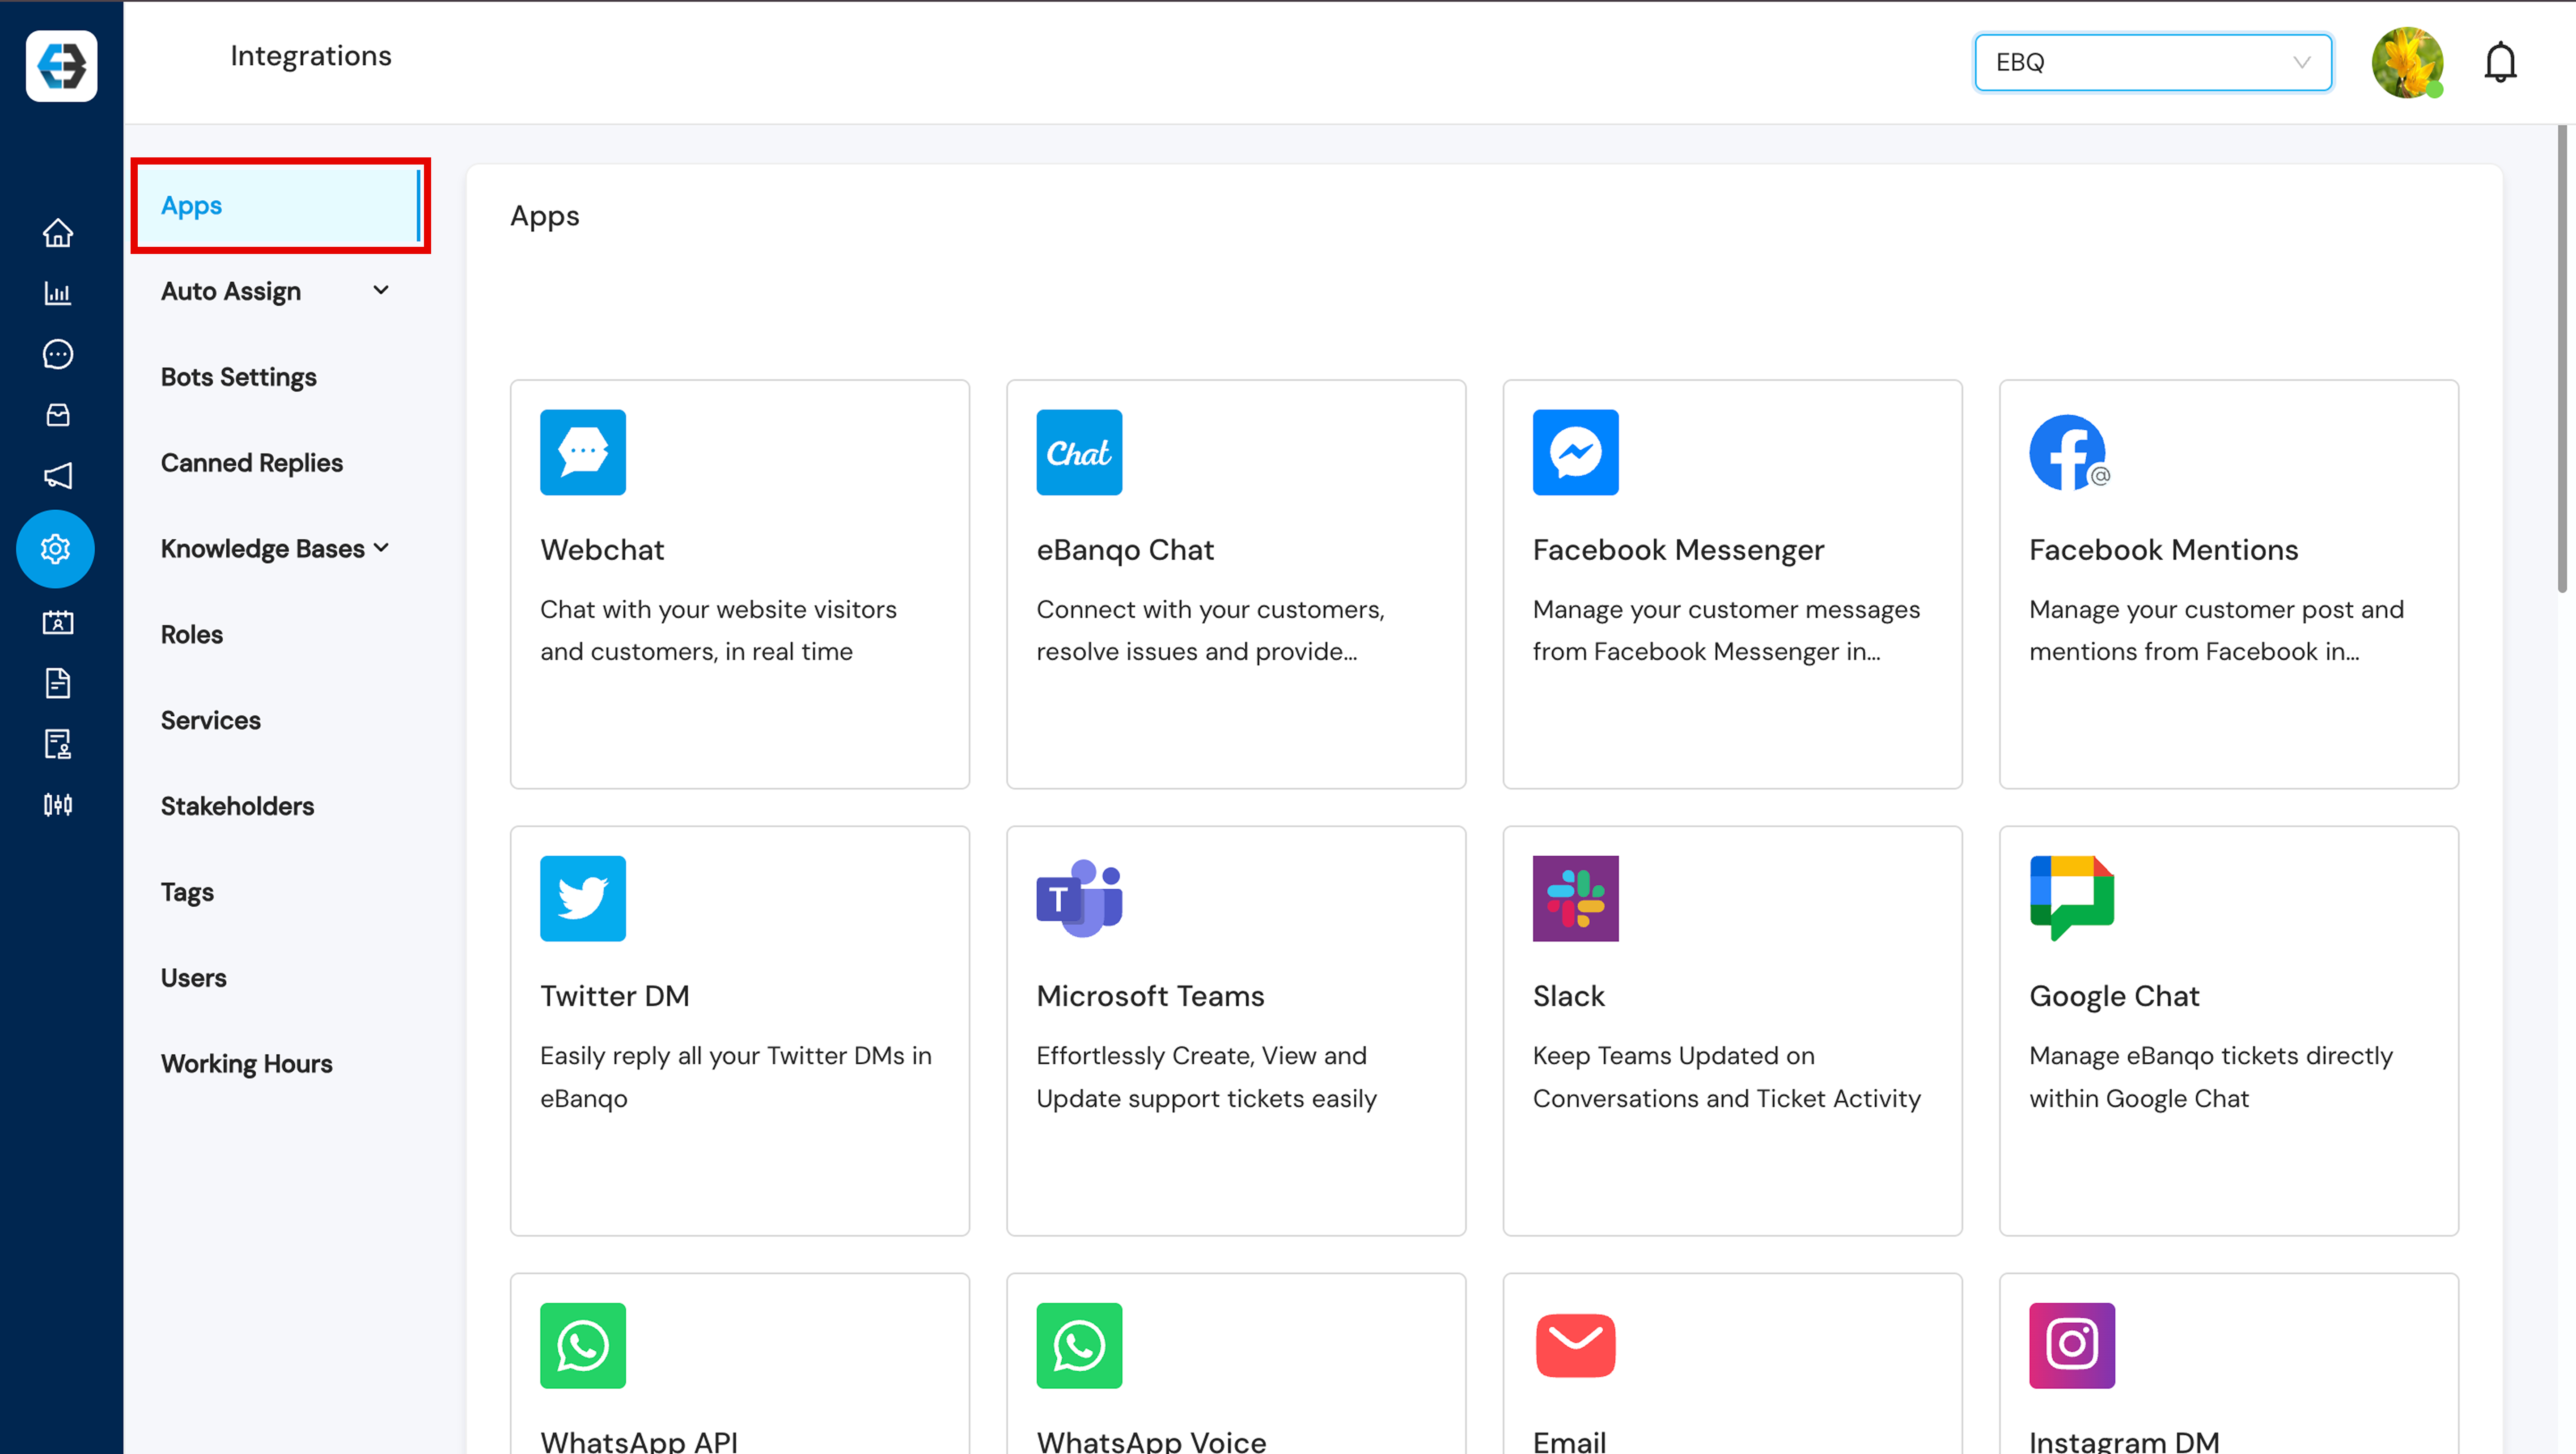
- Go to the Apps section in the sidebar
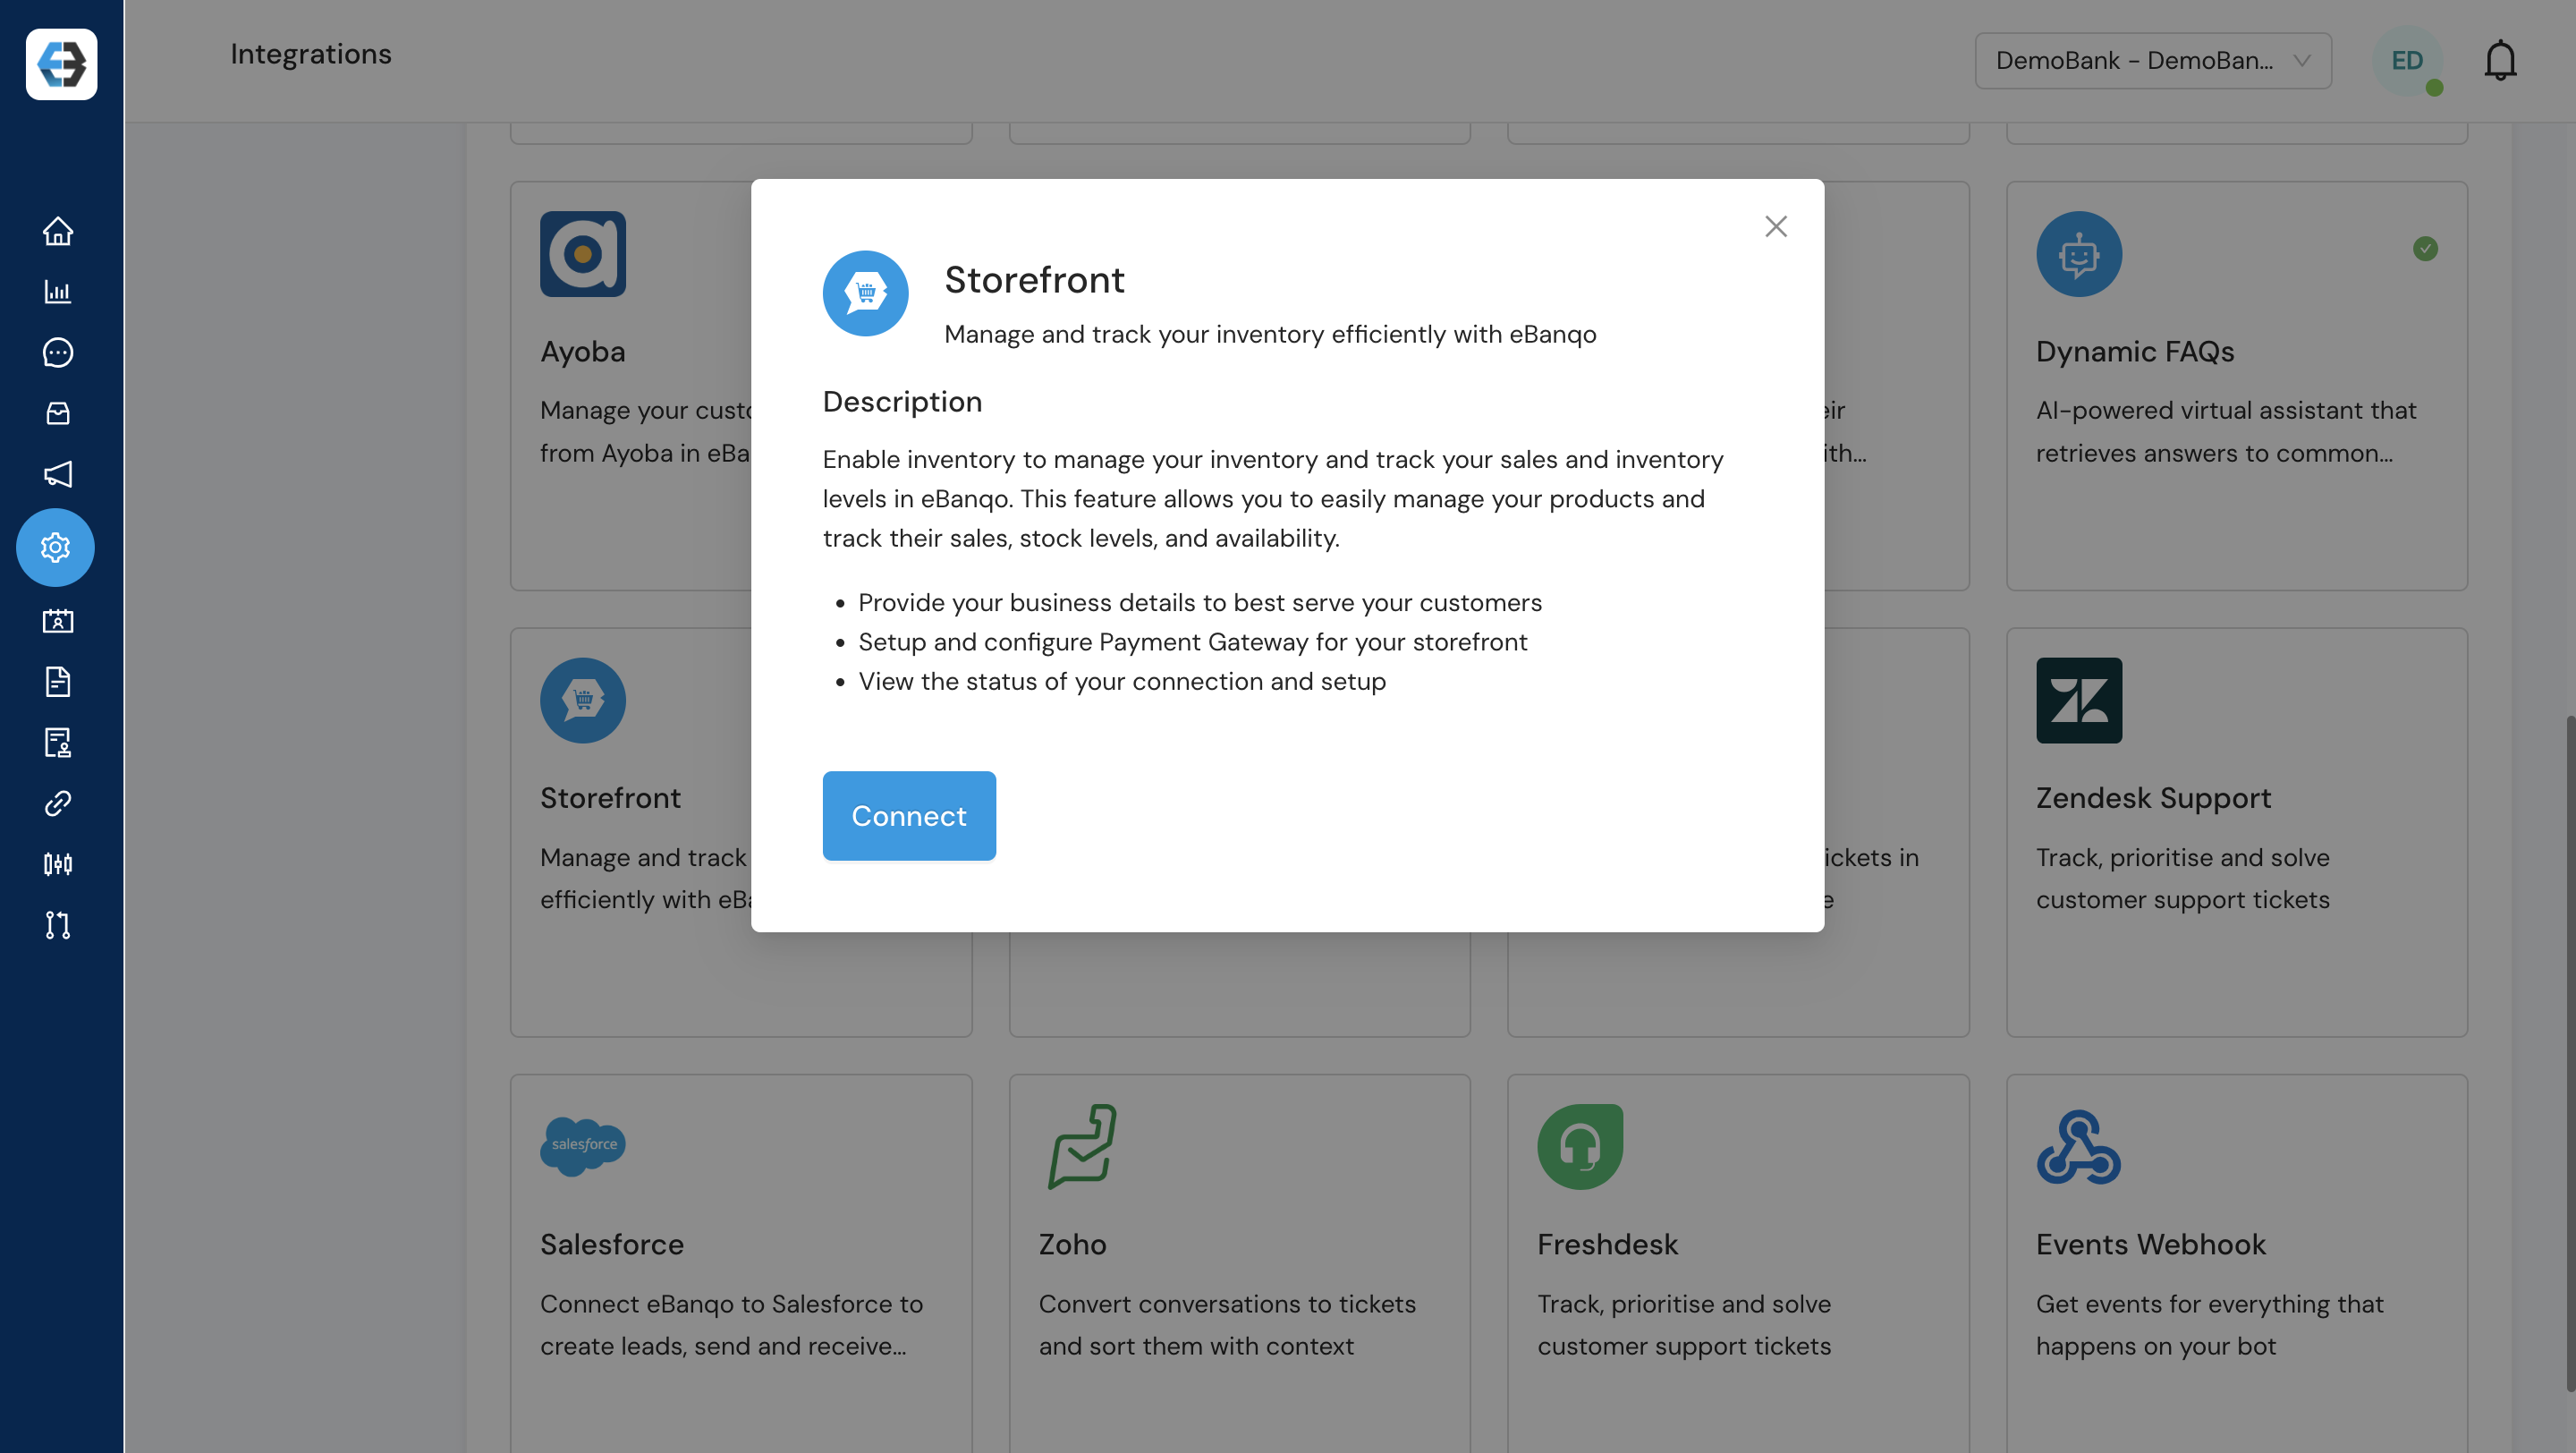
- Select Storefront and click on “Connect”
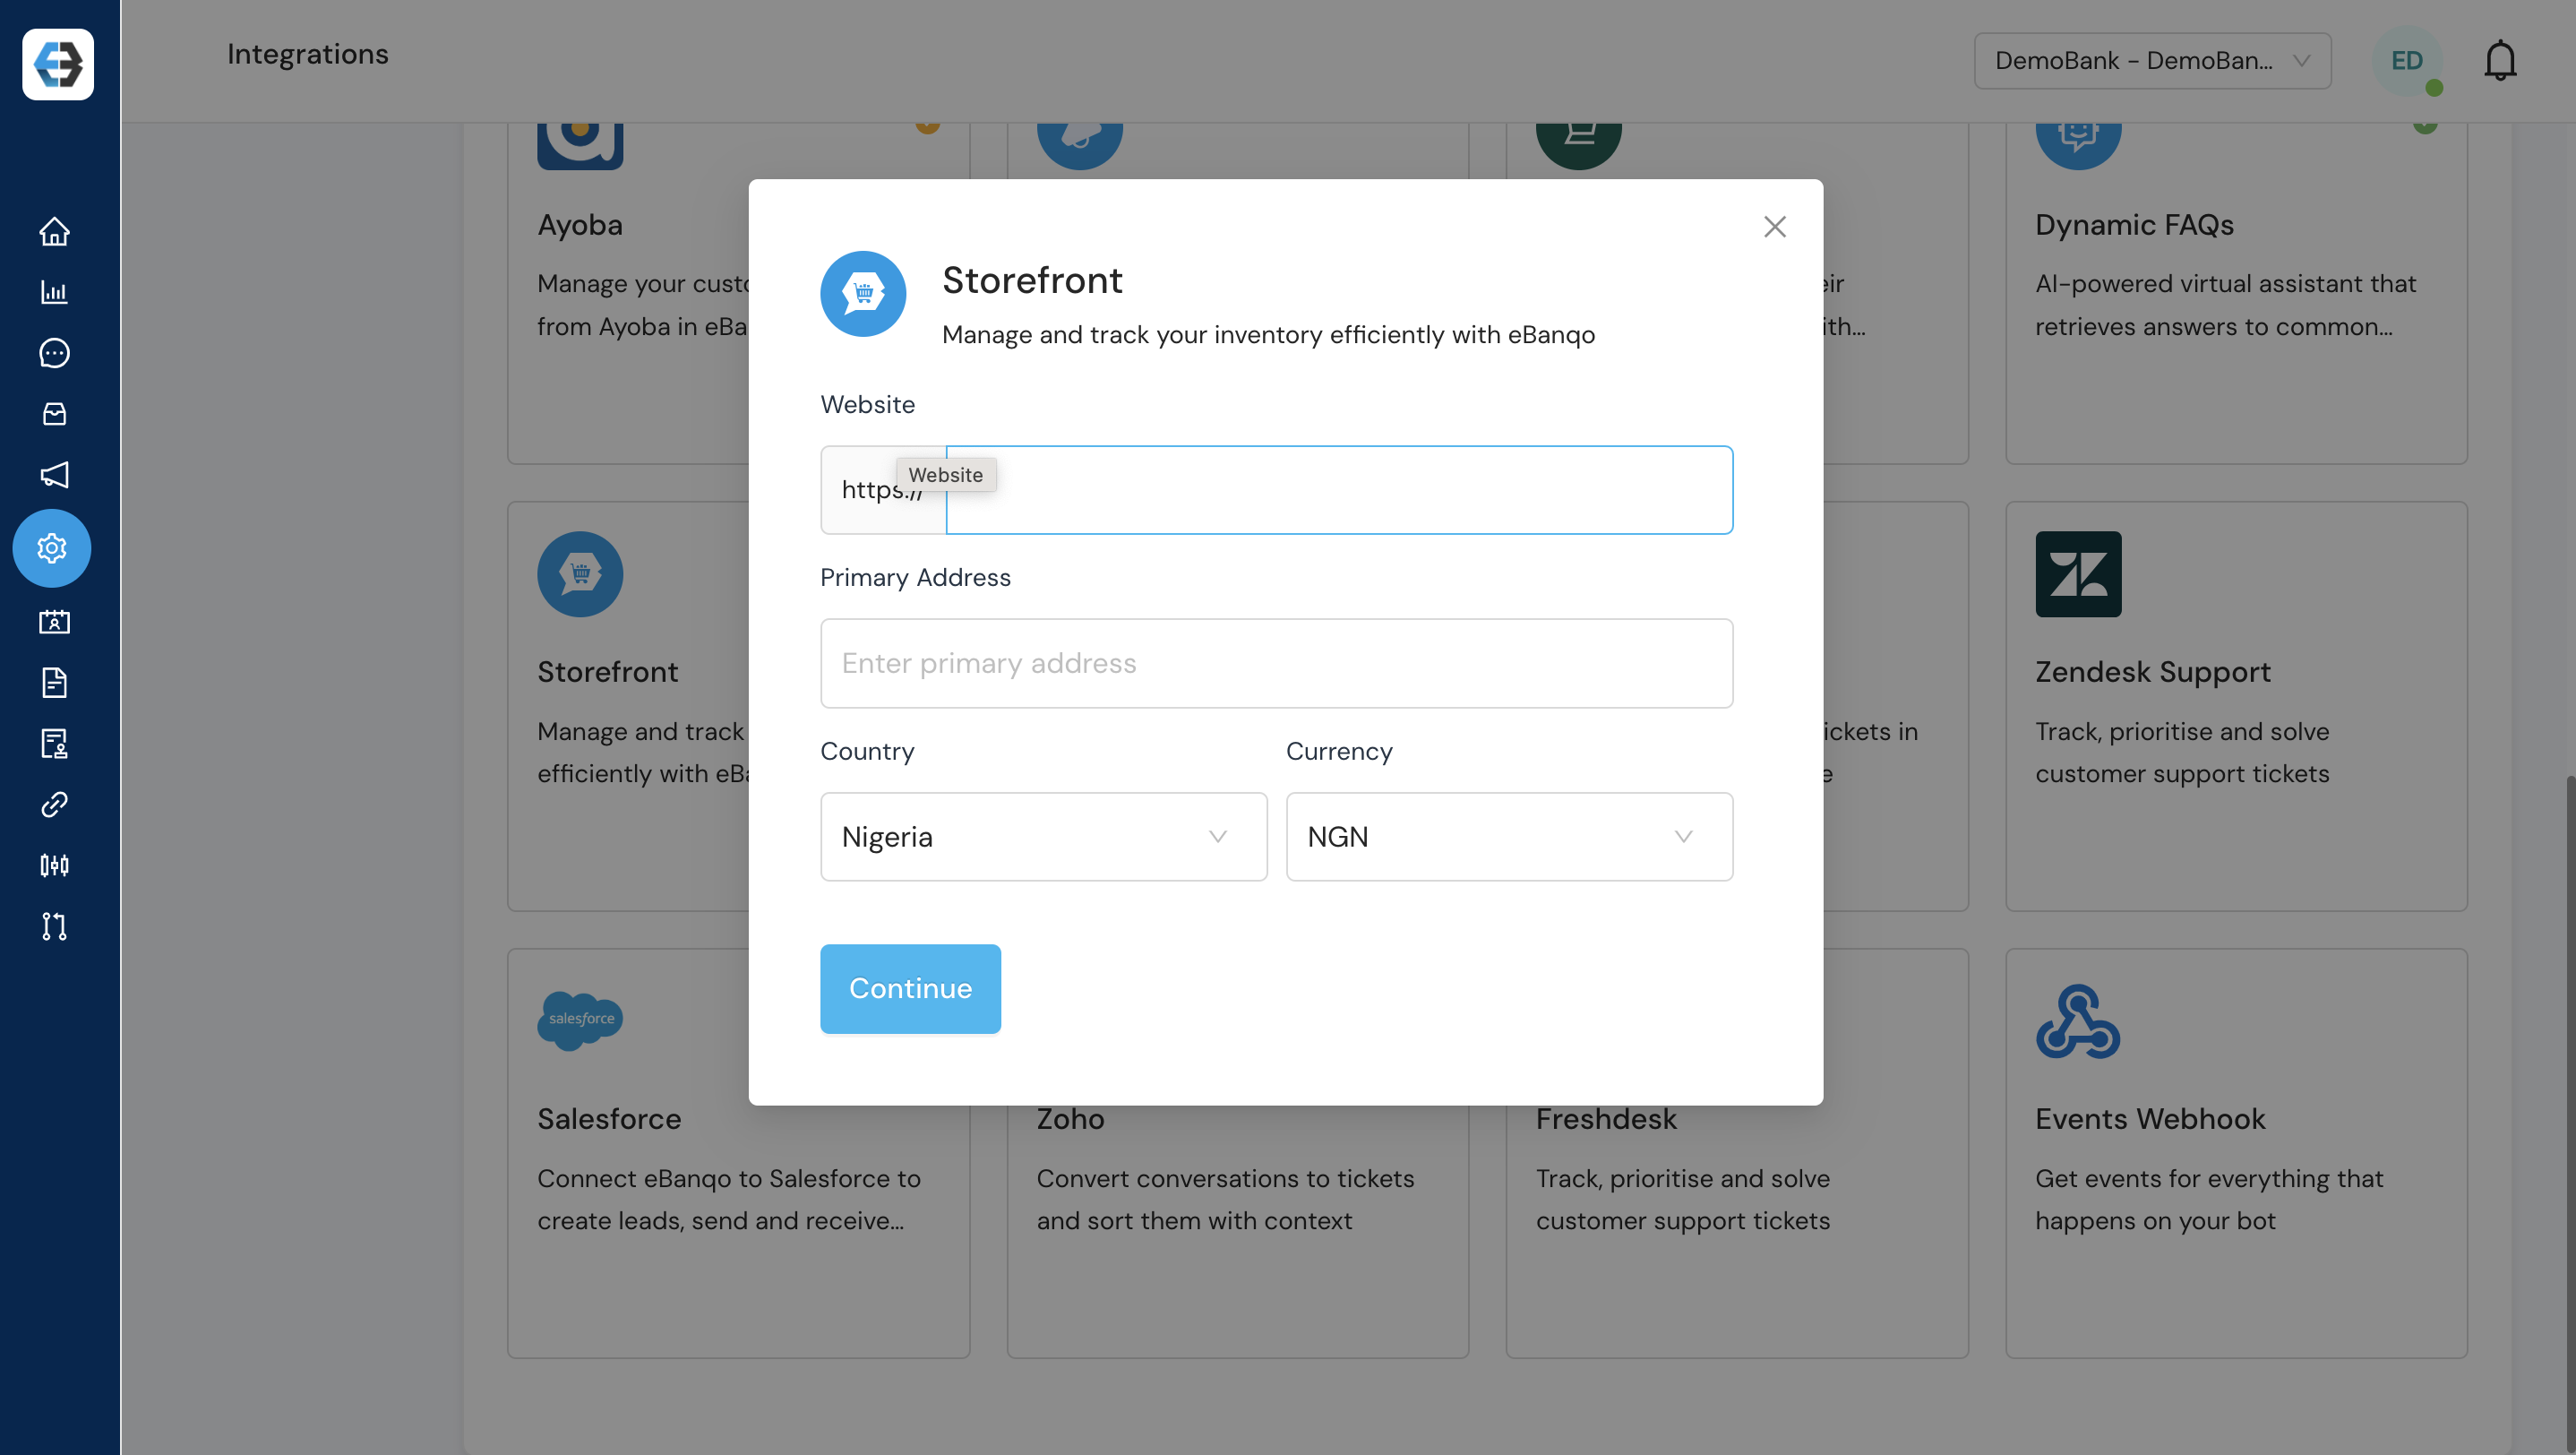
- Complete the basic setup by entering the details: Website, Primary Address, Country, and Currency.
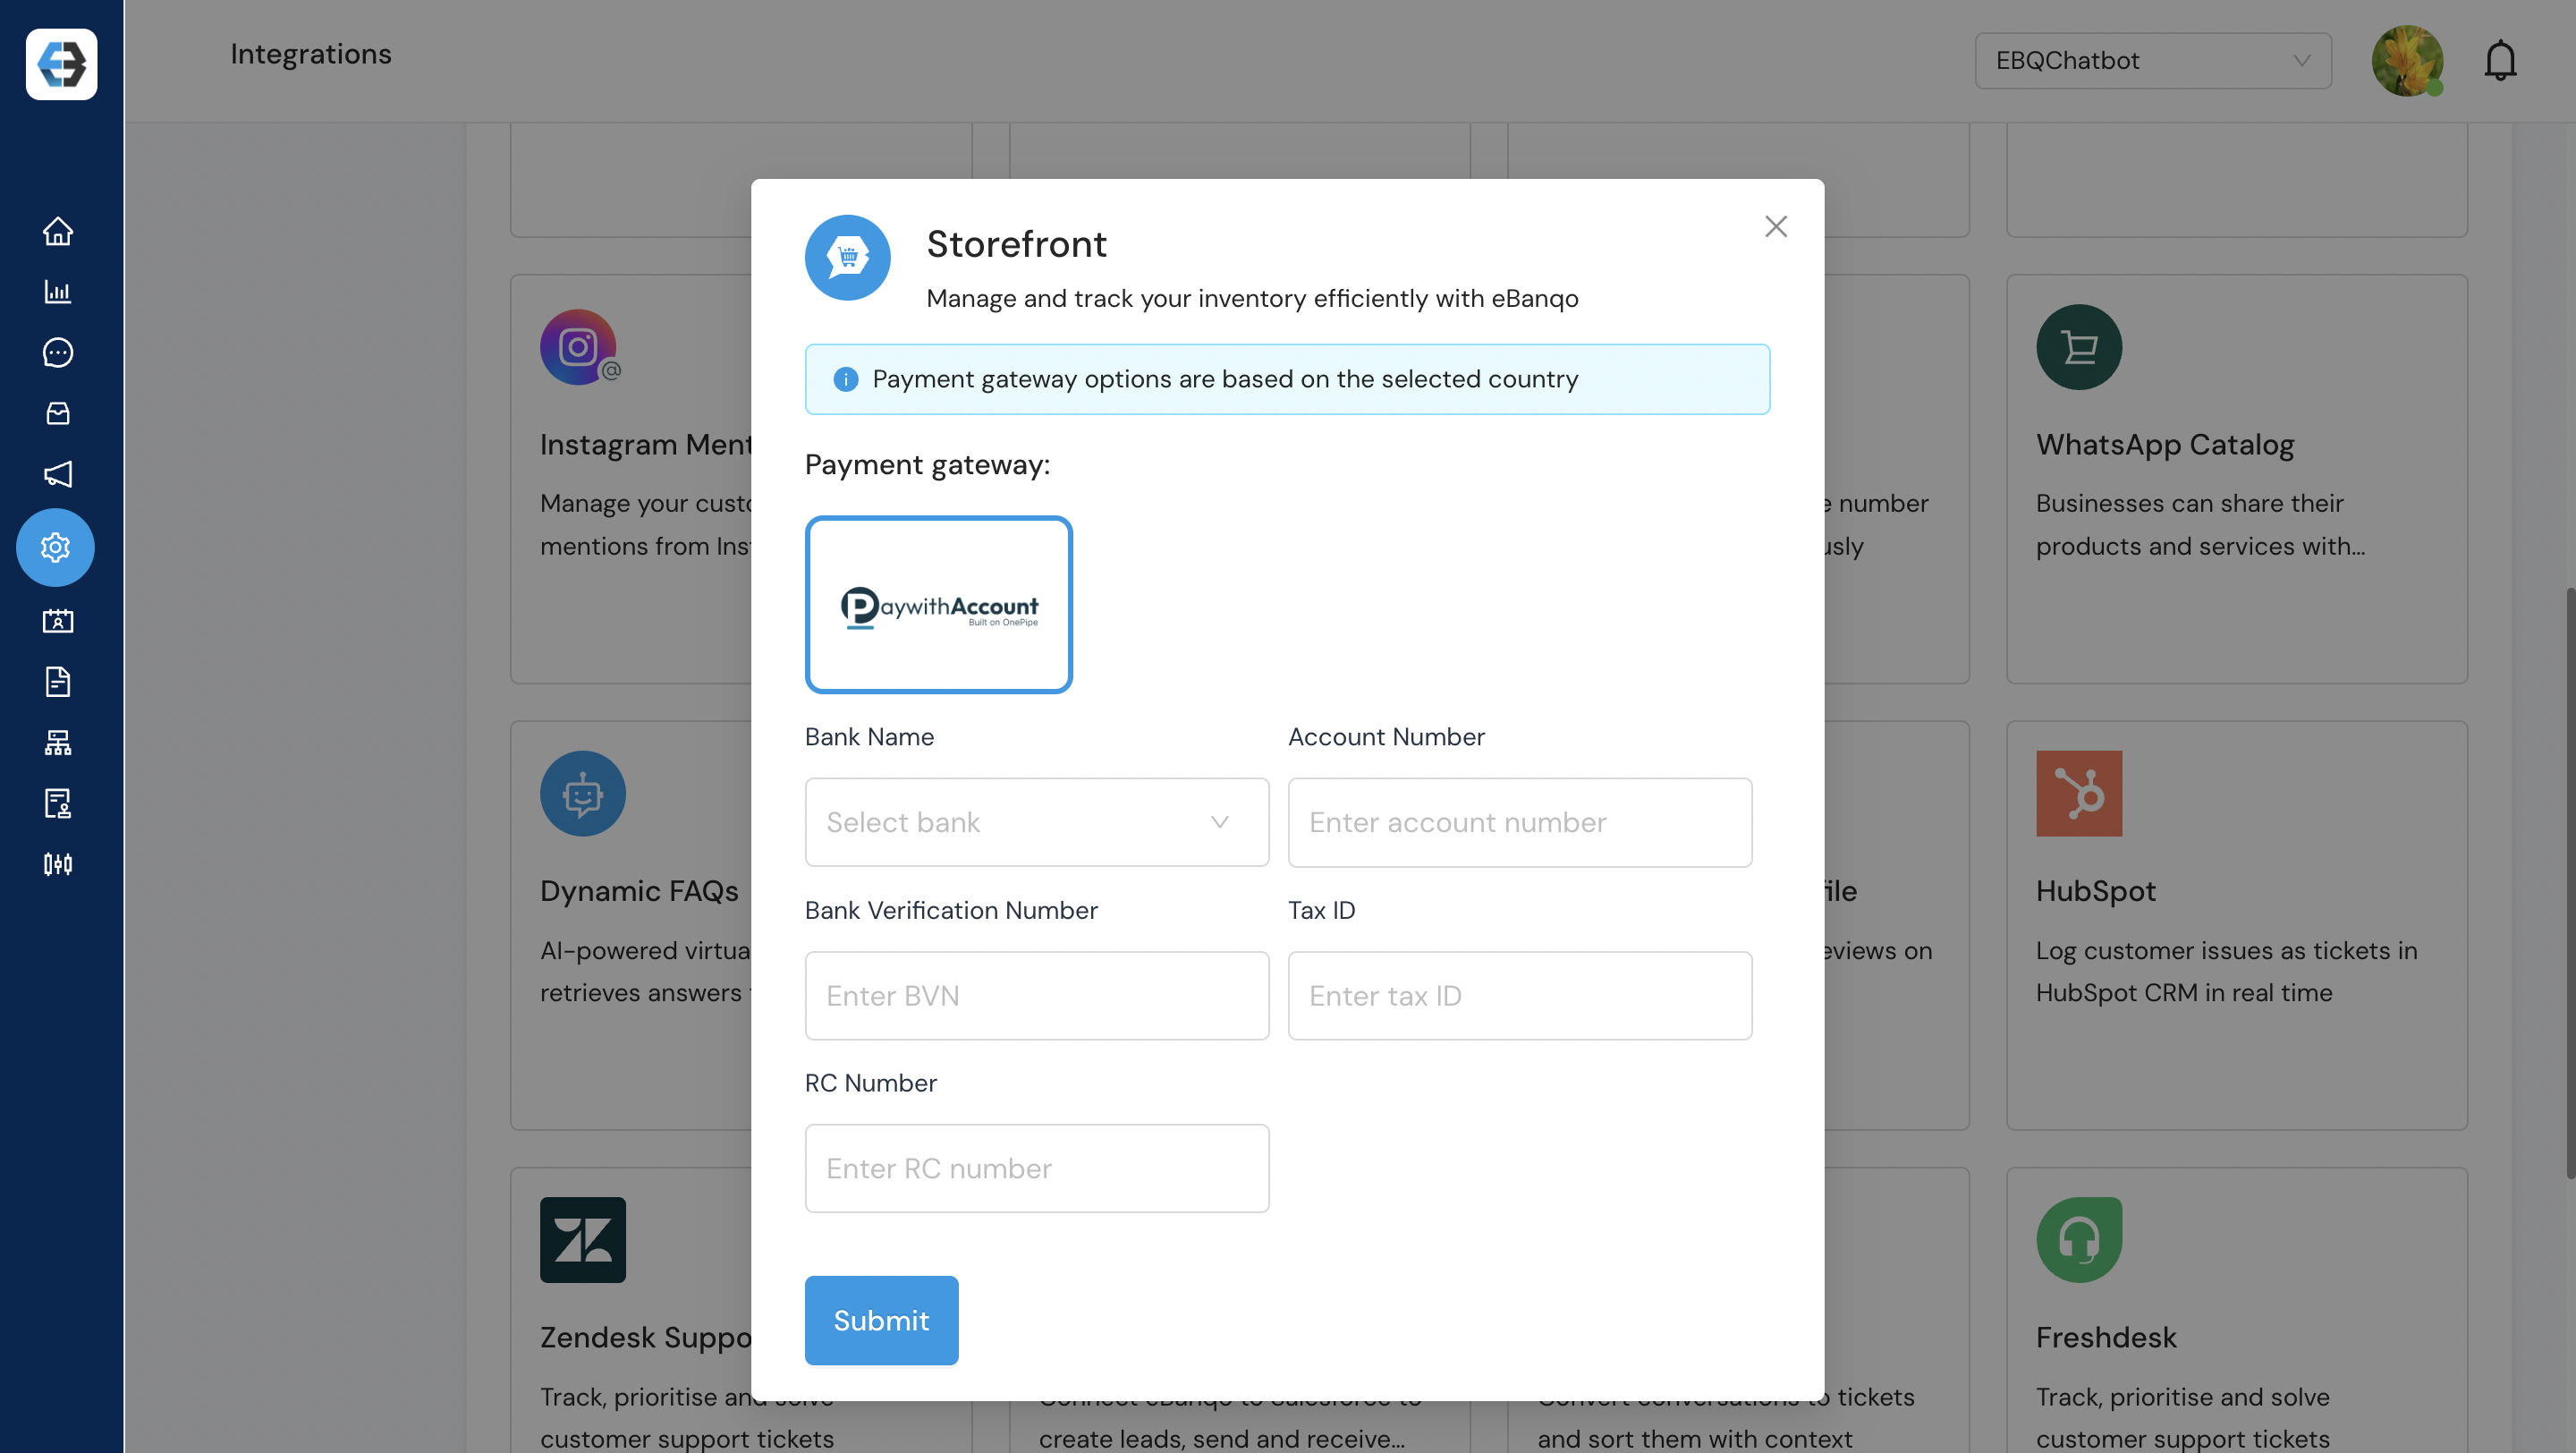
- Payment Account Connection: Complete Account Connection and click “Submit” to link your account successfully.
 Note: Once enabled, Storefront your Chat Bot is automatically activated.
Step 2: Build Your Product Catalog
2.1 Create a Collections Group to group similar products together
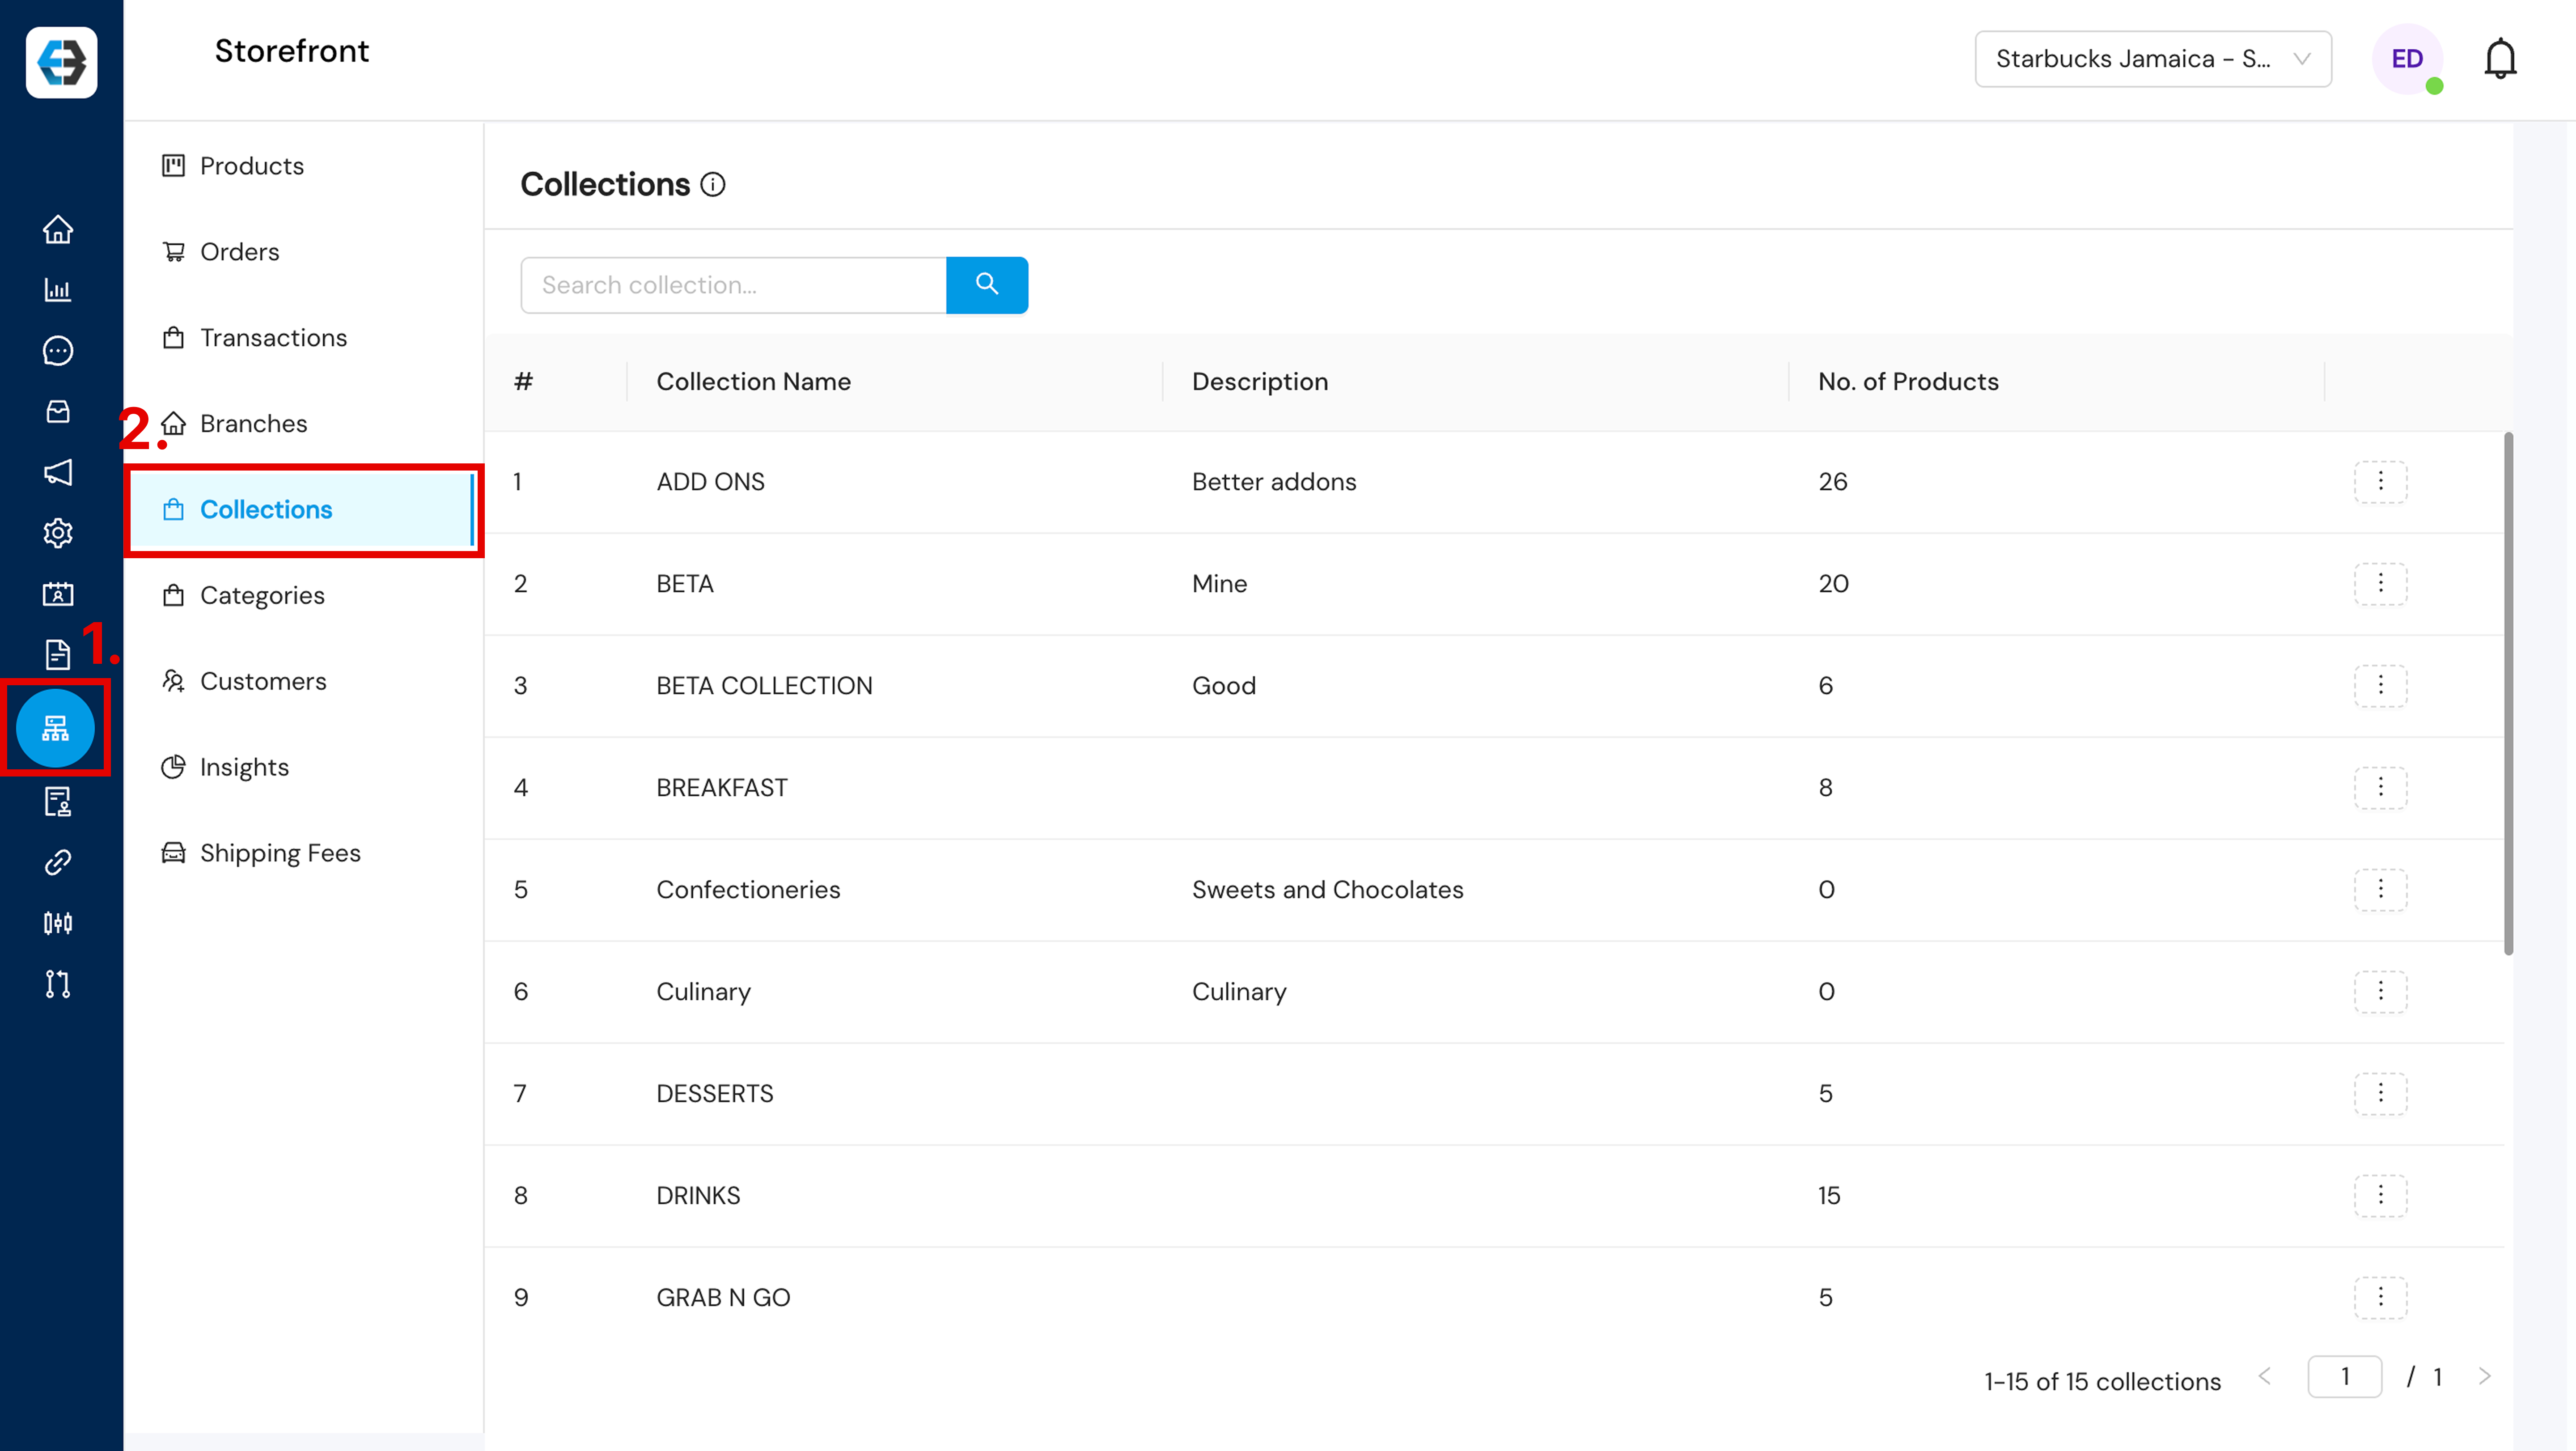
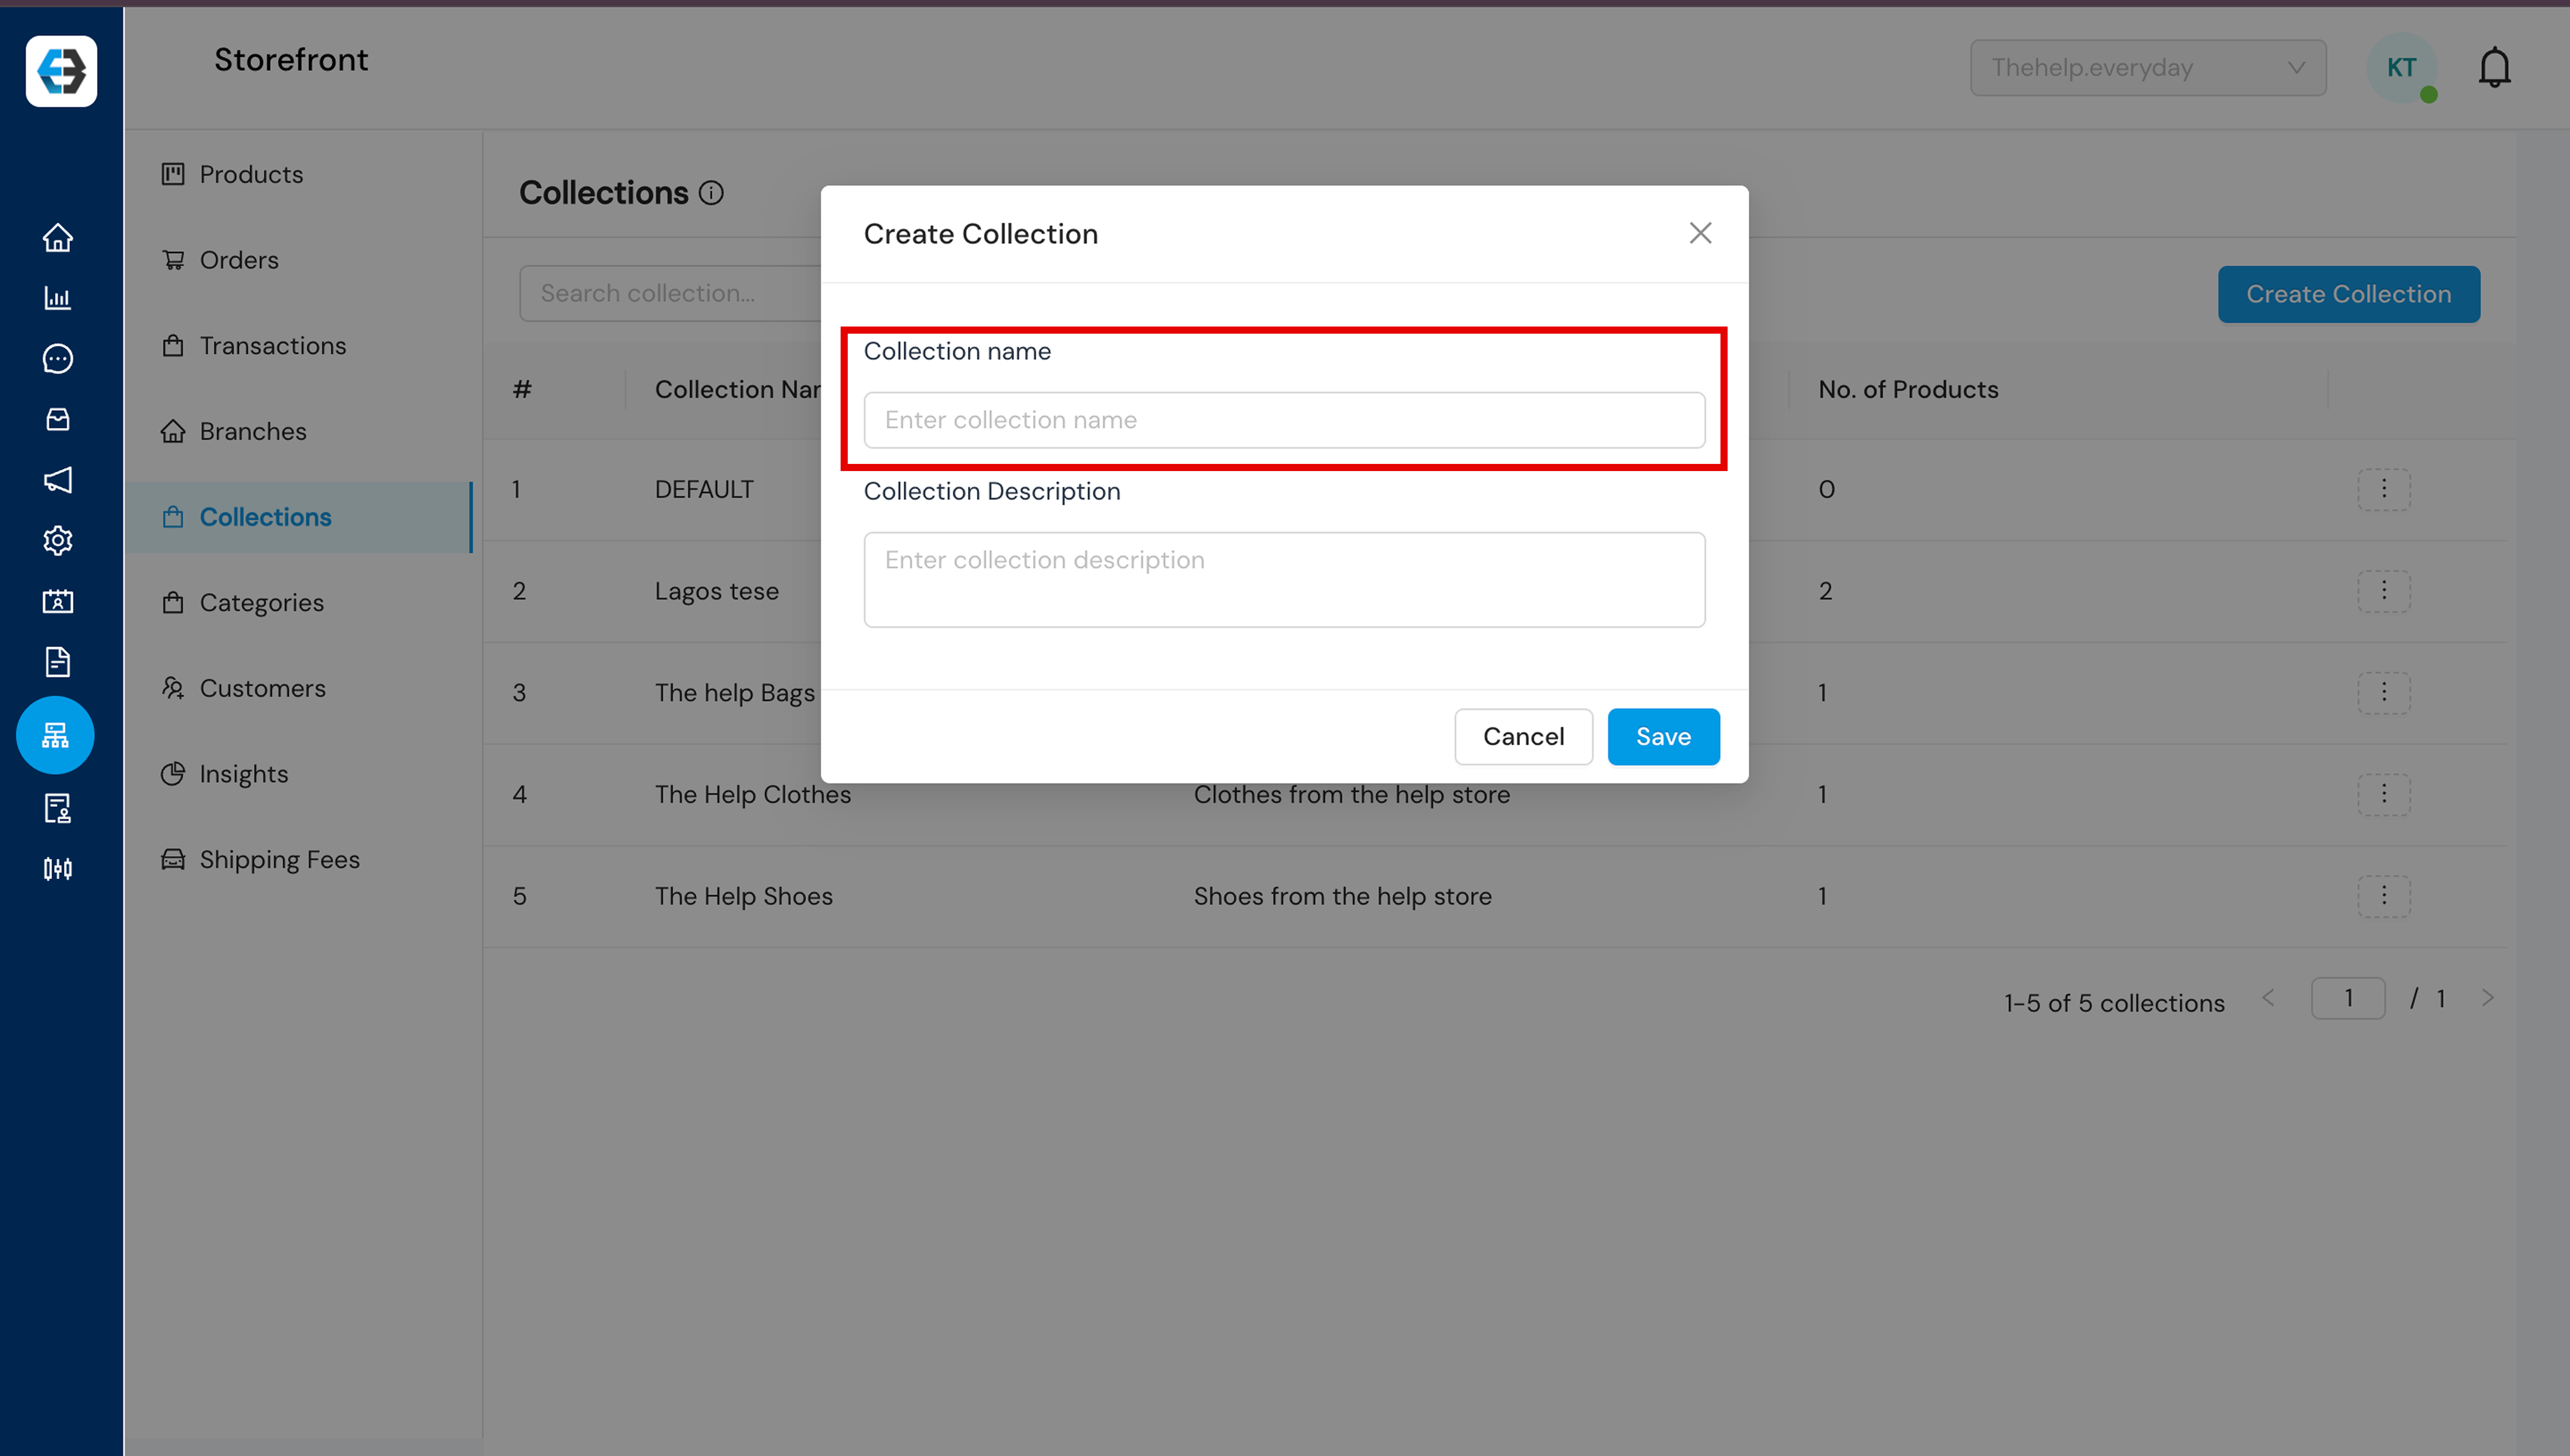
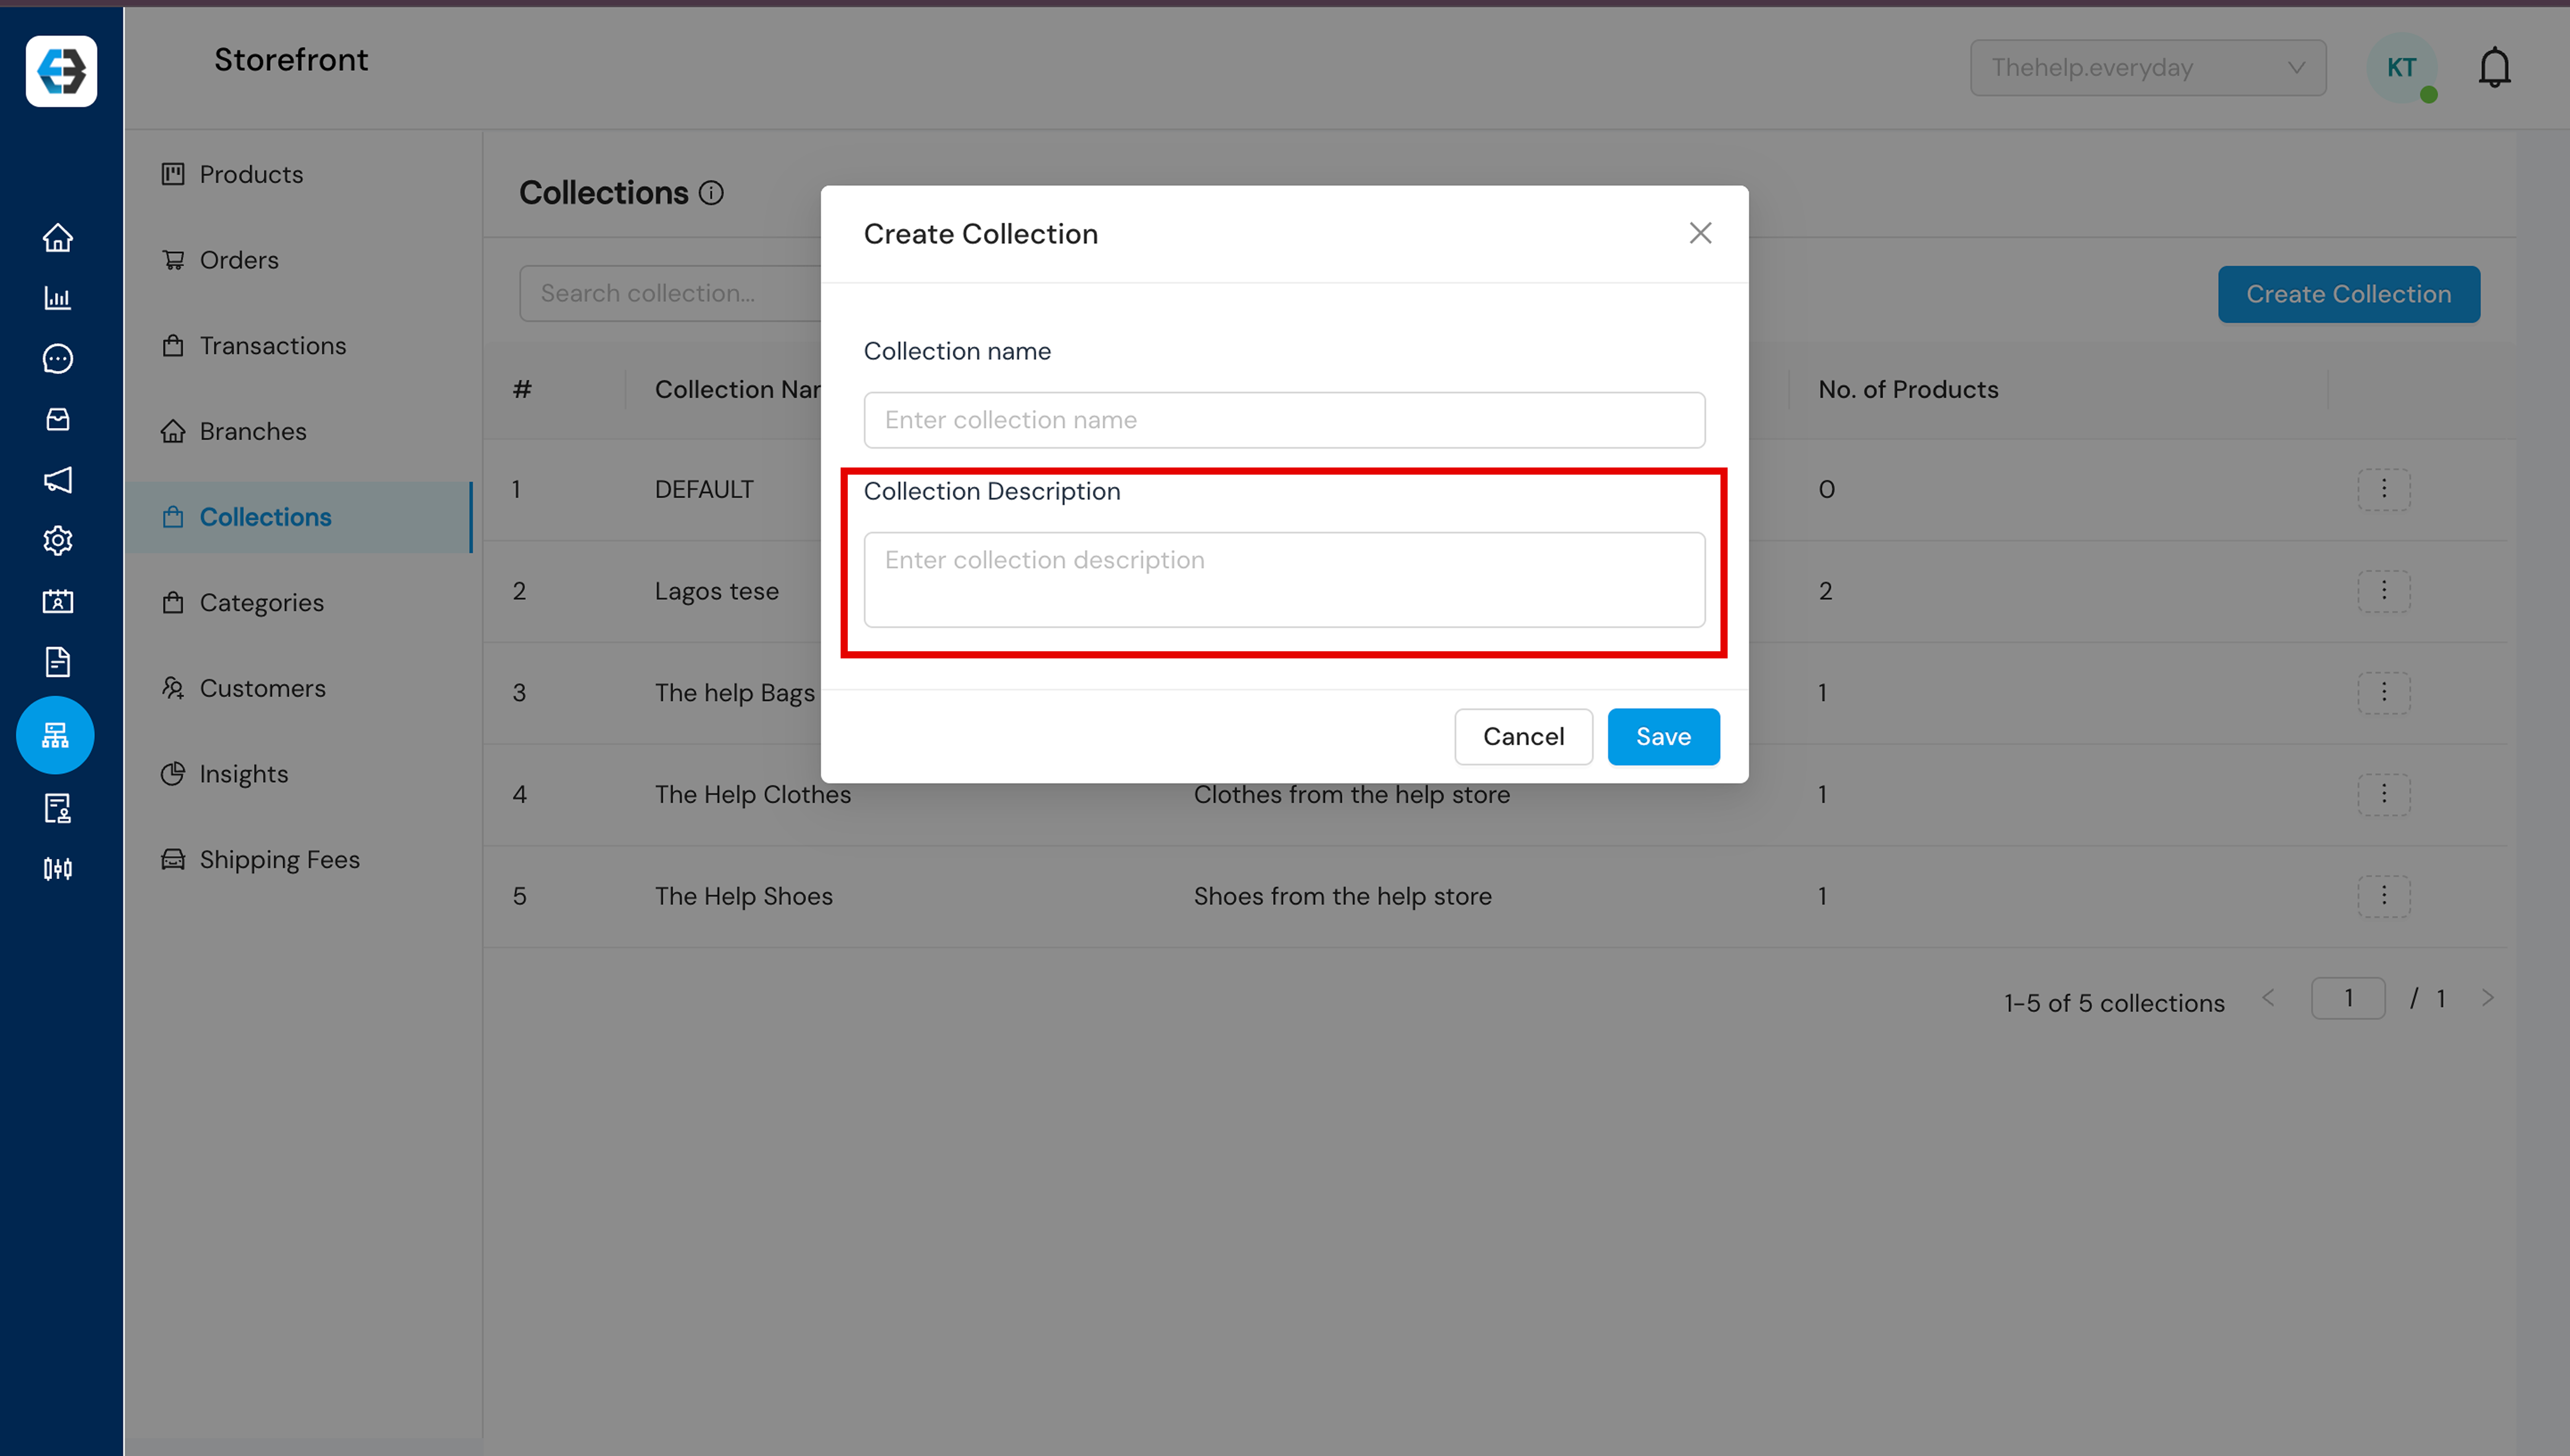
- Go to Storefront → Collections
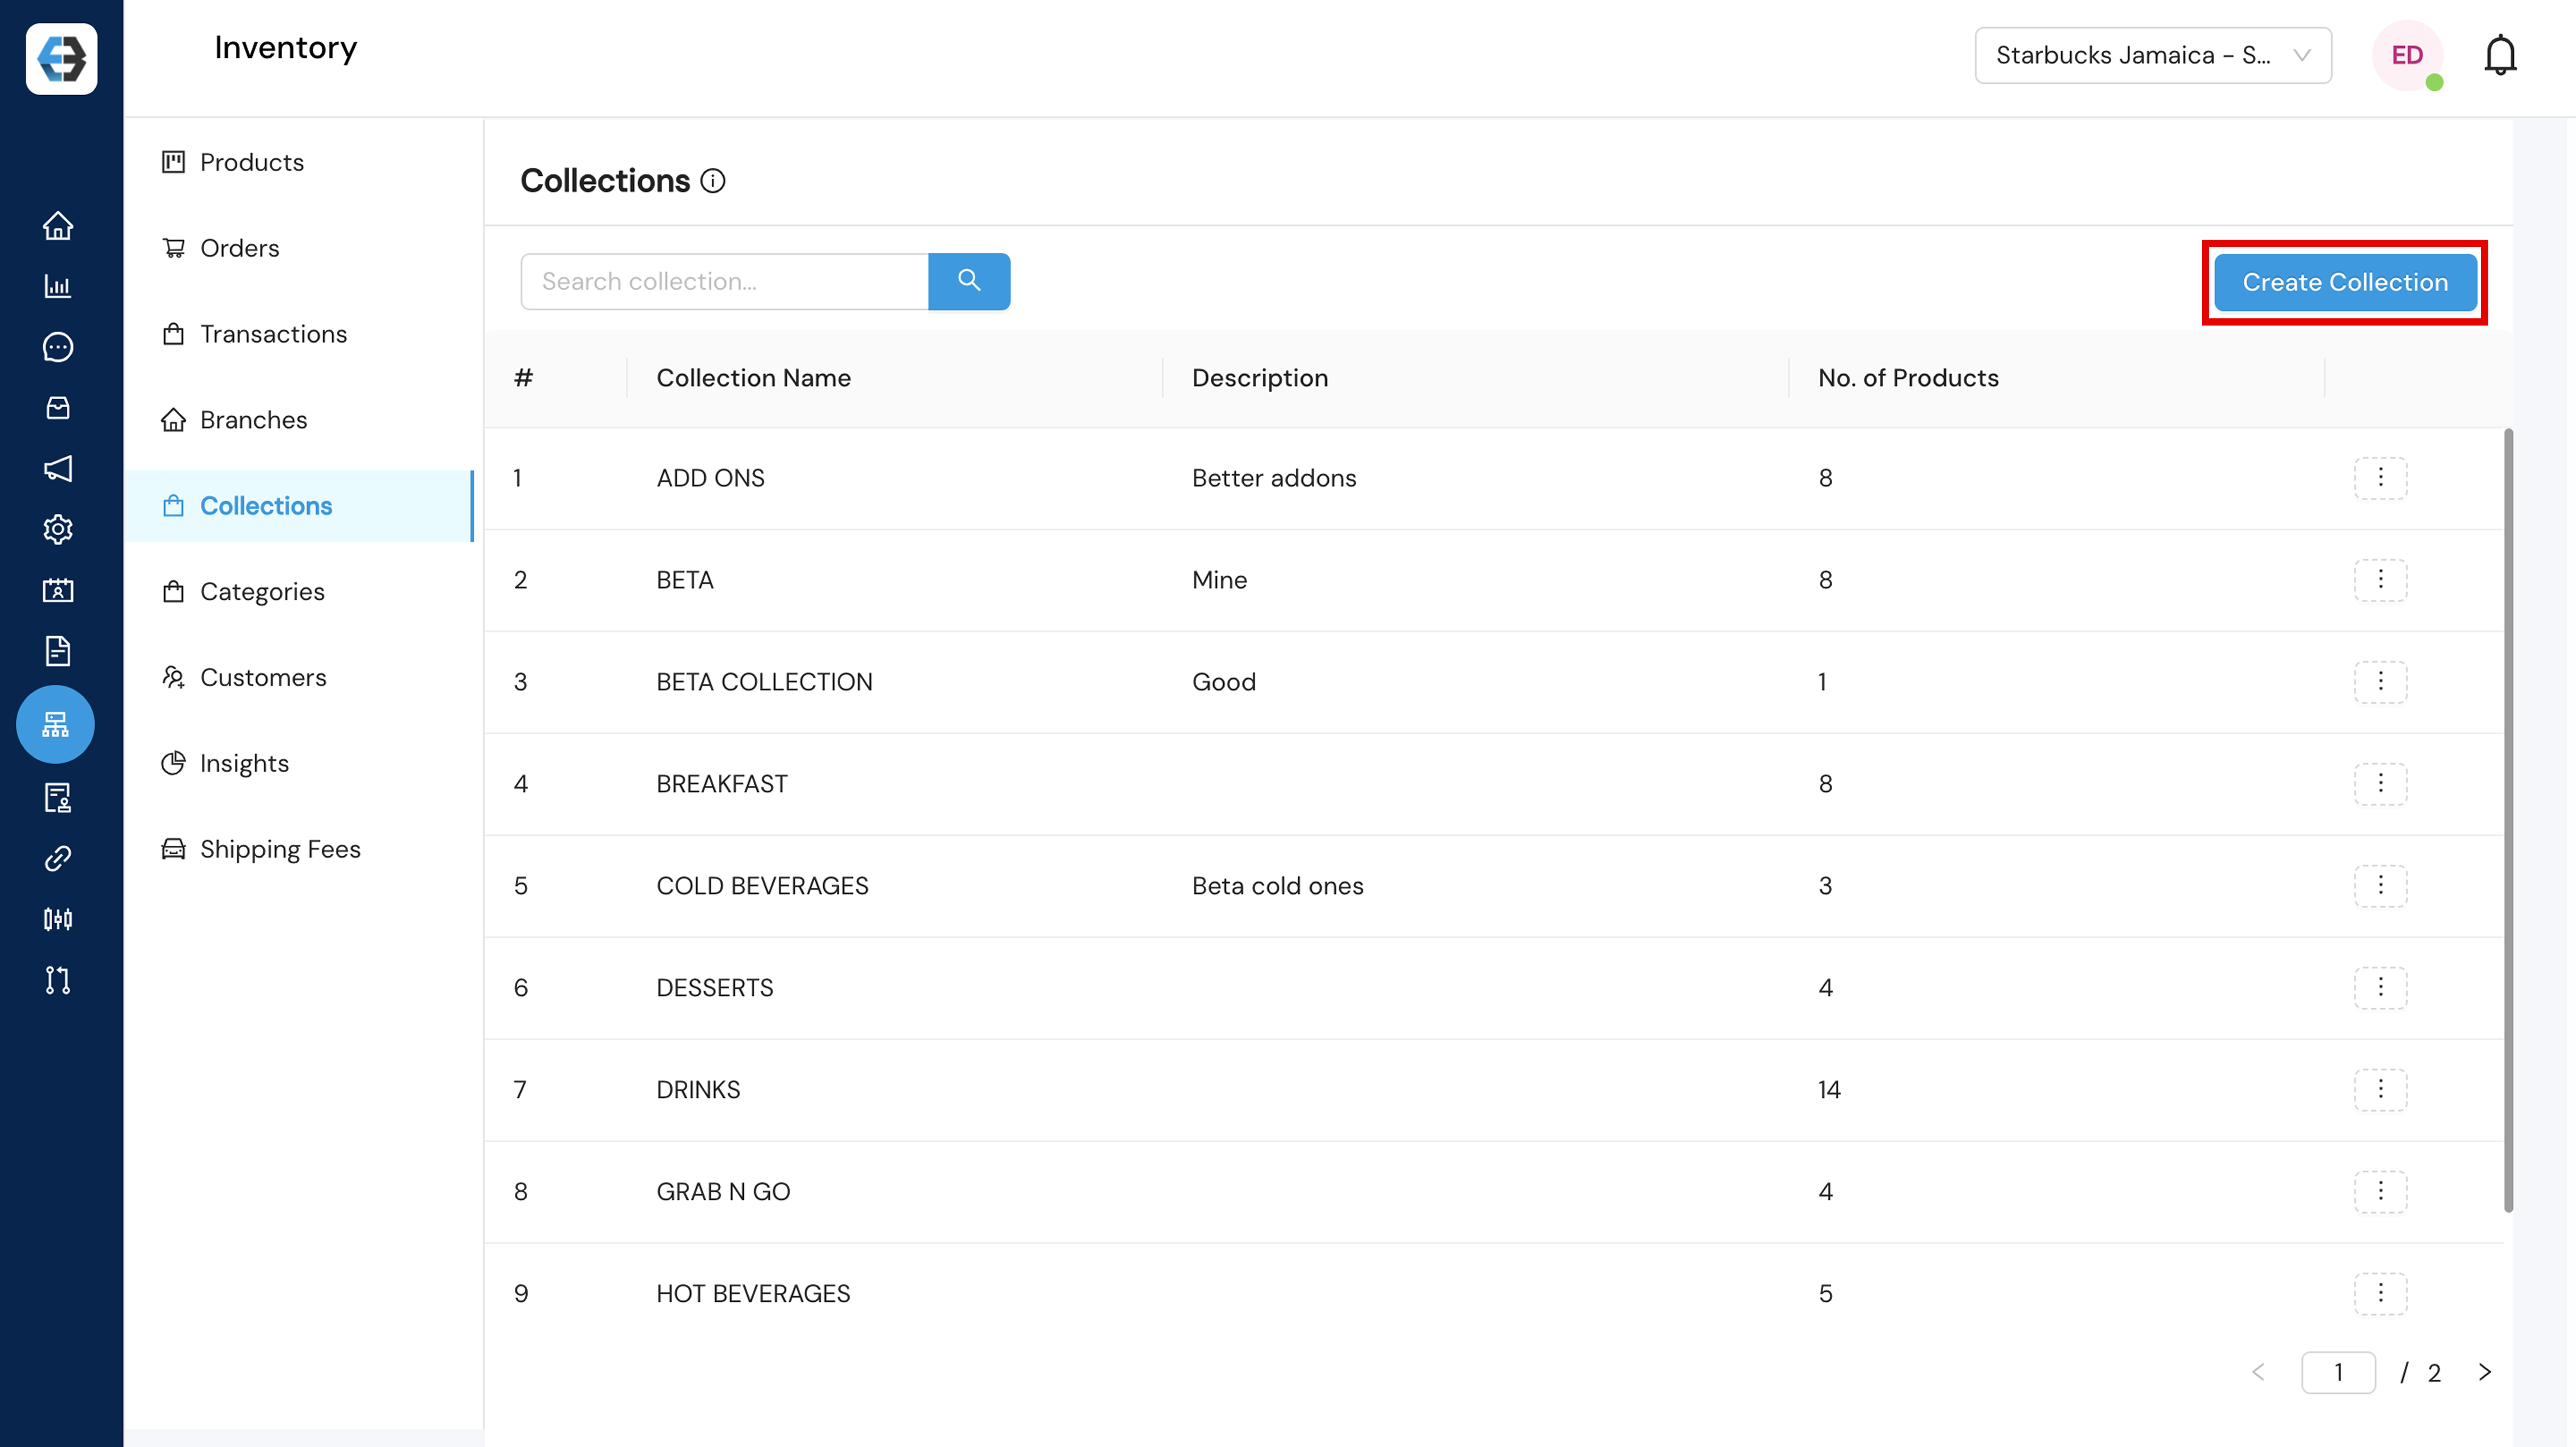
- Click “Create Collection” To create 1 or 2 main categories
- Enter “Collection Name”: Name your collections (e.g., “Electronics”, “Clothing”, “Accessories”)
- Enter “Collection Description” and click save.
2.2 Add Products
Create as many products as you like. Add images, descriptions, prices, etc.
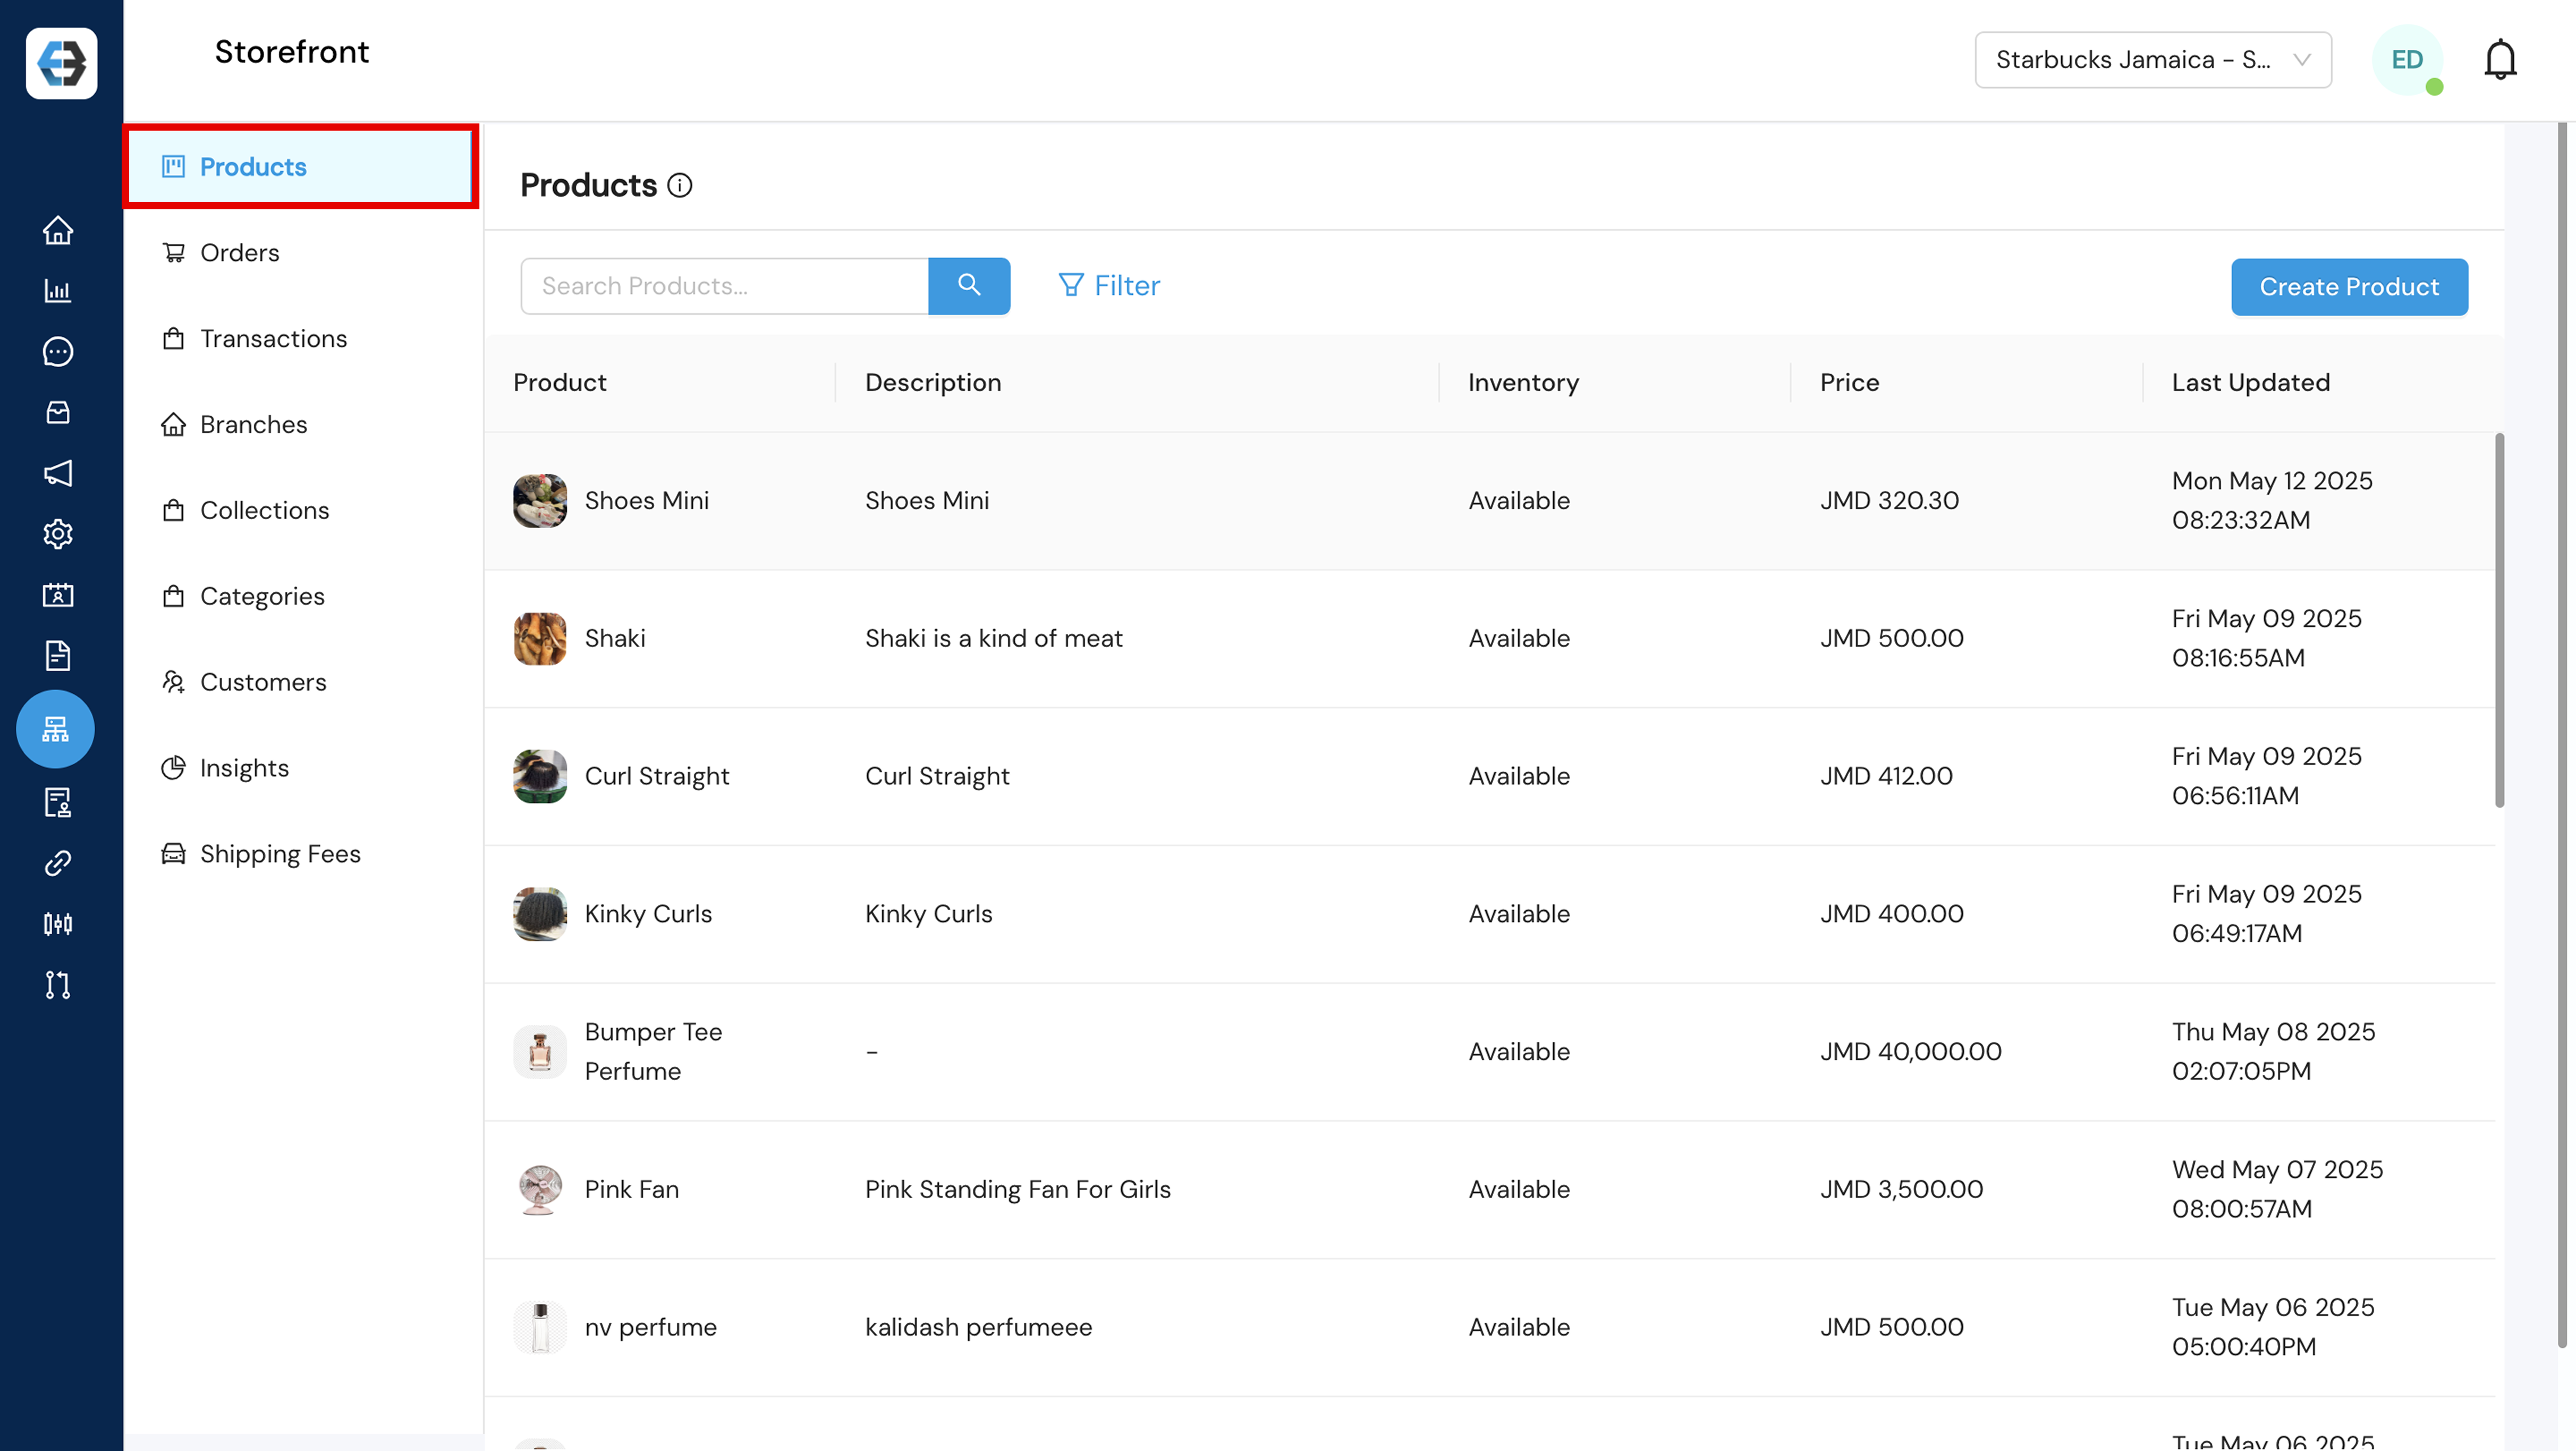
- Navigate to Storefront → Products
- Click “Product”
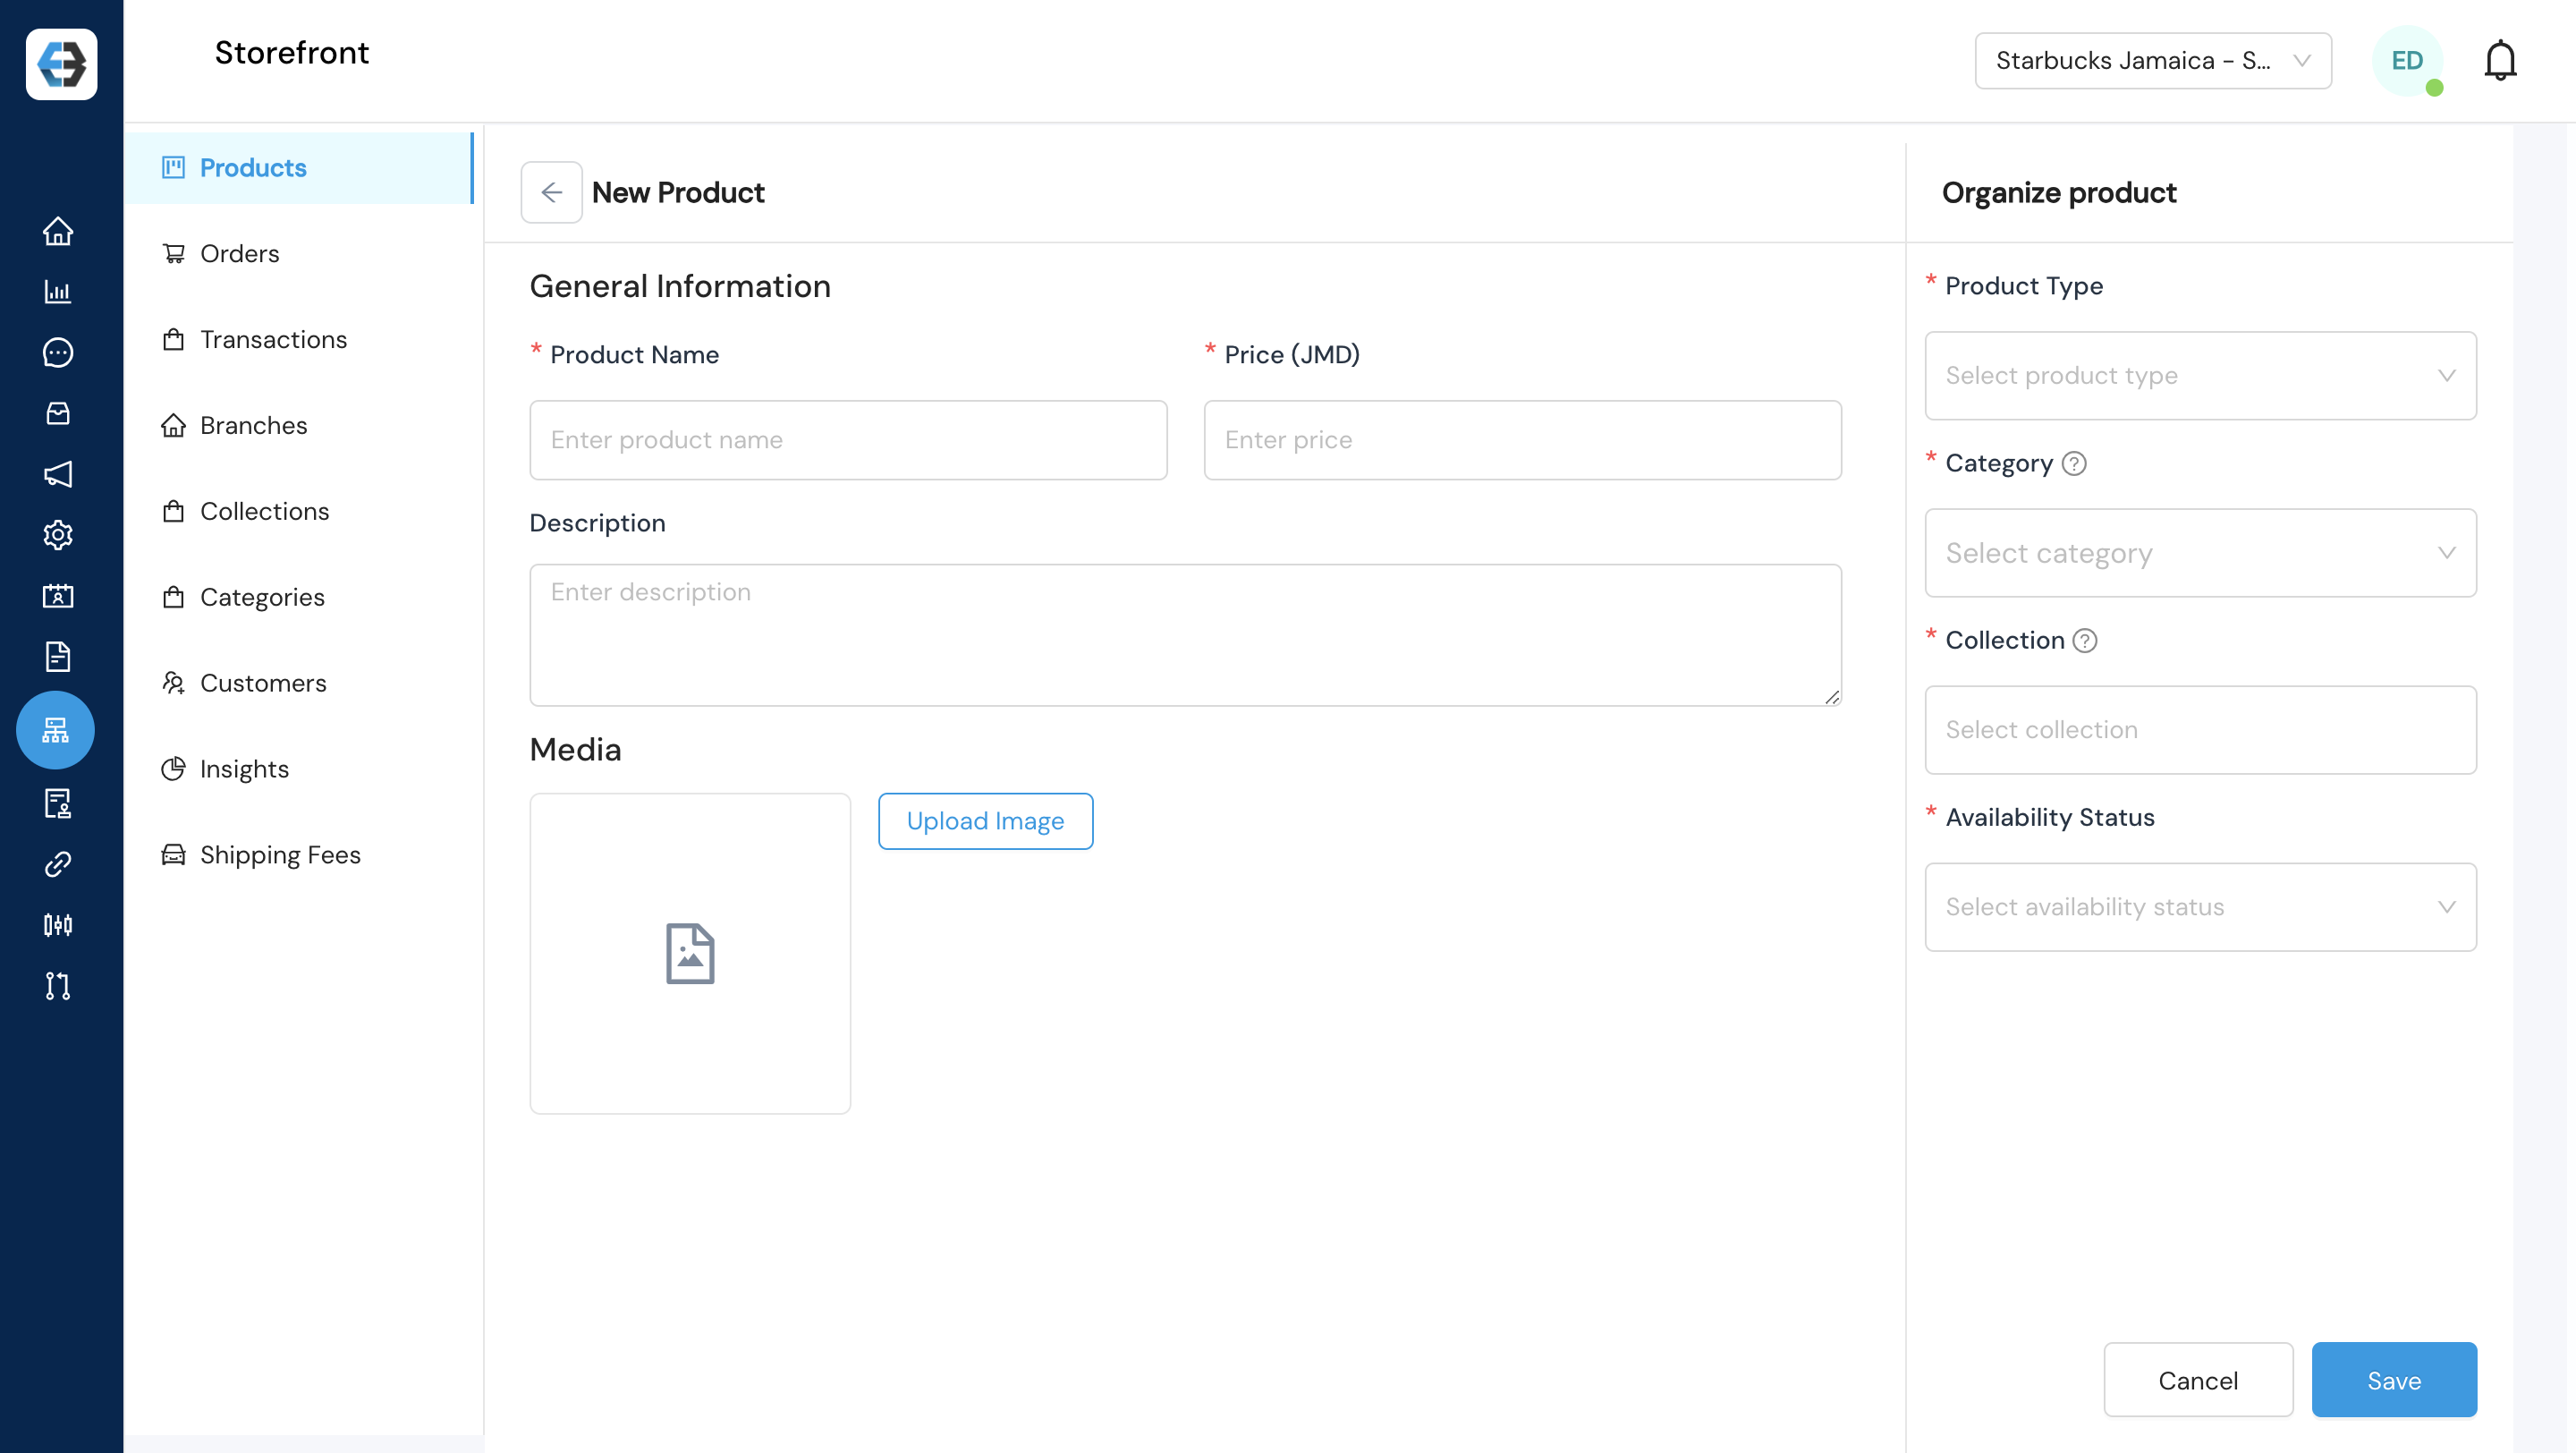
- For each product, provide:
- Product name and description
- Media-high-quality images
- Price
- Enter category
- Assign to the appropriate collection
- Availability Status
- Repeat for all your products
2.3 Set Up Pickup Locations (Branches)
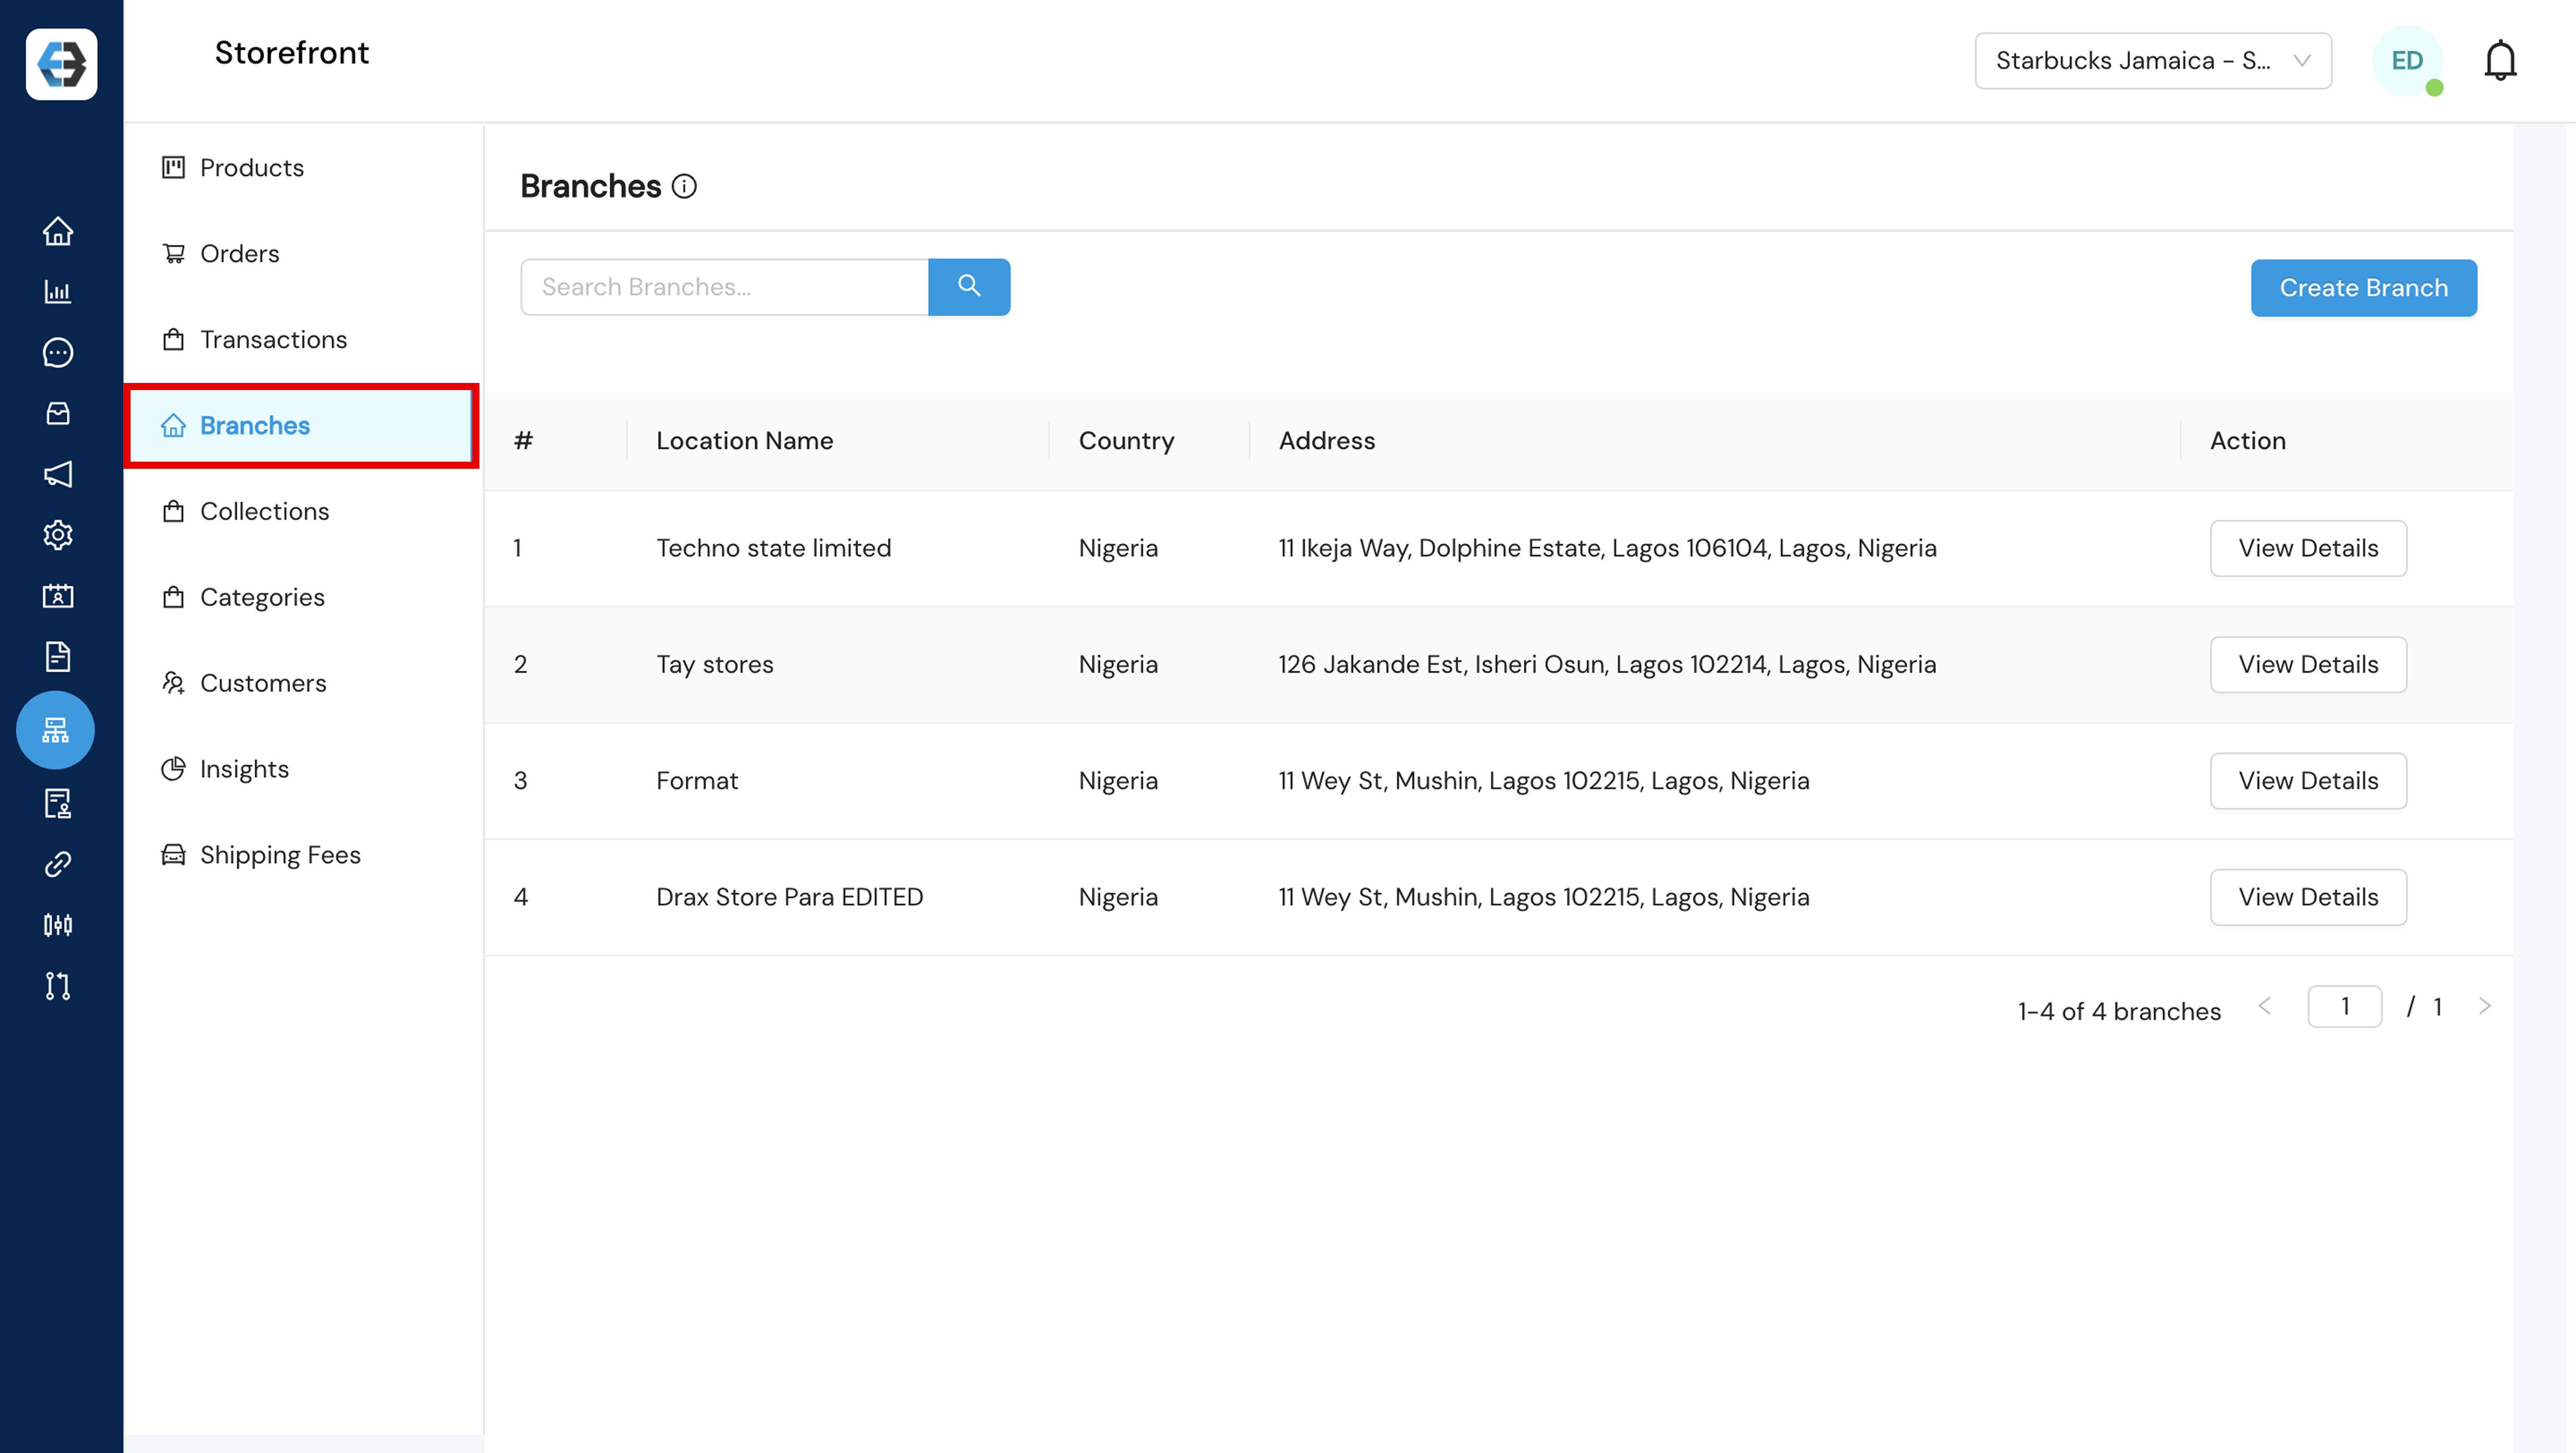
- Go to Storefront → Branches
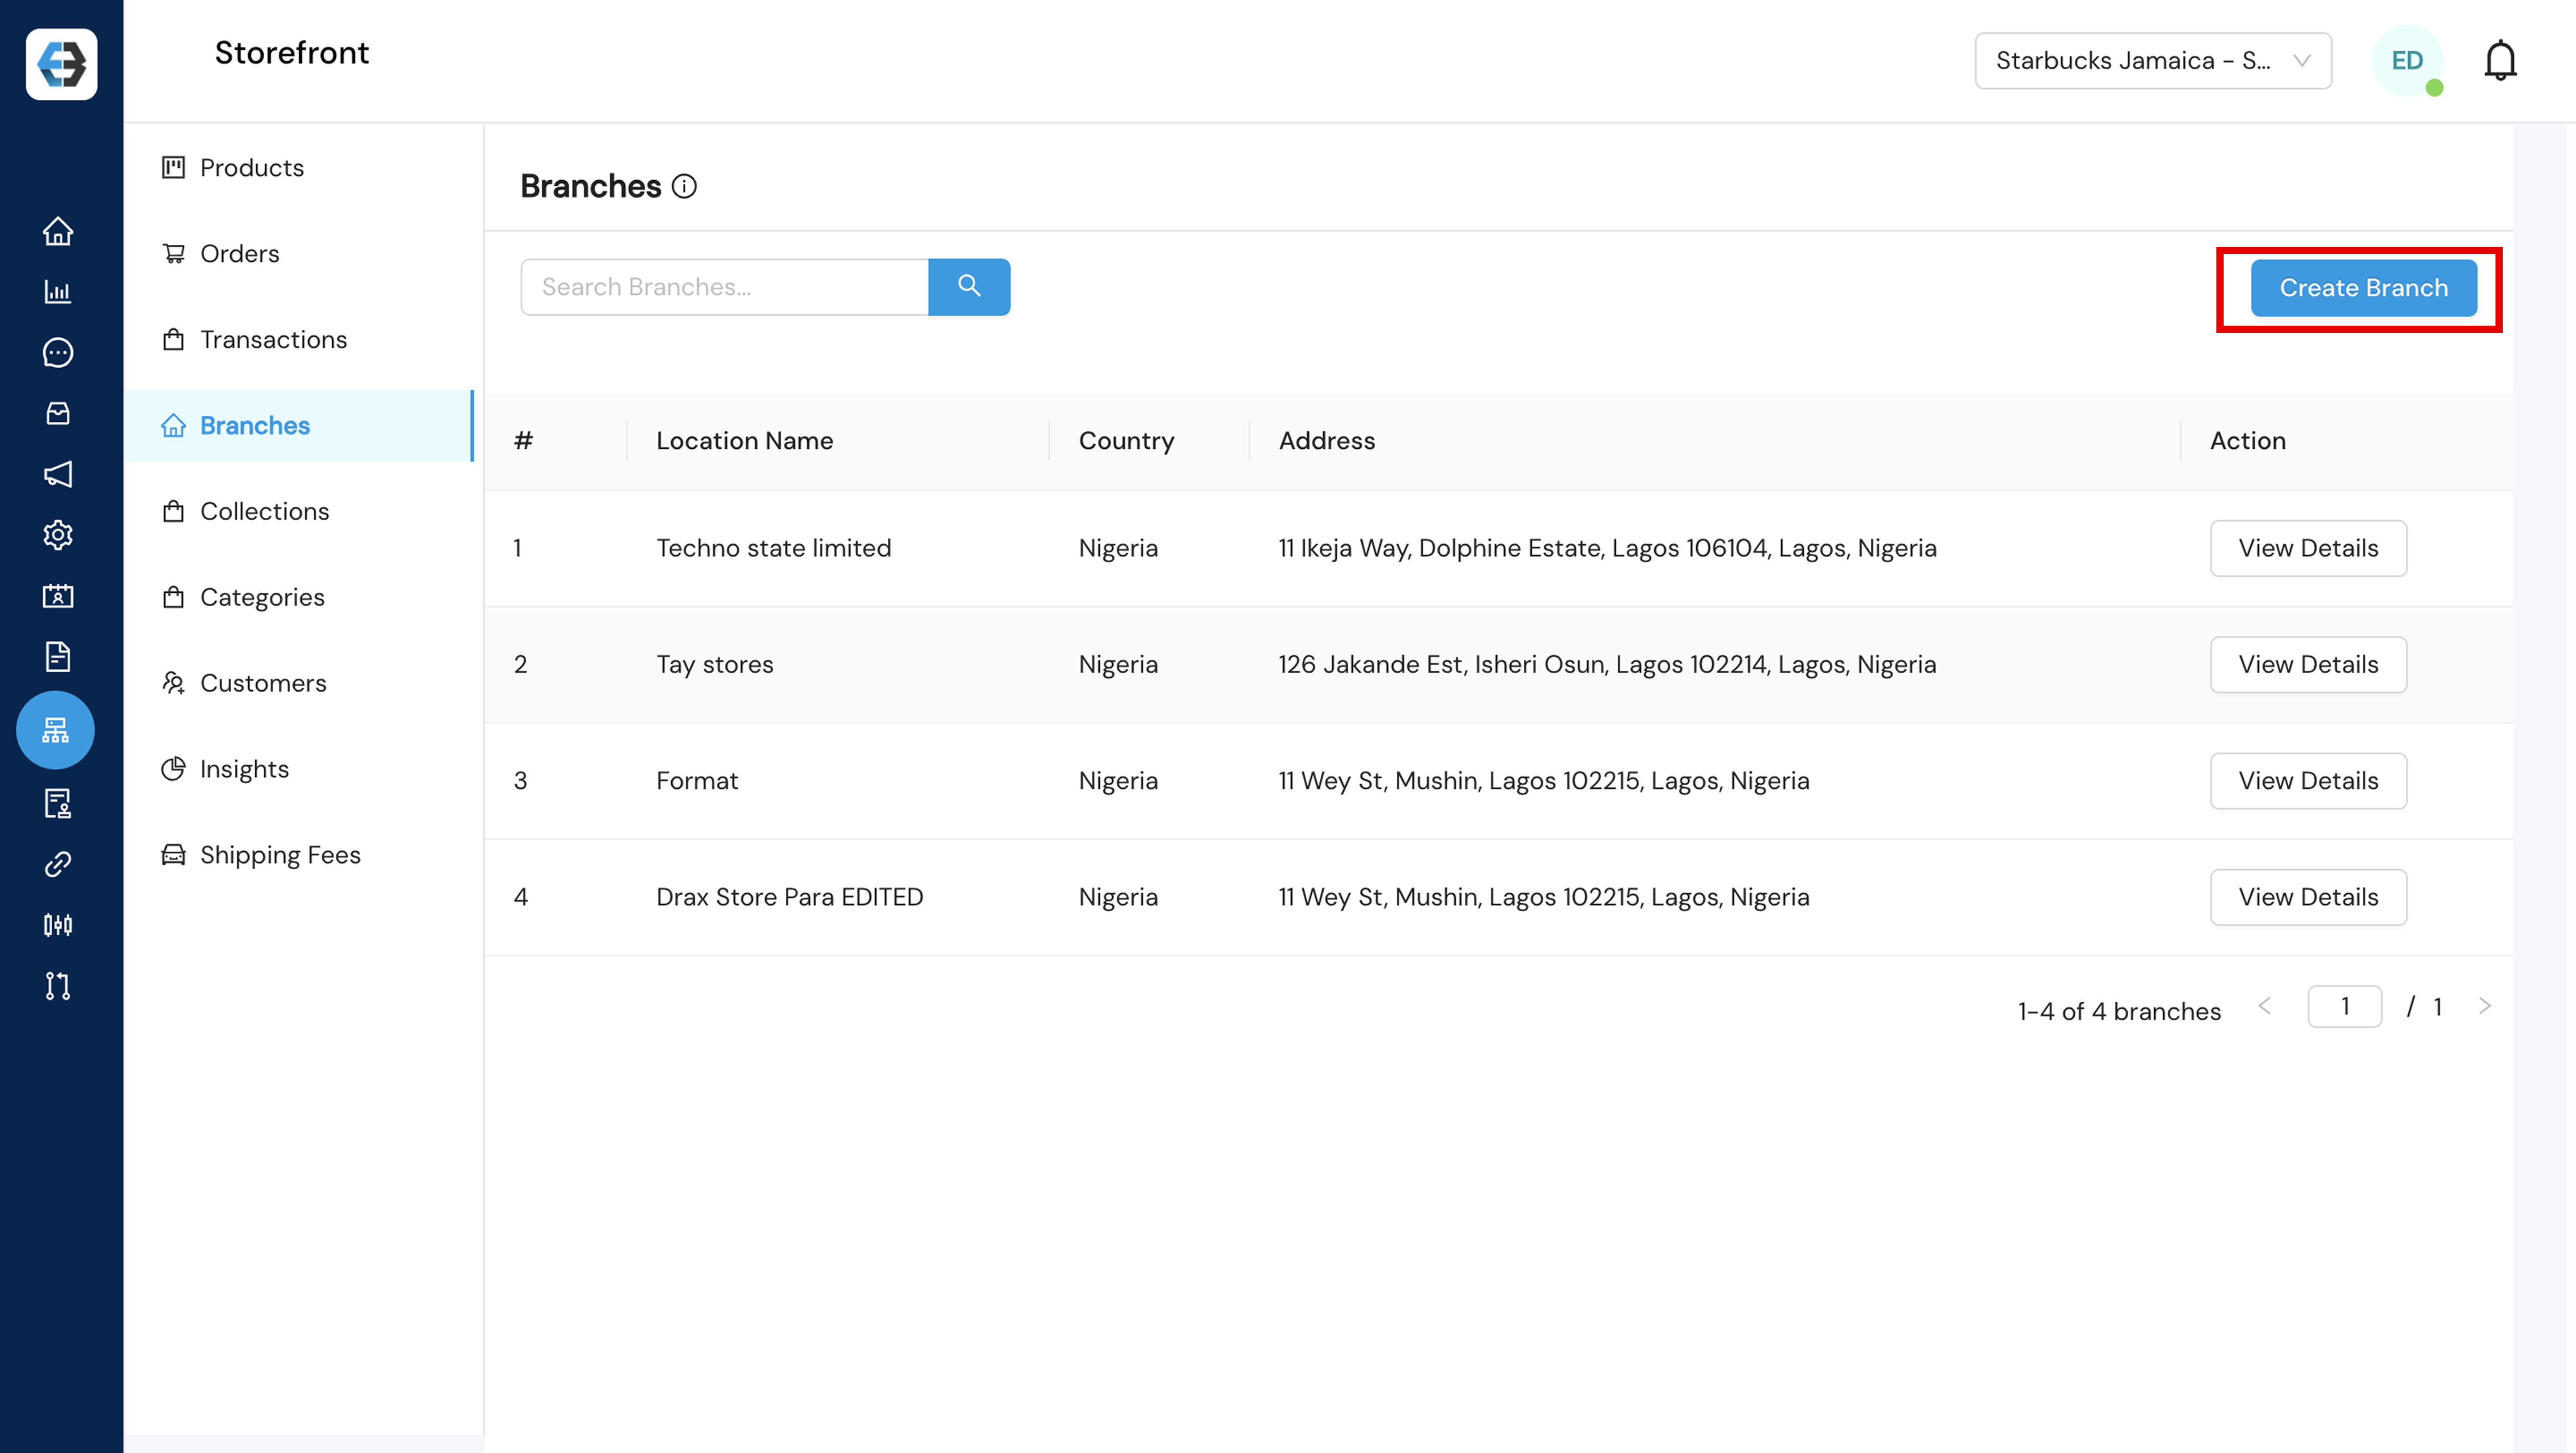
- Click “Create Branch”
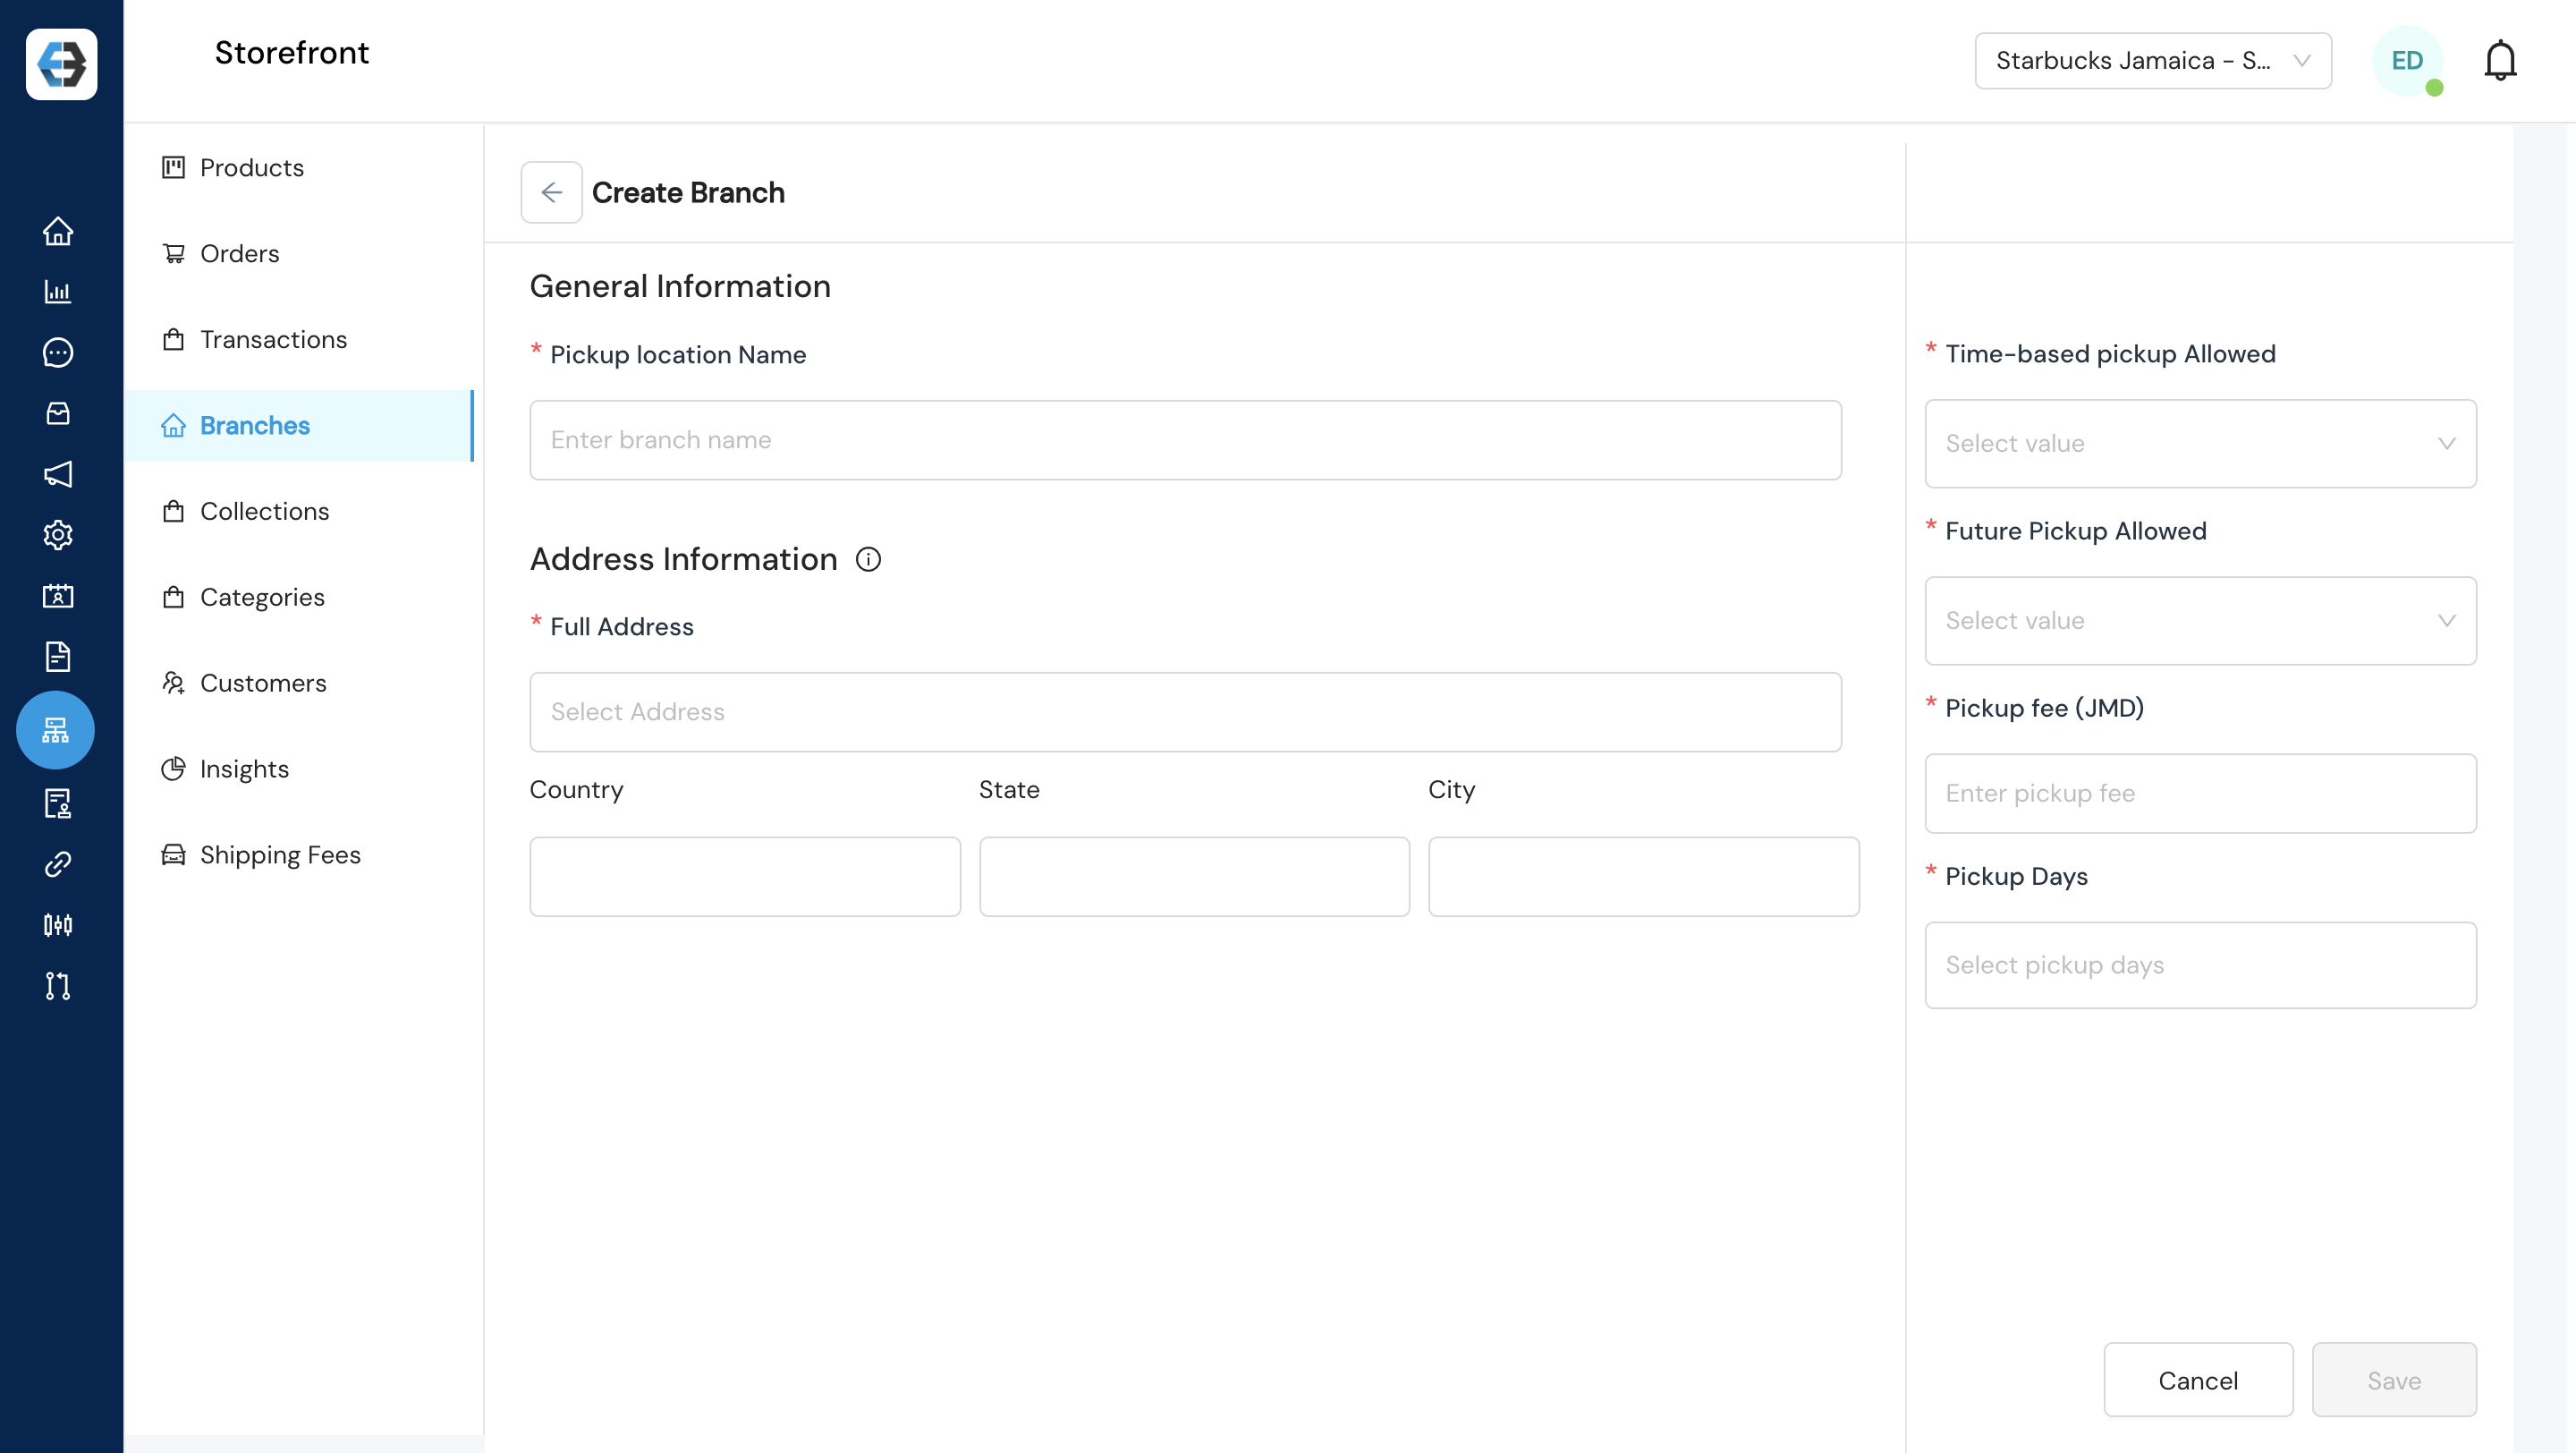
- Enter details for each pickup location:
– Pickup location name
– Full address (country, state, City)
2.4 Configure Shipping Options
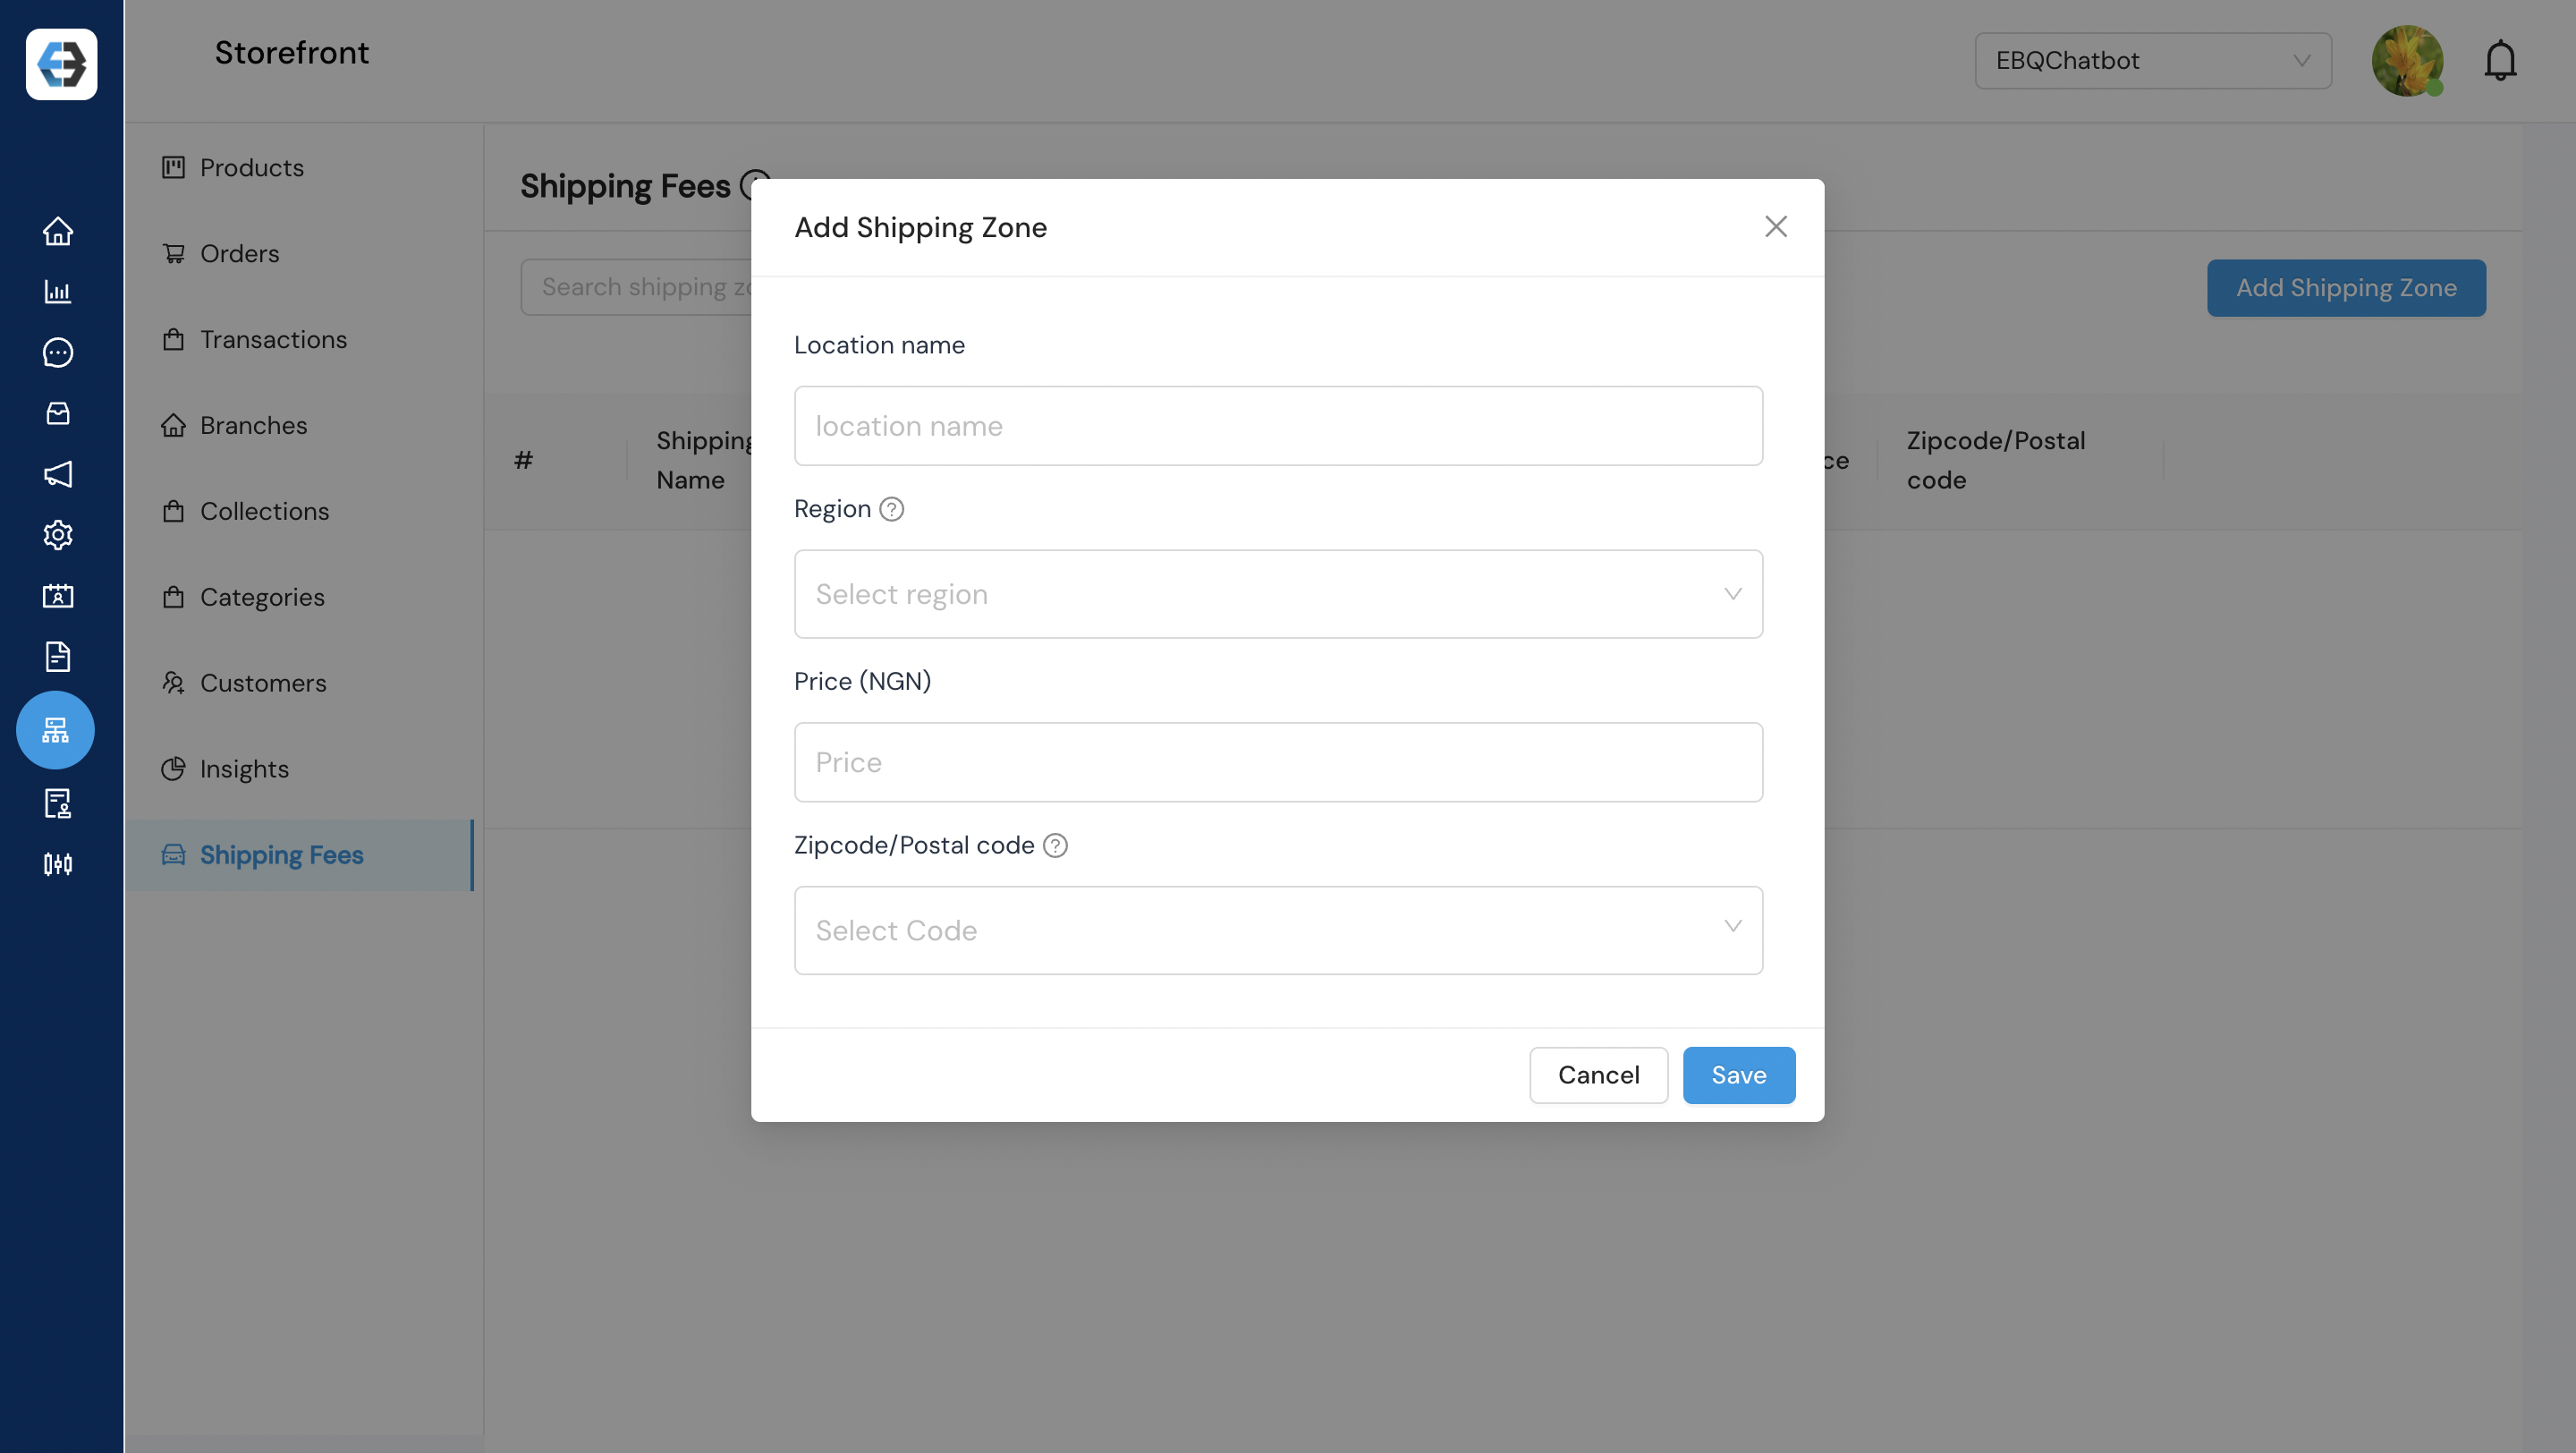
Set up shipping options for customers who prefer delivery. Add fees based on delivery zones or locations.
- Navigate to Storefront → Shipping Fees → Add Shipping Zone
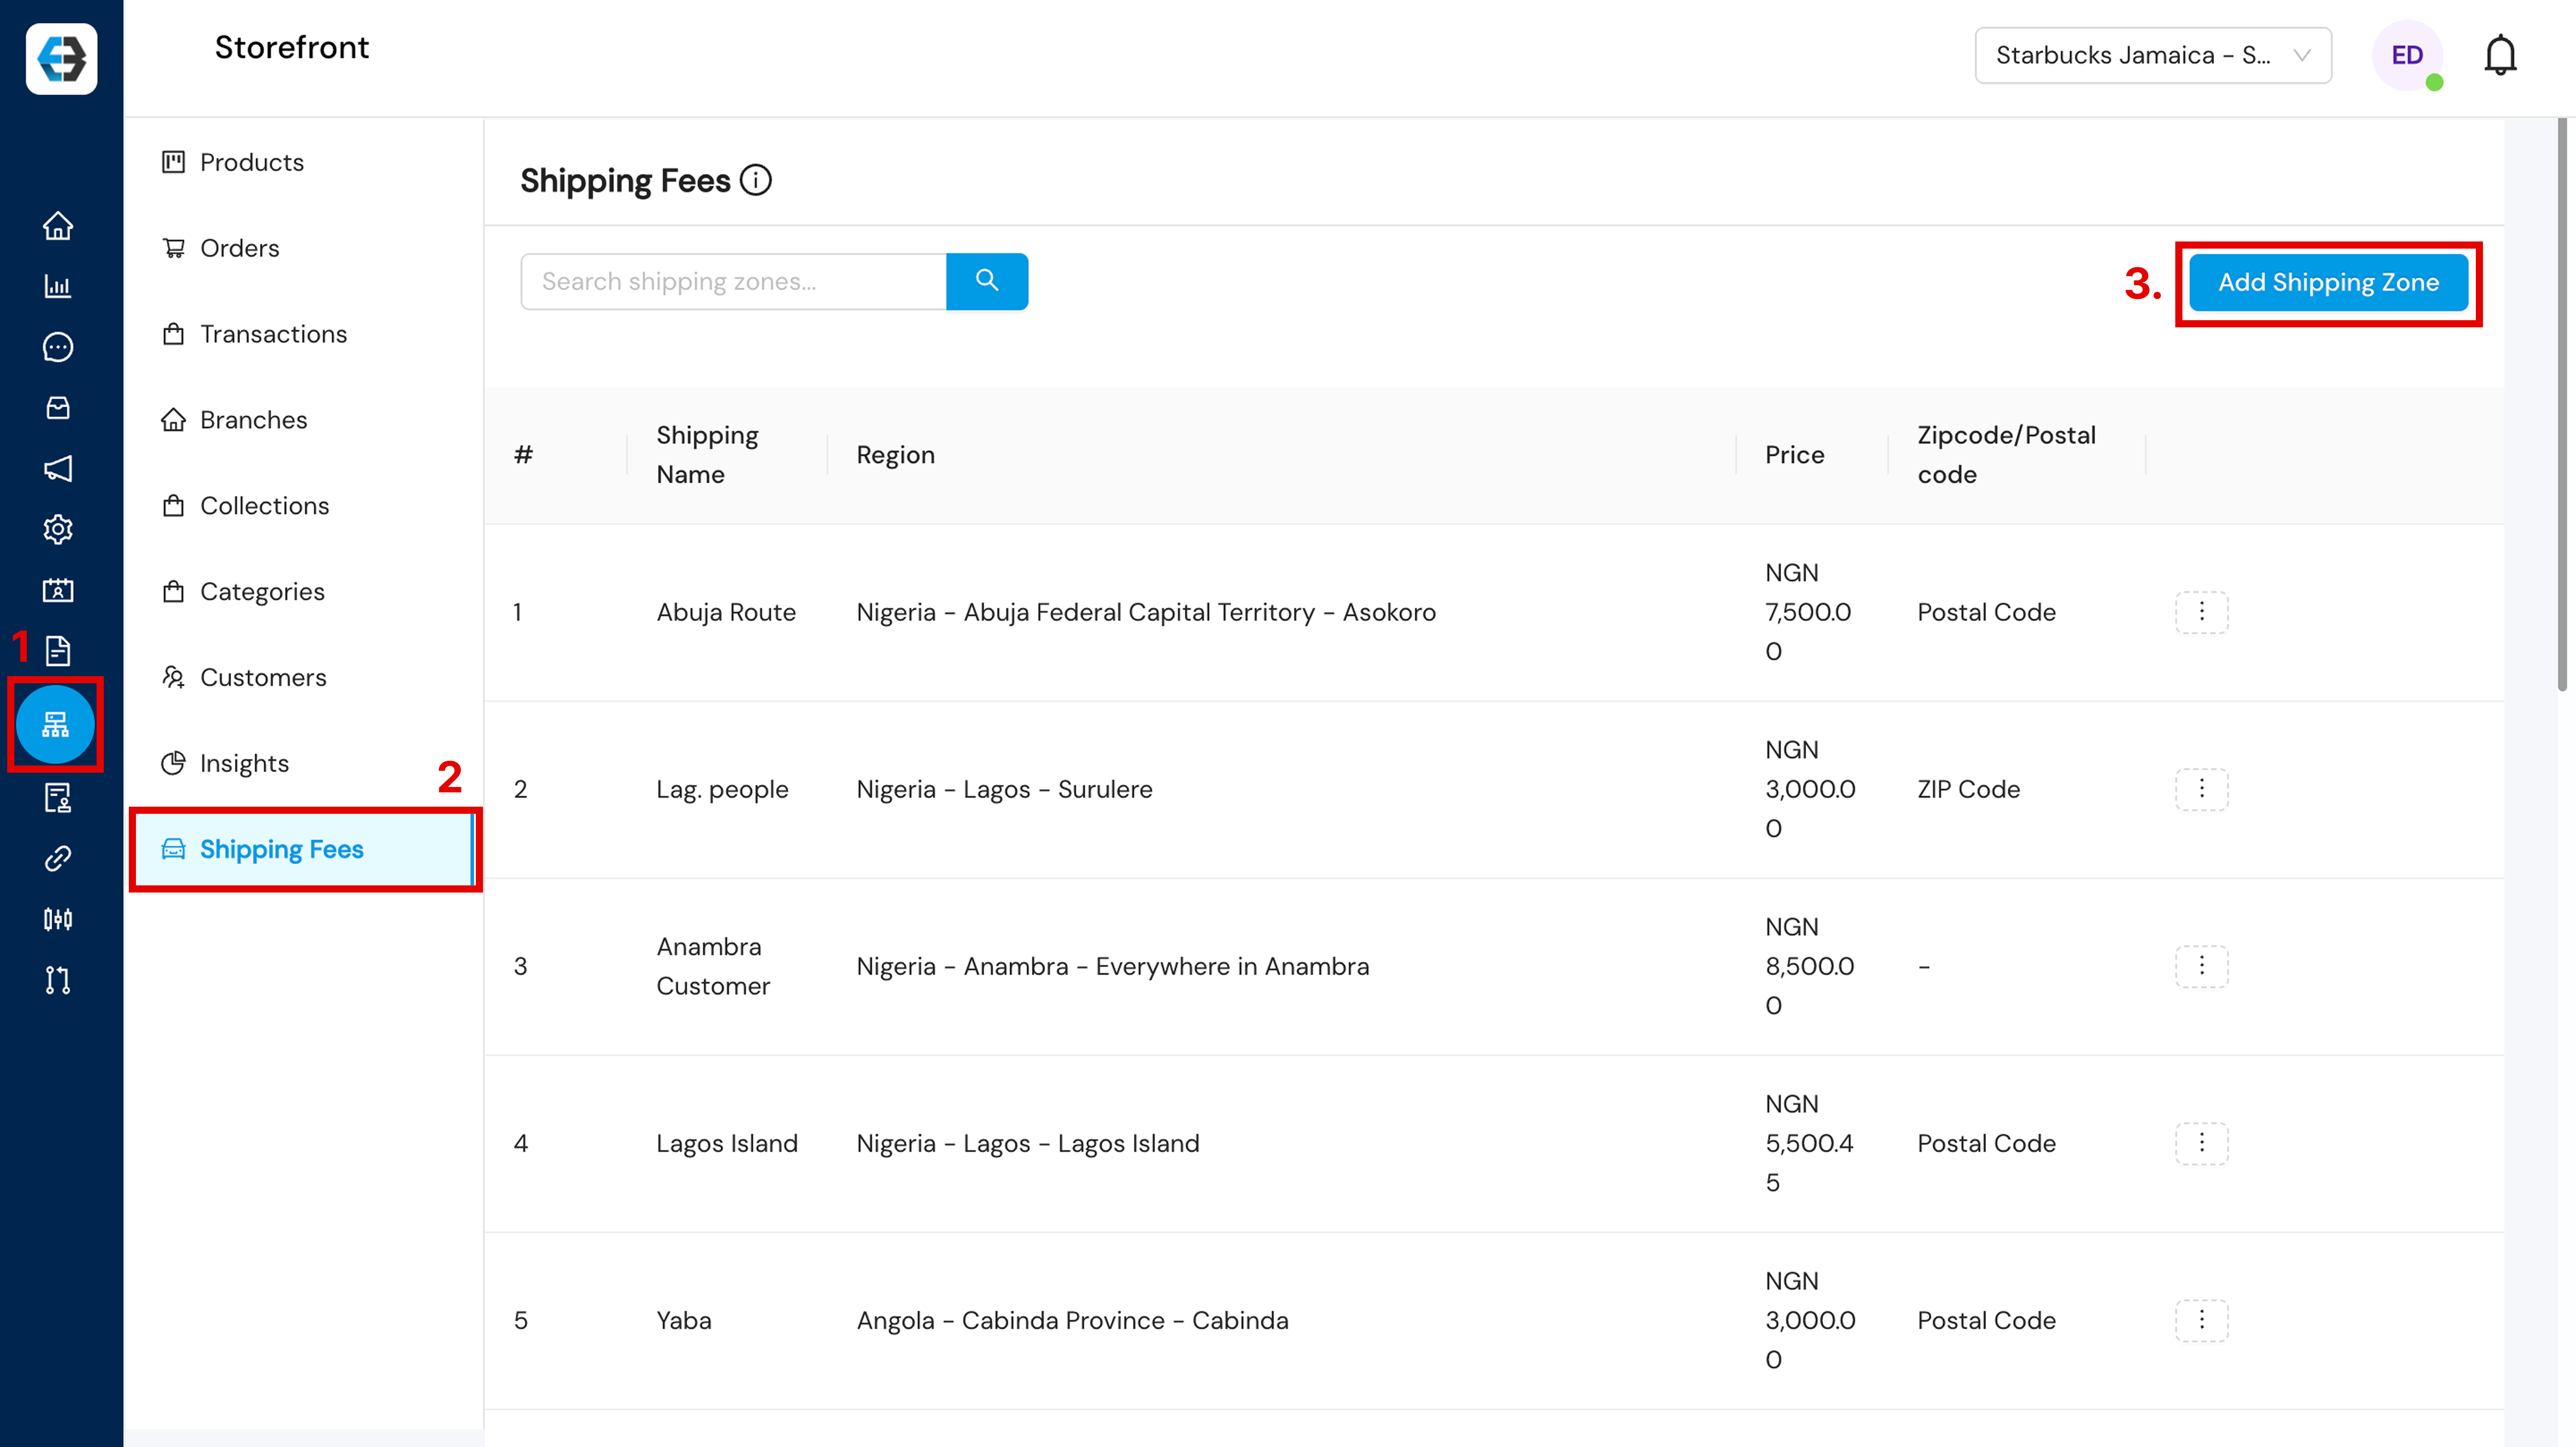
- Set up delivery zones and fees:
- Define Location name
- Select Region
- Shipping costs per location
- Specify Zipcode/Postal Code
Click “Save” once done
Step 3: Connect WhatsApp and Sync Catalog
3.1 WhatsApp Connection
- Go back to Configuration → Apps → WhatsApp API
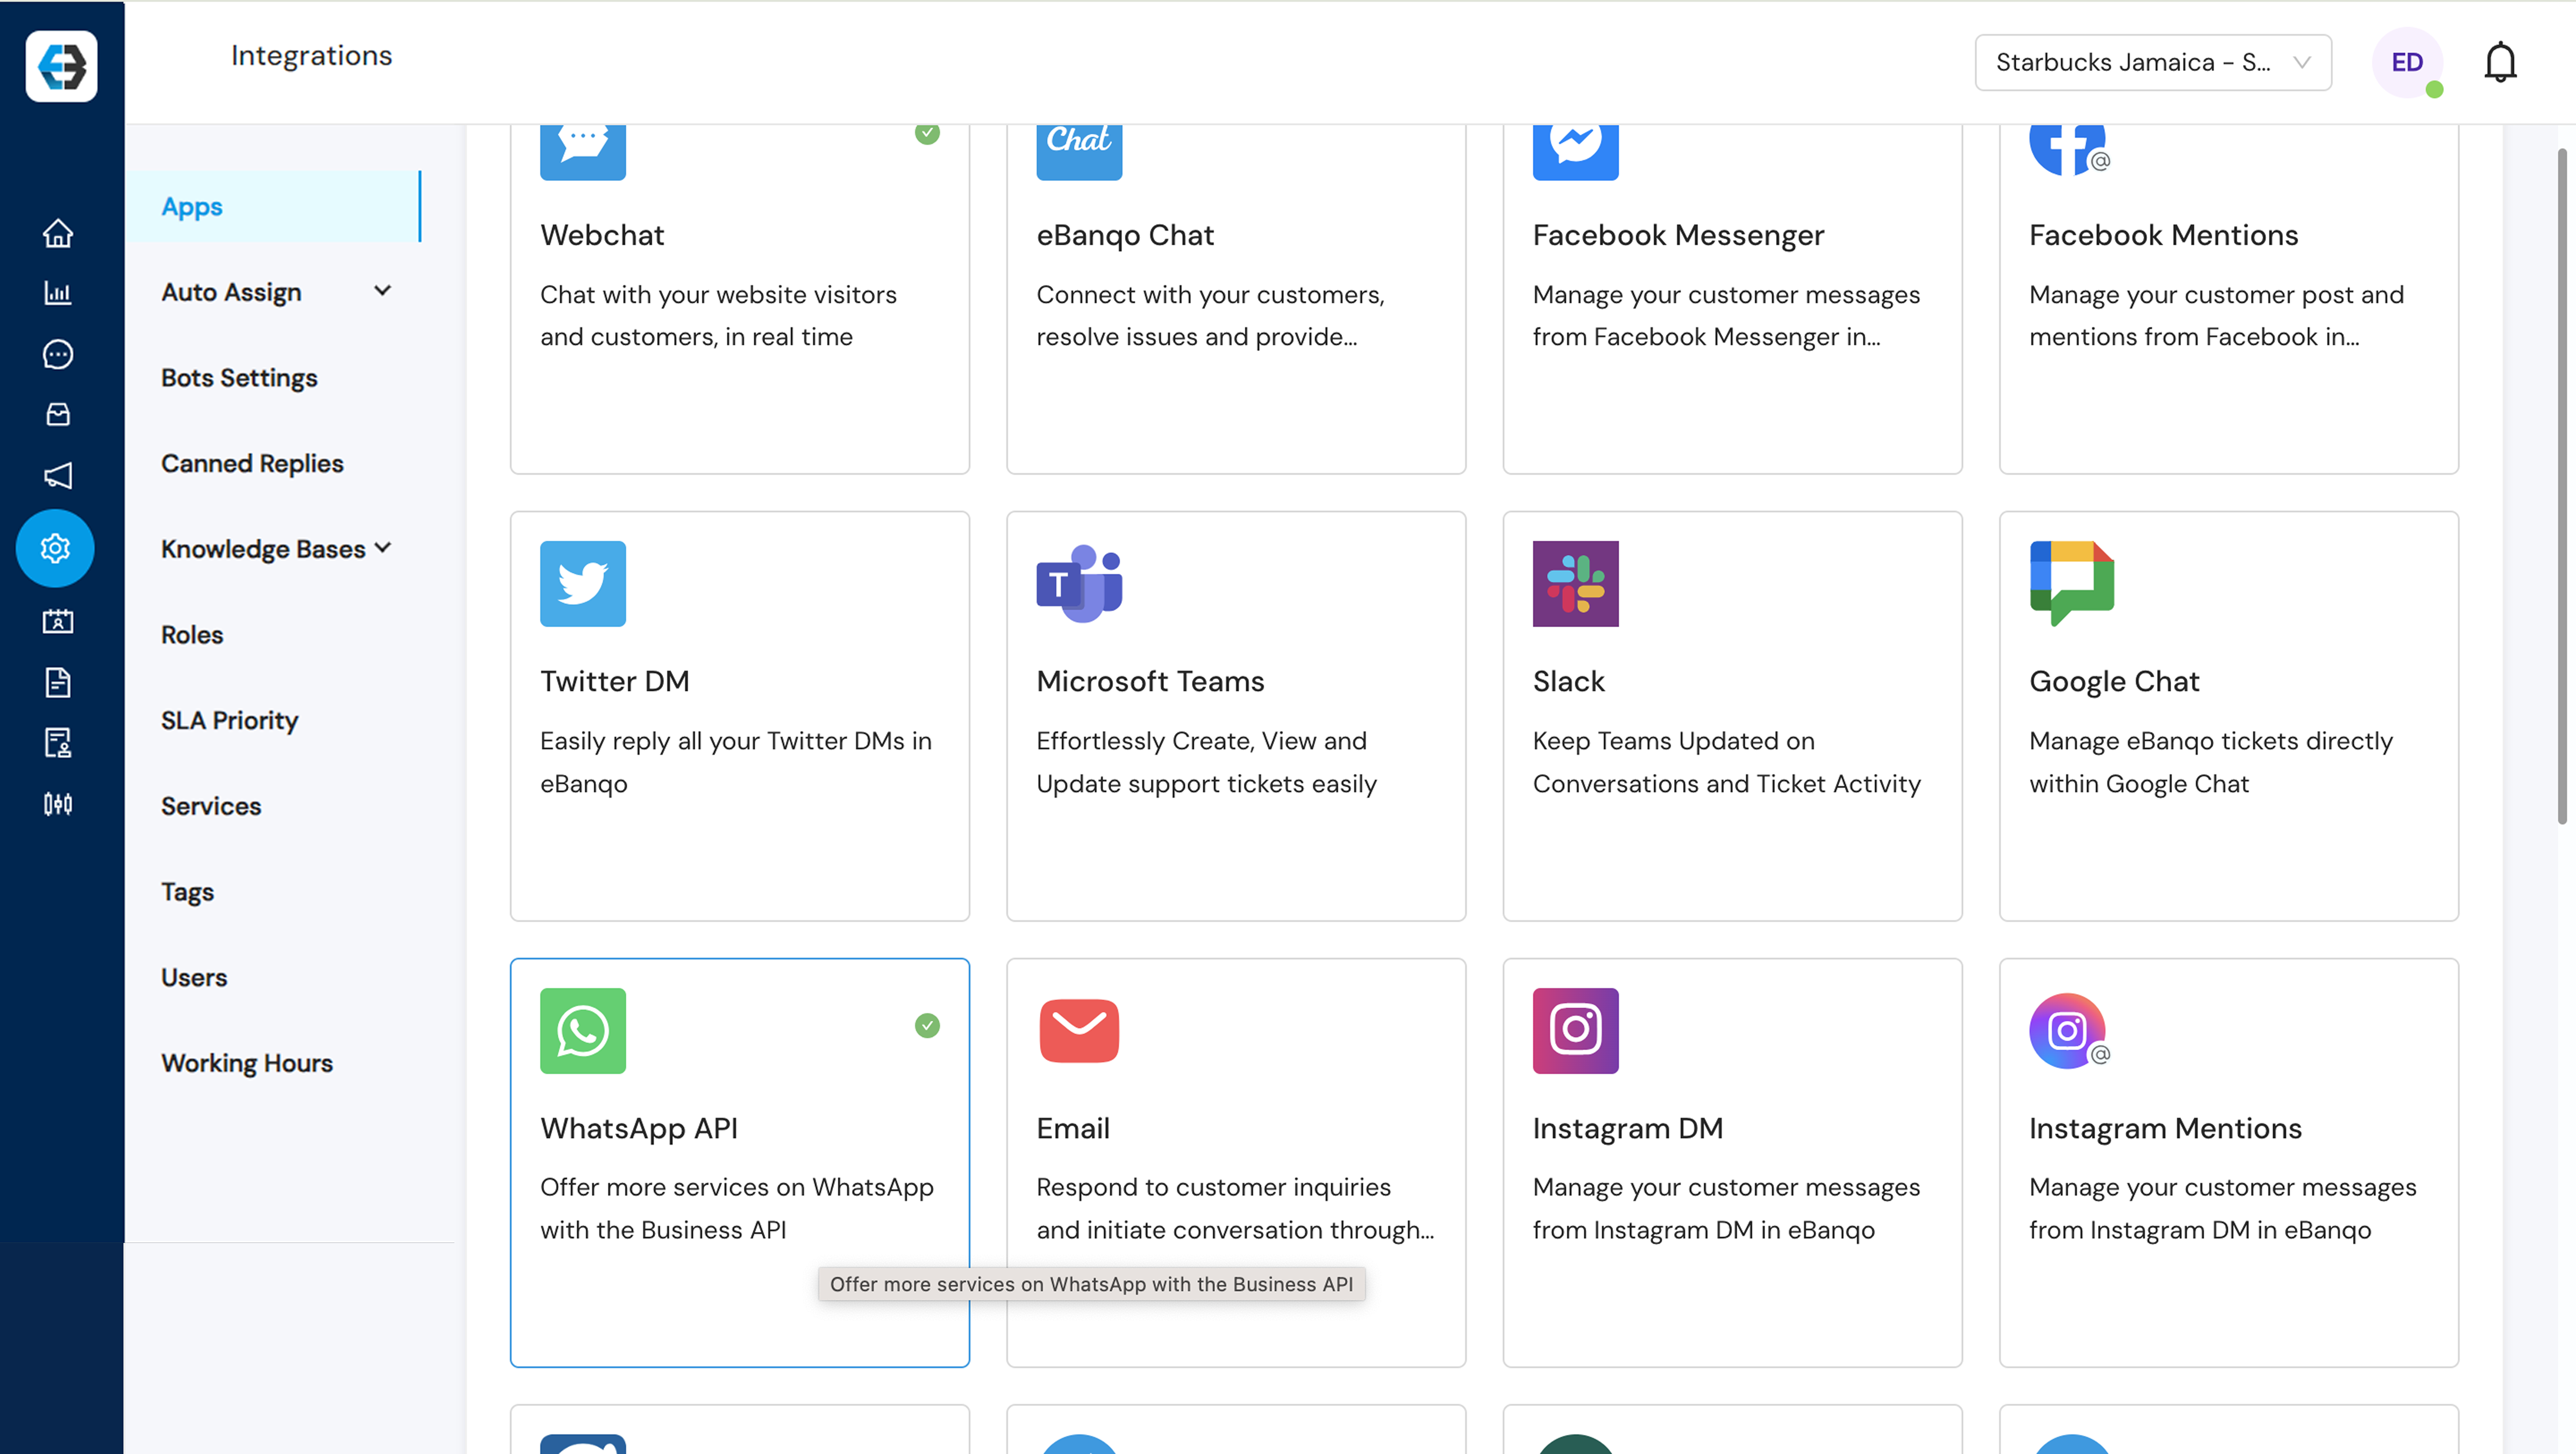
- Follow the WhatsApp connection process:
- Add your phone number
- Complete verification
- Update your business profile
Note: You must connect WhatsApp before setting up the catalog.
3.2 Create WhatsApp Catalog
- Navigate to Apps → WhatsApp Catalog
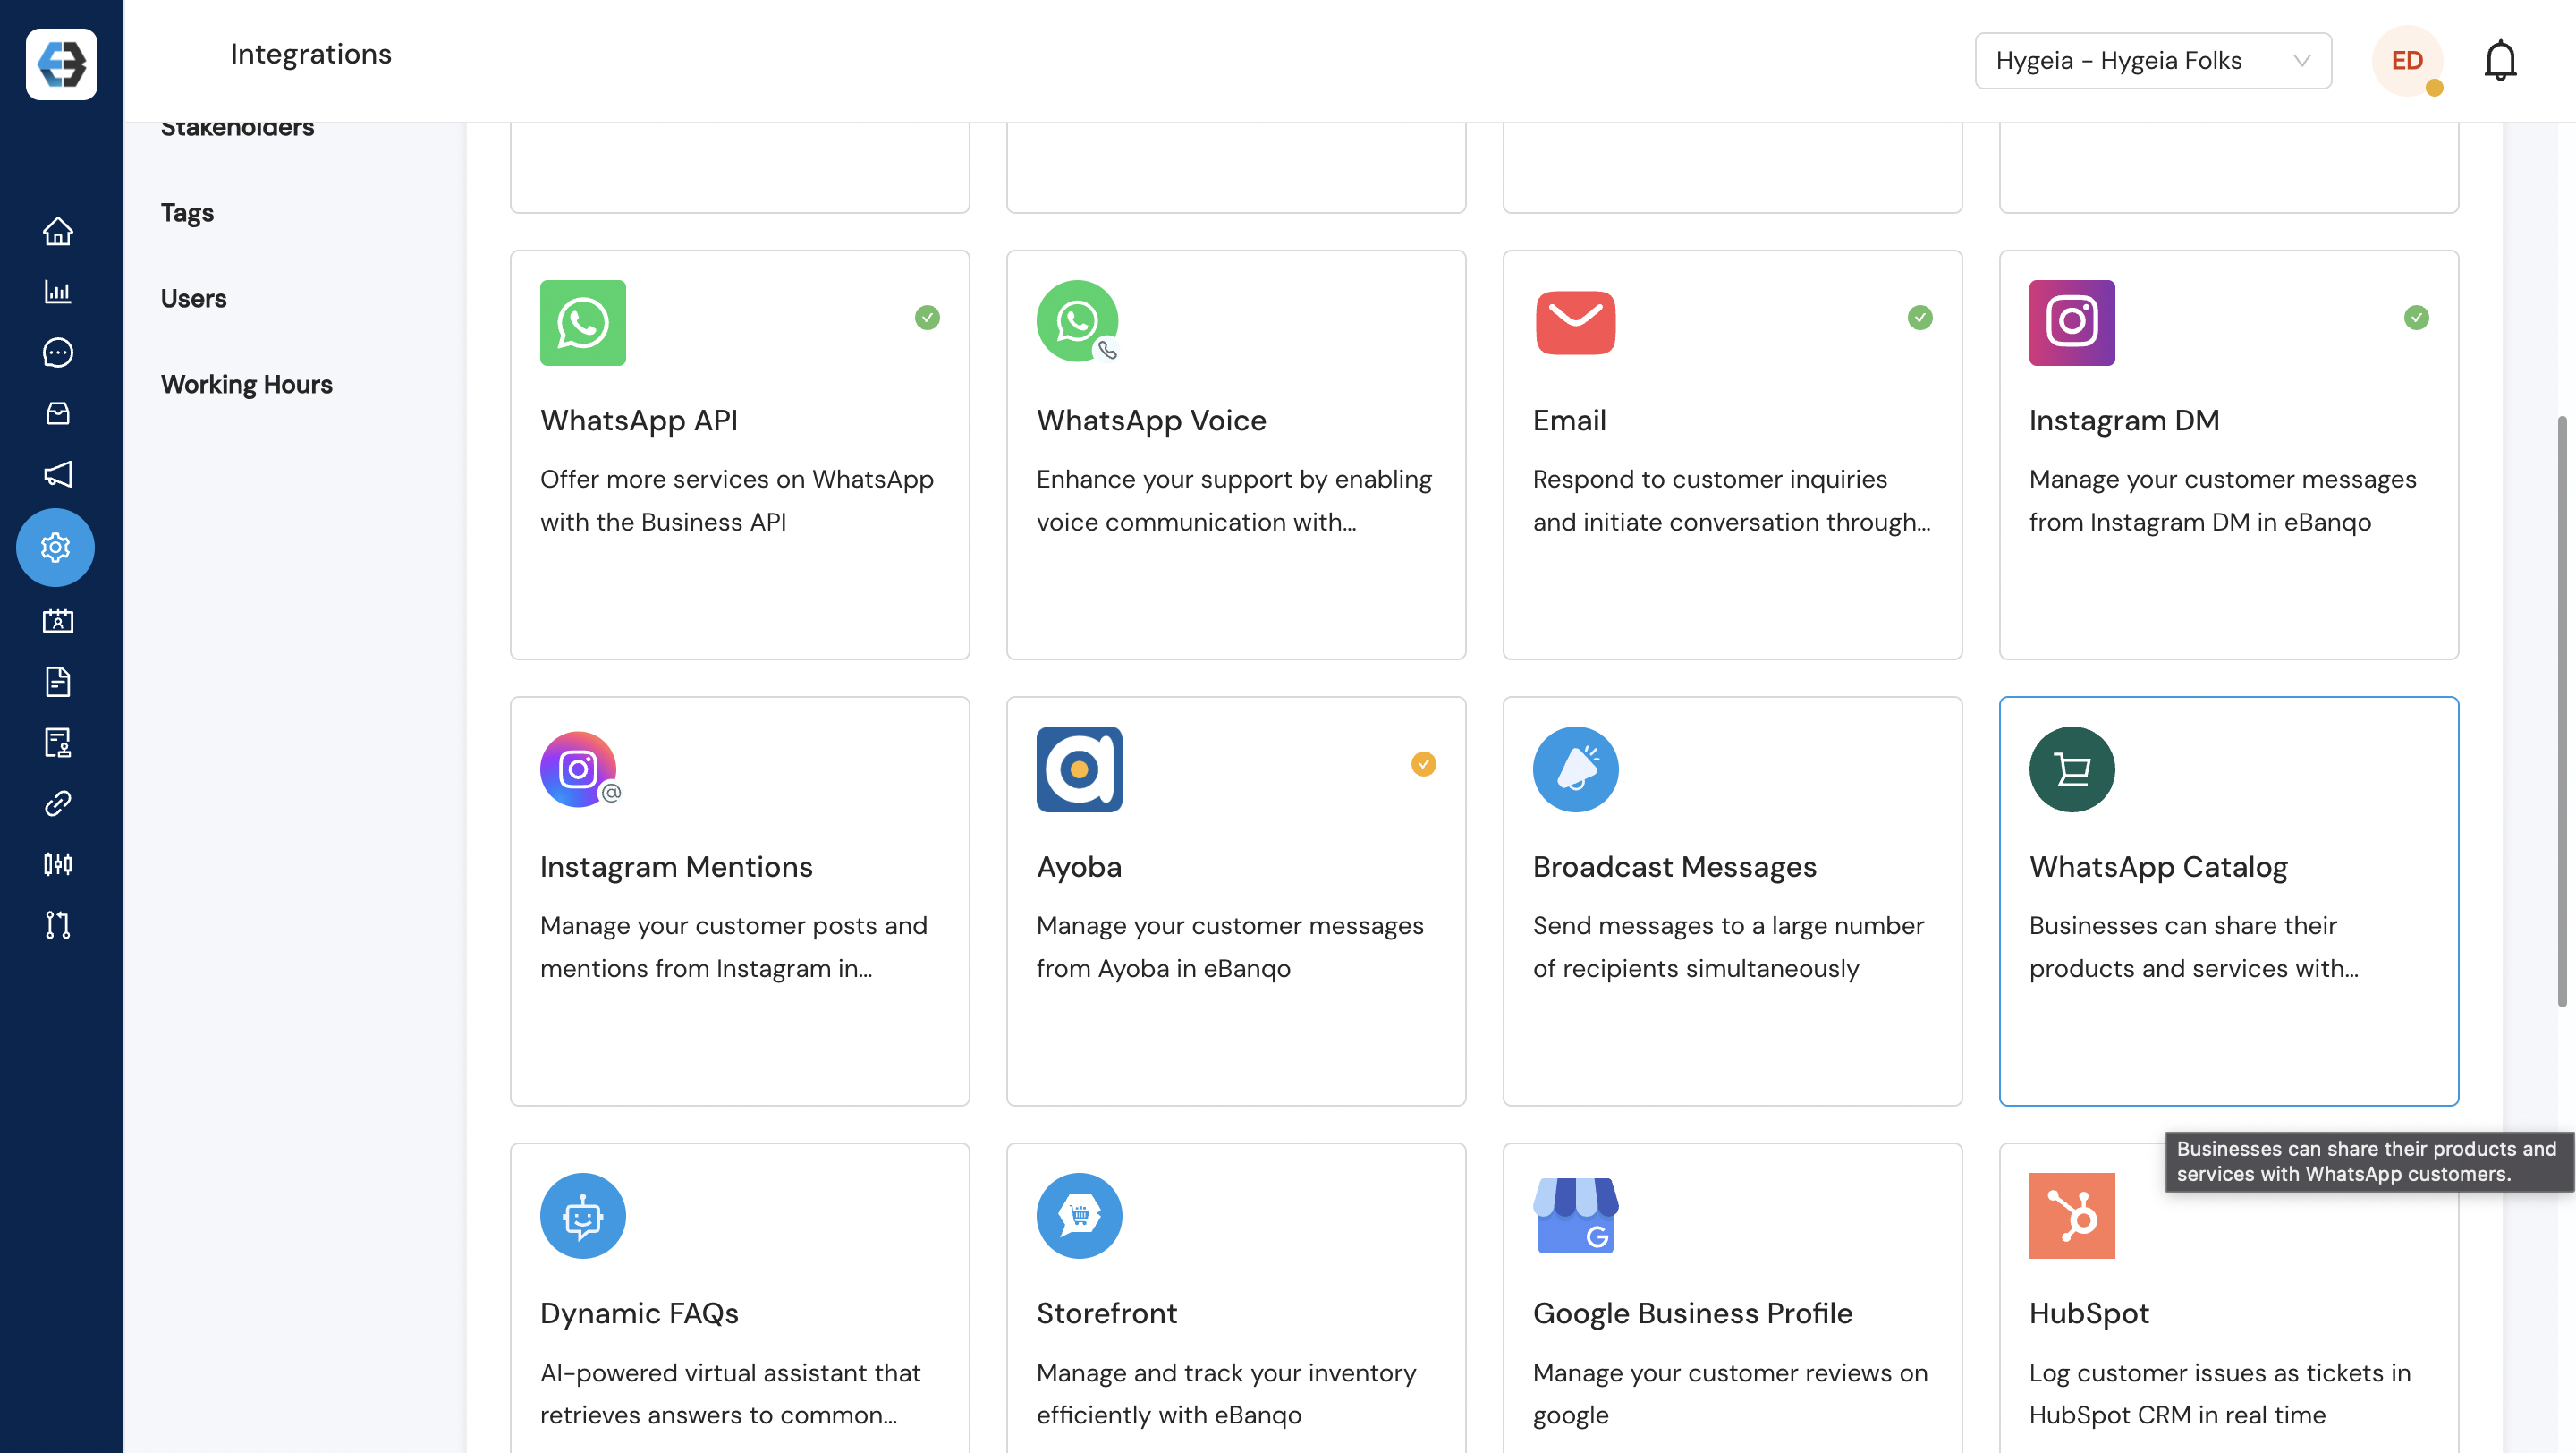
- Click “Create Catalog”
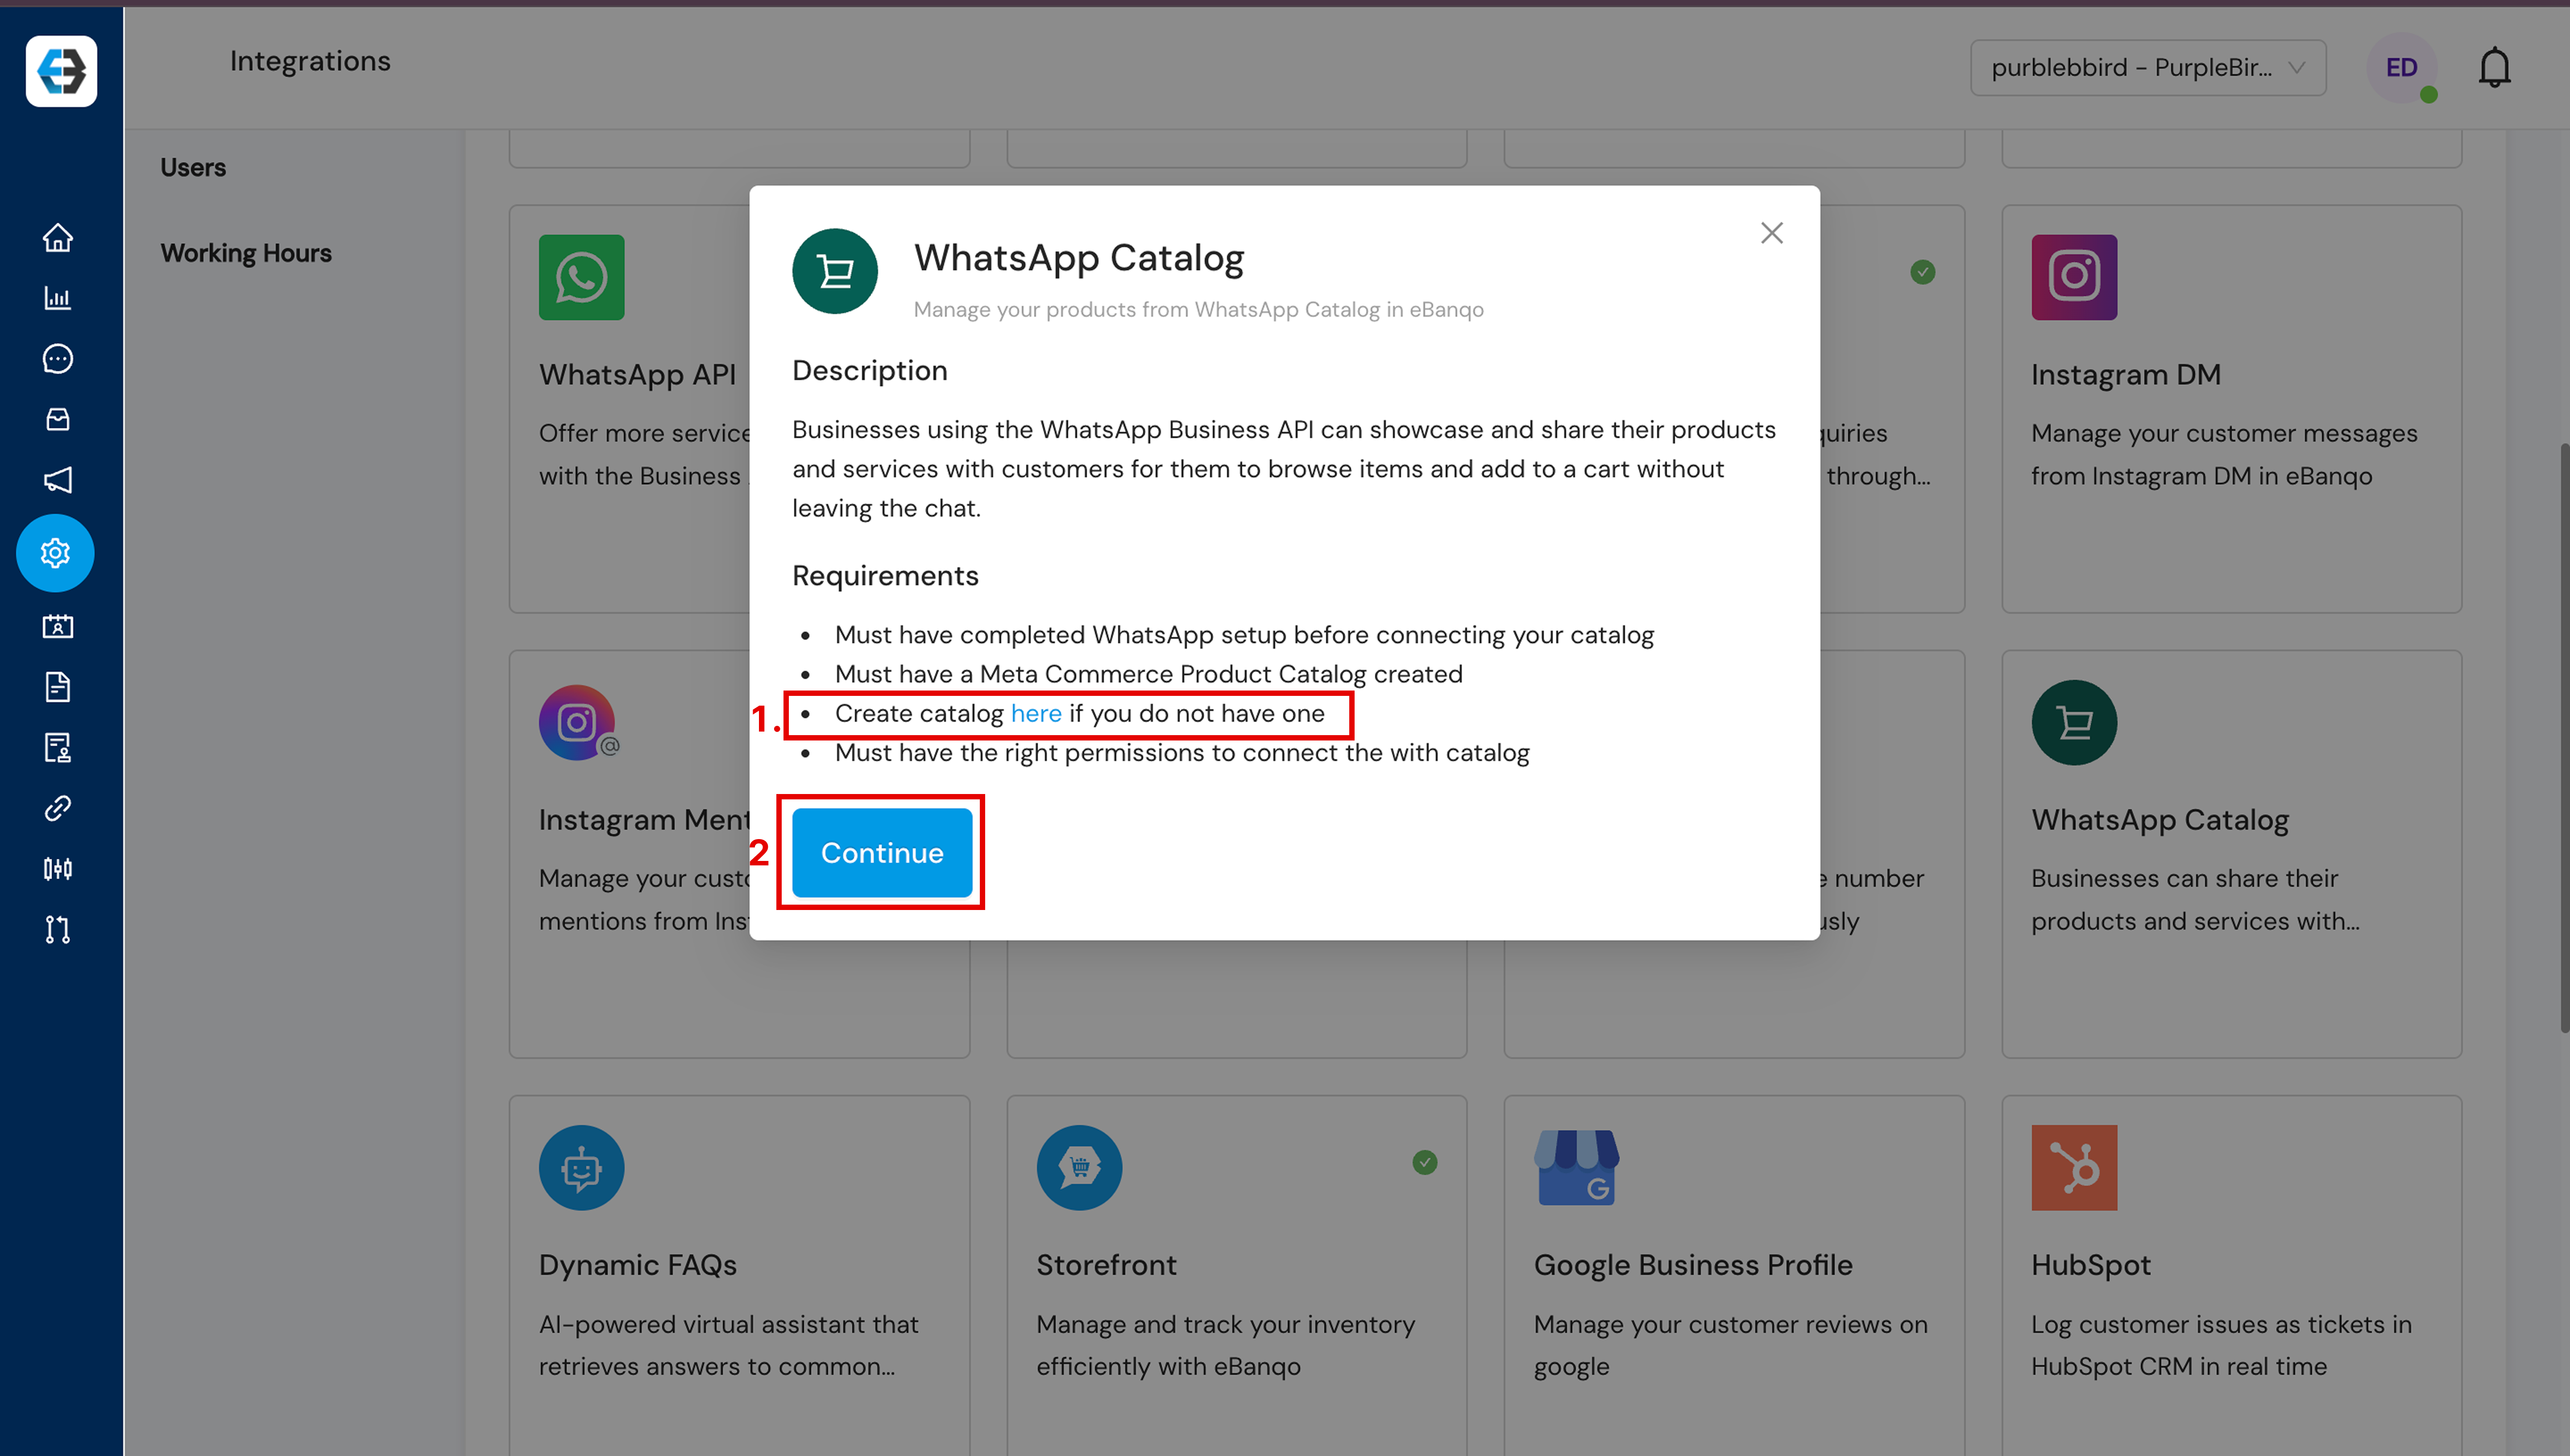
- You’ll be redirected to Facebook:
- Follow the prompts to create your Meta catalog
- Complete the Facebook setup process
- Return to eBanqo when finished
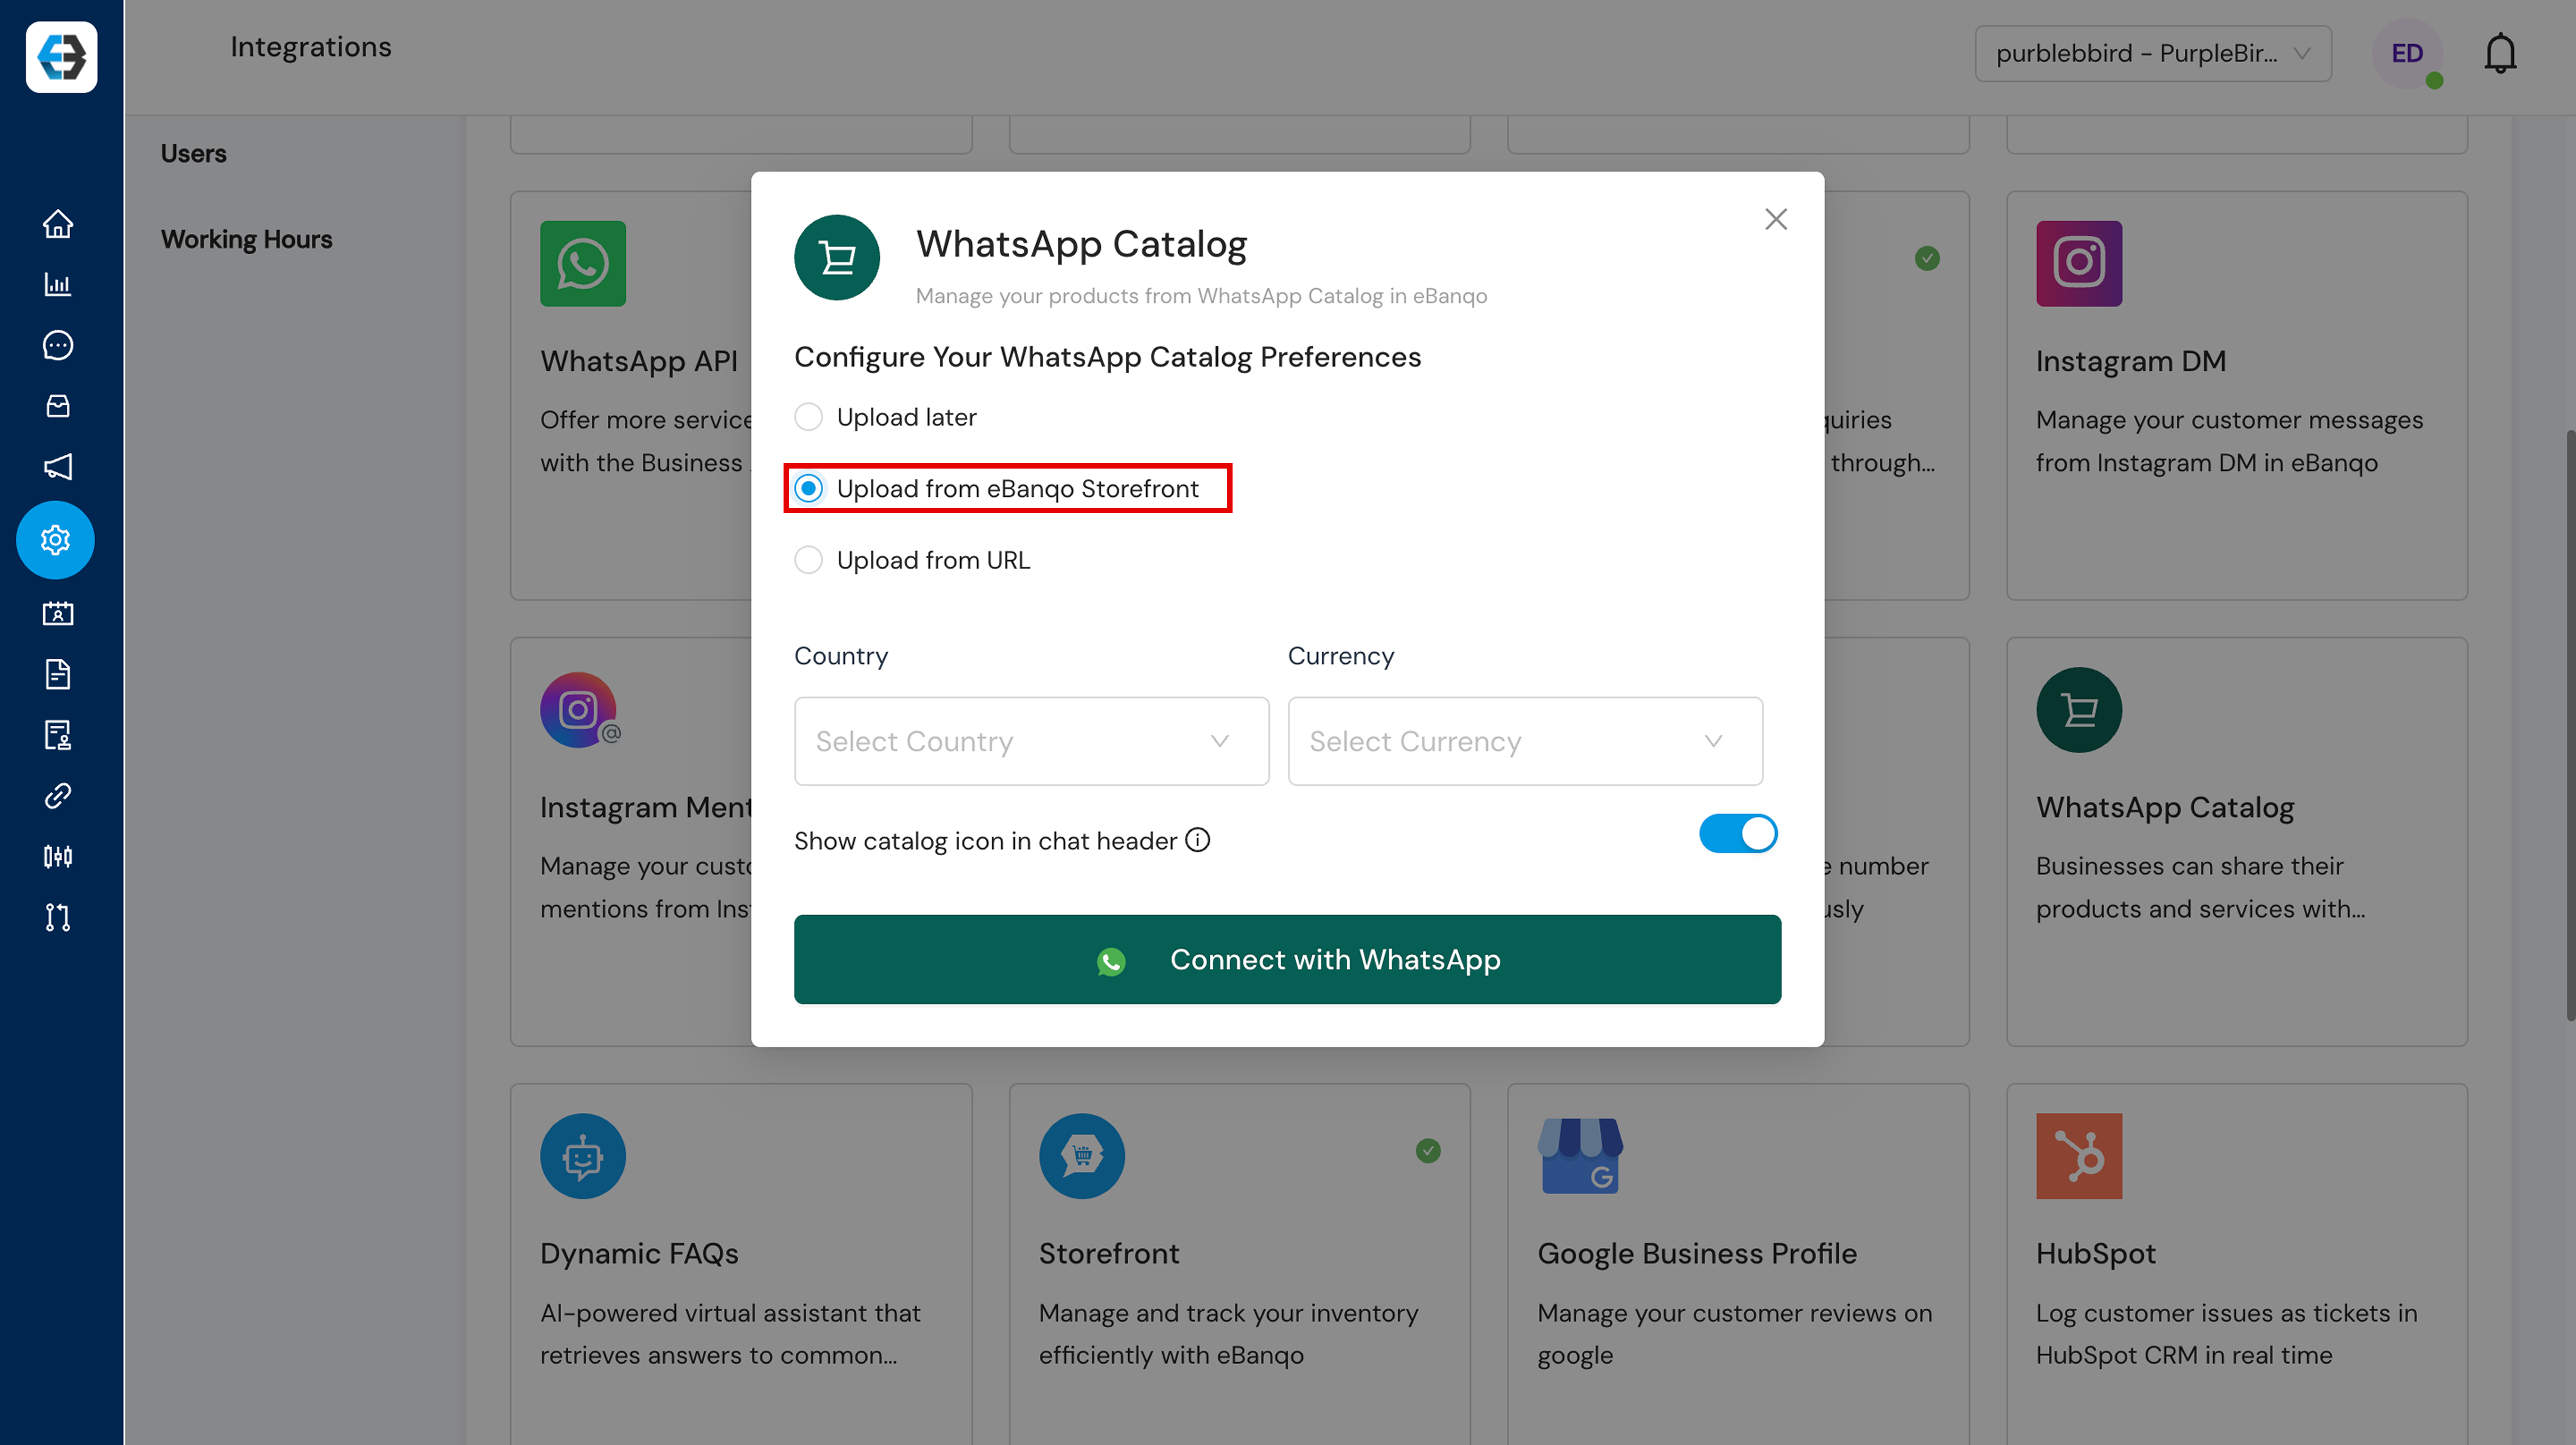
Once you return to eBanqo, select the option to upload products from the Storefront you’ve already created.
3.3 Sync Your Catalog
- Choose “Upload from eBanqo” (recommended)
- Select your country and currency
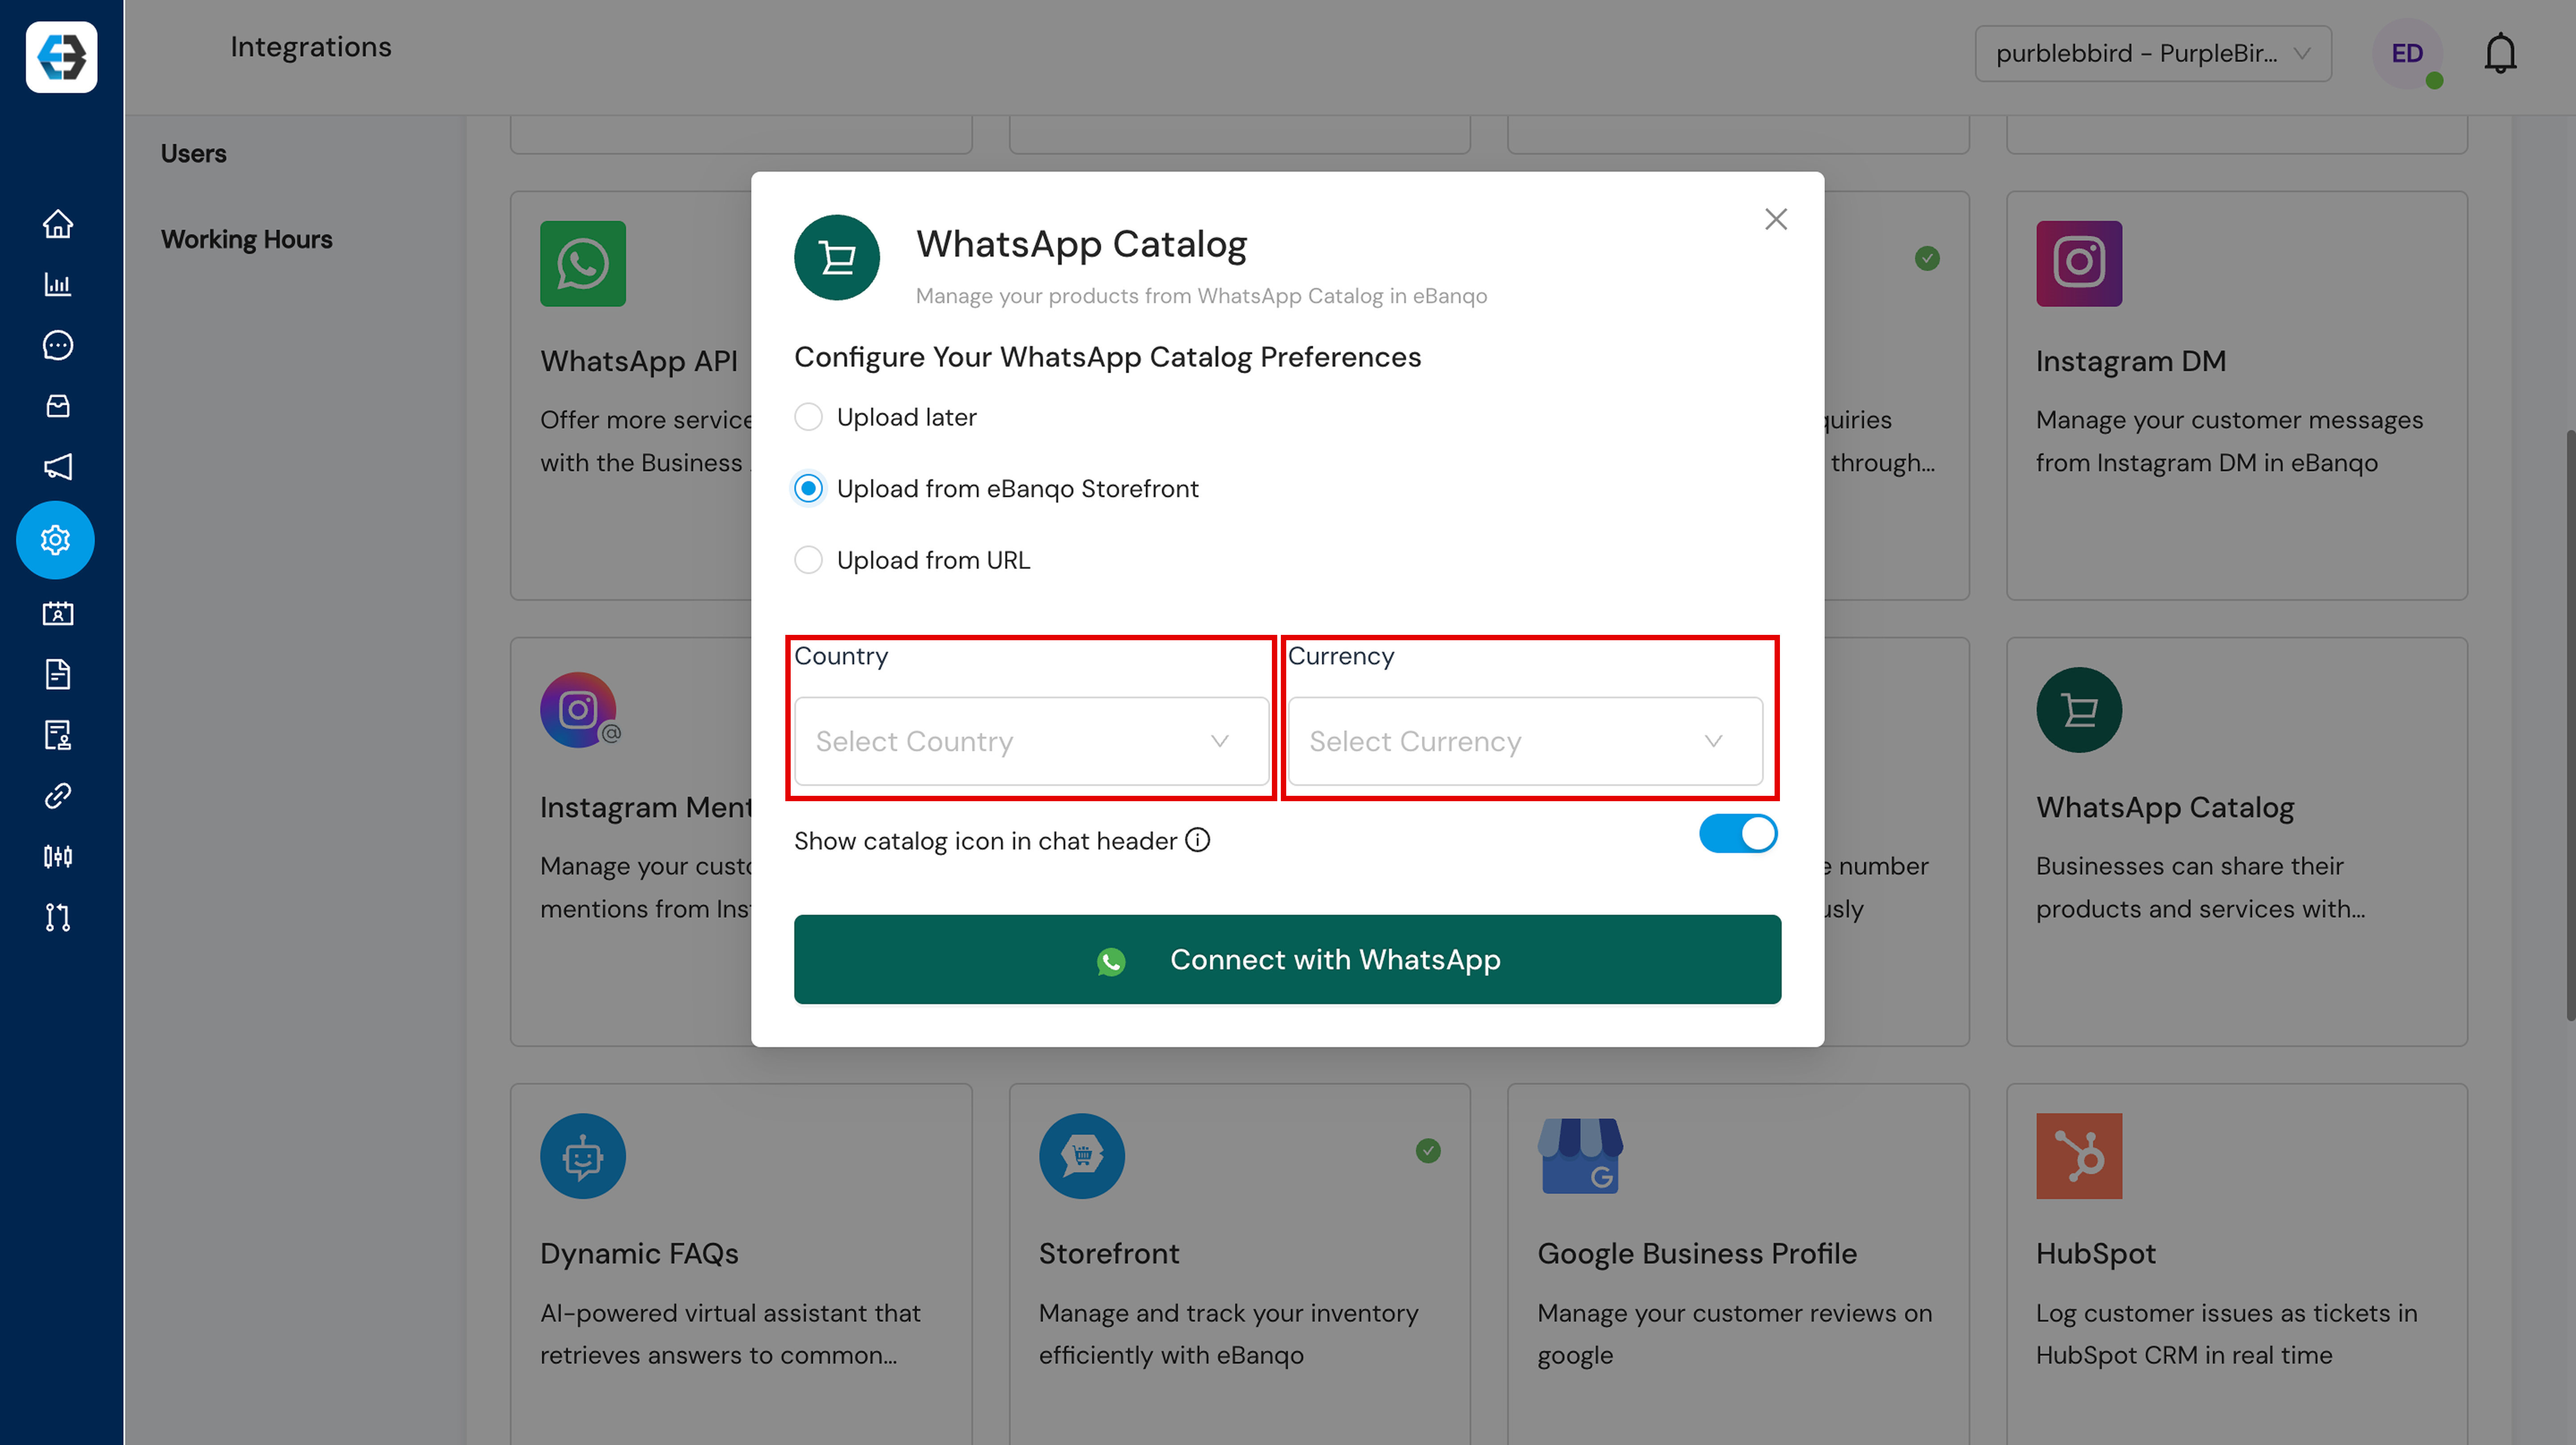
- Your products will automatically sync to WhatsApp
Step 4: Manage Inventory & Orders
4.1 Understanding Order Status
- Click on Storefront → Insights → Inventory Insight → to view all transactions:
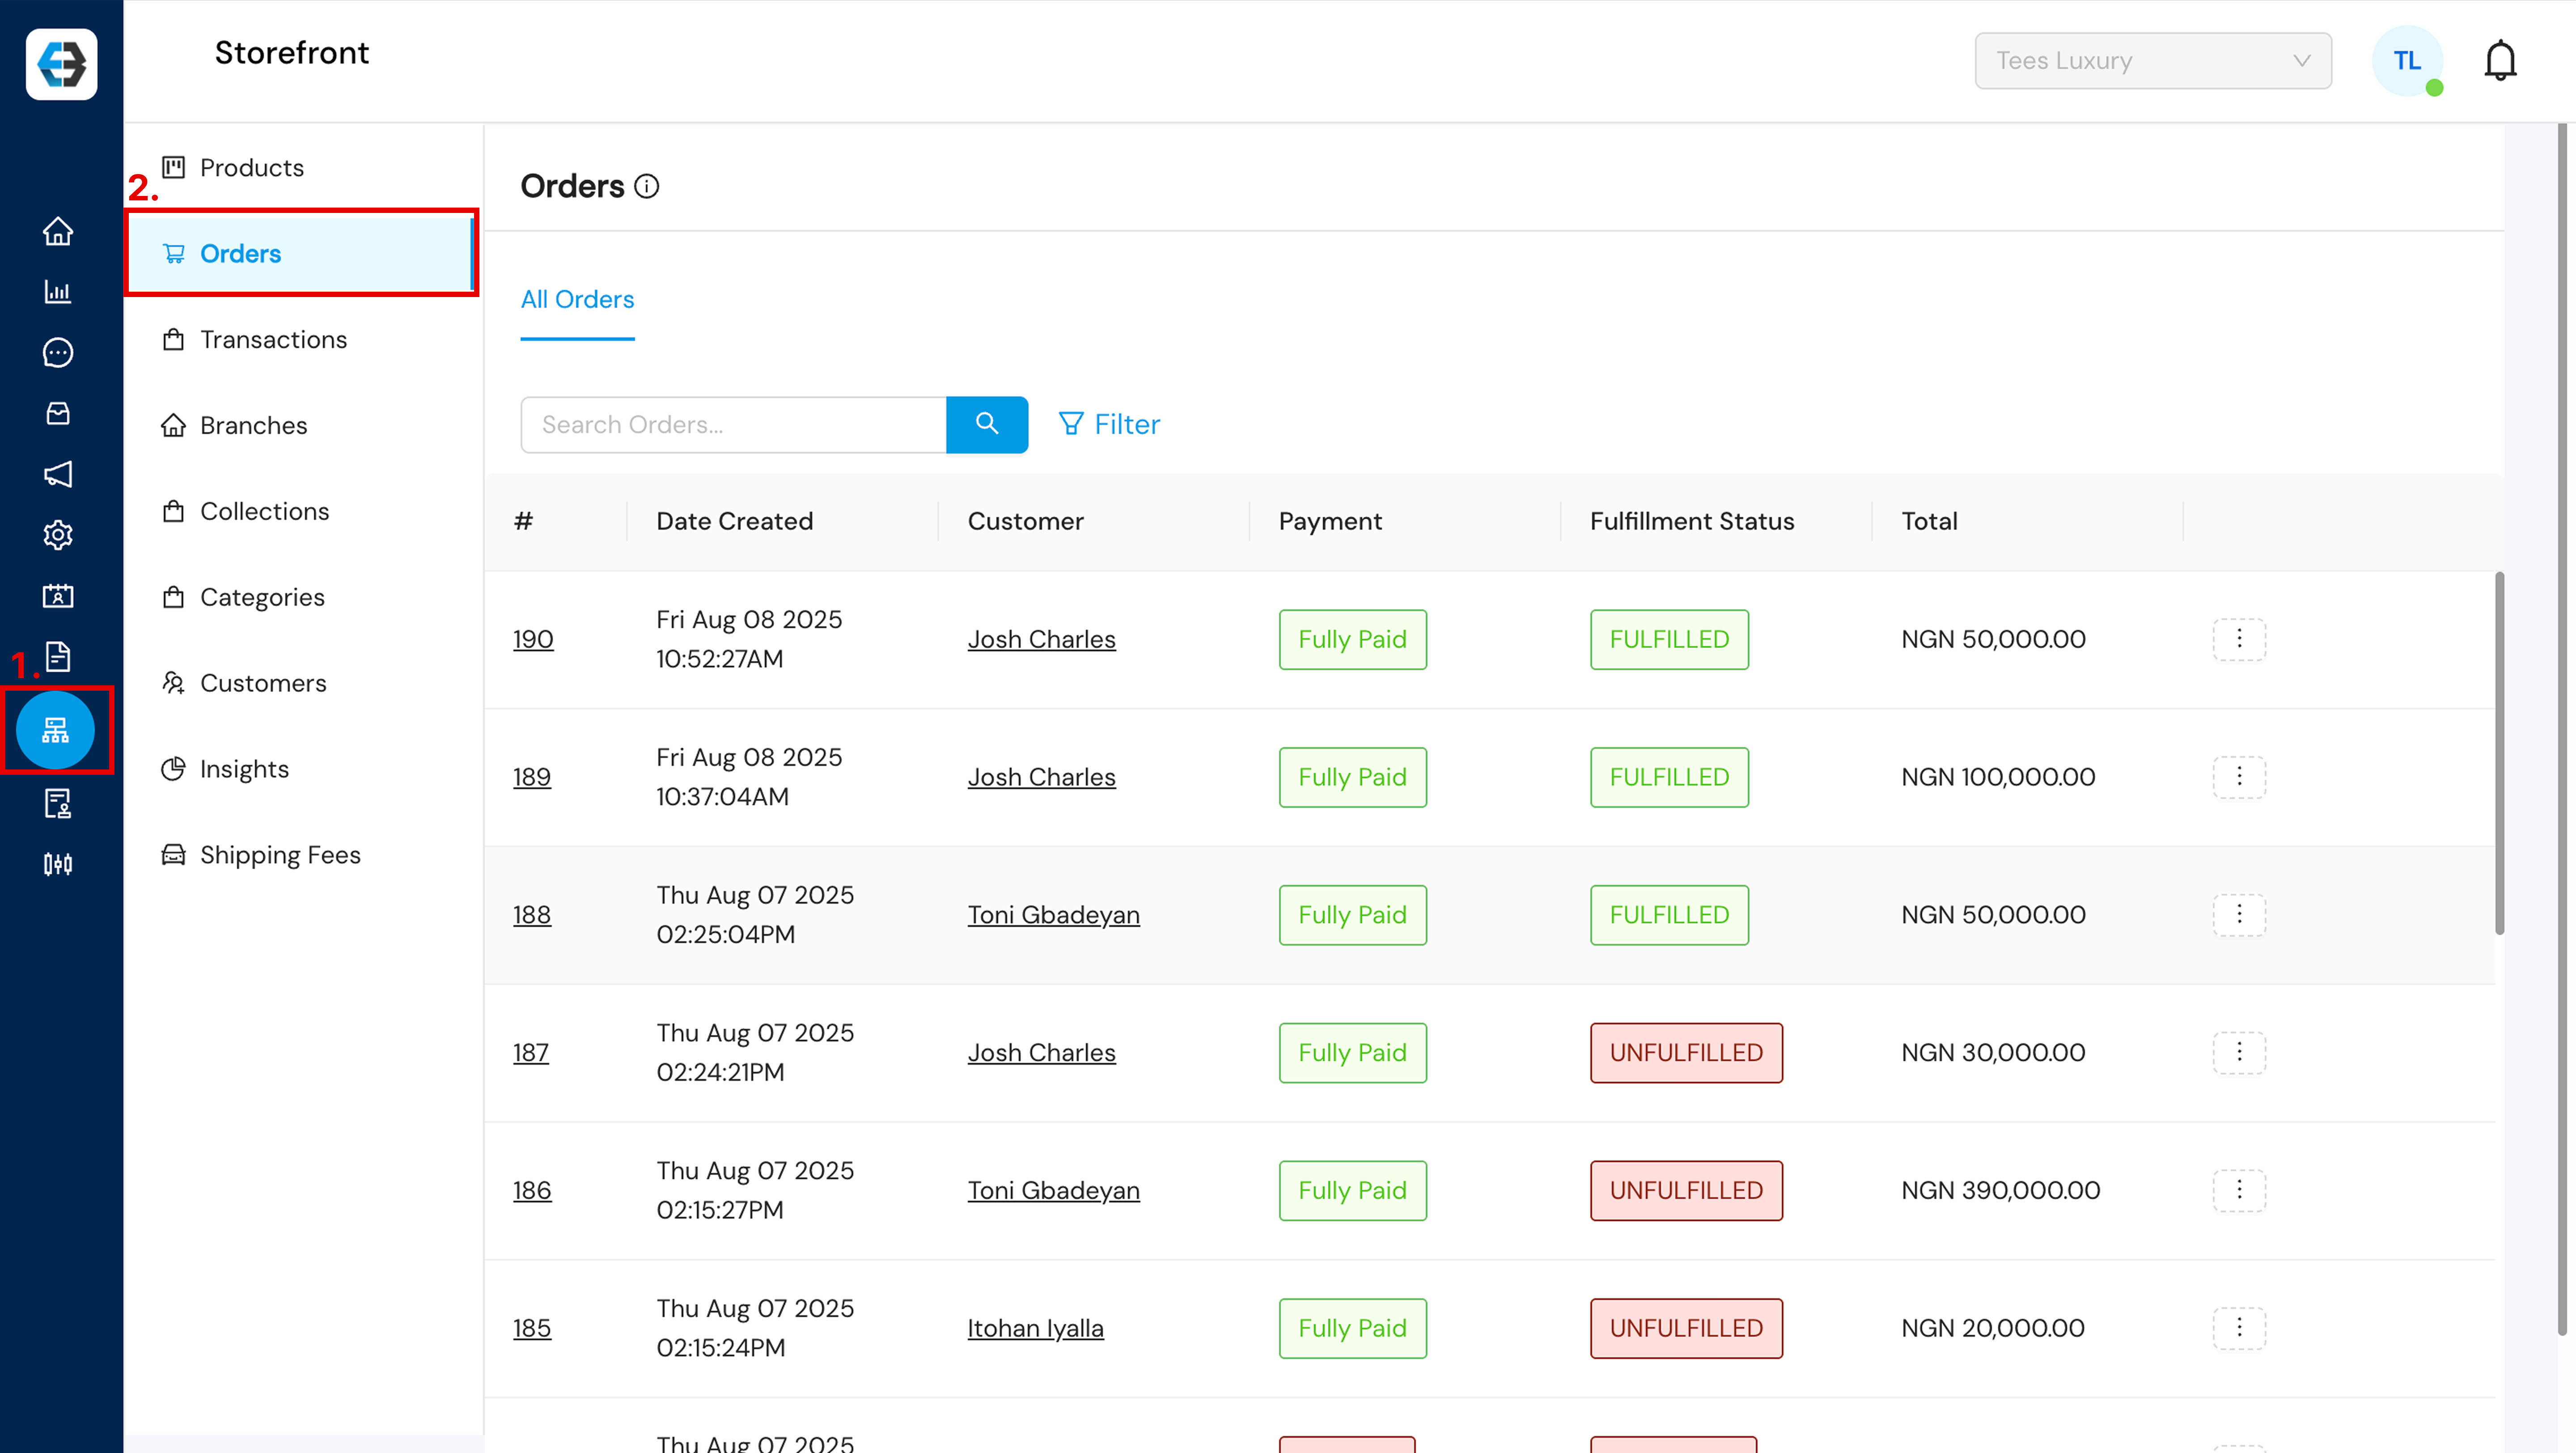
- Order Statutes:
- Fully Paid: Customer completed payment within the time limit (≈3 minutes)
- Not Paid: Payment was not completed or expired
- Fulfilled: Order has been delivered or picked up
- Canceled: Order was canceled by the customer or business
5.2 Processing Orders
For Paid Orders:
- Click on the order to view details
Congratulations!
Your store is now live! Start selling and engaging with your customers seamlessly via eBanqo and WhatsApp.
Need More Help?
Email: customersuccess@ebanqo.com for 24 / 7 support.
How useful was this post?
Click on a star to rate it!
Average rating 5 / 5. Vote count: 1
No votes so far! Be the first to rate this post.
We are sorry that this post was not useful for you!
Let us improve this post!
Tell us how we can improve this post?